Online Banking Resource Guides
Home Page Guide
Login Process & Device Registration Guide
User Roles Guide
User Setup and Template Guide
User Management Corporate Guide
Account and Alerts
Account Details and History Guide
Account Labeling Guide
Activity Center Guide
Alerts Guide
Transfers and Payments
Check Search Guide
Funds Transfer Guide
Multi Account Transfers Guide
One Time Commercial Payments Guide
Recipient Upload From Batch Guide
Tax Payments Guide
Messaging
Reporting
ACH and Wire
ACH File Import Guide
ACH or Wire Recipient Guide
ACH Payroll Transactions Guide
ACH Template Creation Guide
One Time Commercial Payments Guide
Wire Origination Guide
Wire Upload Guide
Positive Pay
ACH and Check Positive Pay Guide
Mobile Banking
Contact us immediately if you suspect fraud or identity theft.
We encourage you to view the educational video below and to read the information provided to educate yourself on our services and to help protect your identity. Please be careful to avoid phishing schemes, phone scams, text messages and emails that may be fraudulent.
The FDIC provides practical advice on how to become a knowledgeable user of financial services, including helpful hints, quick tips, and common-sense strategies to protect and stretch your hard-earned dollars. Below you'll find recent FDIC publications that are full of guidance on a variety of subjects. We welcome you to bookmark this page and return periodically to further your knowledge of financial services.
In an effort to protect your identity and your accounts:

FFIEC Business Account Guidance: Risk Assessment & Layered Security

FDIC - short for the Federal Deposit Insurance Corporation - is an independent agency of the United States government
What amount of insurance coverage do I have for my accounts?
The FDIC Standard Maximum Deposit Insurance Amount (SMDIA) for deposits is $250,000 per depositor per insured financial institution.
FDIC Coverage Over Basic Insurance
The FDIC provides separate insurance coverage for deposit accounts held in different categories of ownership. It is possible to qualify for more than the current $250,000 in coverage at one insured bank if you own deposit accounts in different ownership categories. The ownership categories are (1) single, (2) joint, (3) revocable trust (informal revocable trusts such as Payable-on-death accounts and formal revocable trusts such as living/family trusts created for estate planning purposes), (4) irrevocable trusts, (5) certain retirement plans, (6) employee benefit plans, (7) business (corporation, partnership, unincorporated associations), and (8) government. For more information on coverage, visit fdic.gov
or watch the educational FDIC video.
© 2024 Santa Cruz County Bank. All rights reserved.
California Consumer Privacy Act Notice | Privacy Policy | Member FDIC | ![]() Equal Housing Lender
Equal Housing Lender
Santa Cruz County Bank has no control over information at any site hyperlinked to or from this site. Santa Cruz County Bank makes no representation concerning and is not responsible for the quality, content, nature, or reliability of any hyperlinked site and is providing this hyperlink to you only as a convenience. The inclusion of any hyperlink does not imply any endorsement, investigation, verification or monitoring by Santa Cruz County Bank of any information in any hyperlinked site. In no event shall Santa Cruz County Bank be responsible for your use of a hyperlinked site.
Santa Cruz County Bank has no control over information at any site hyperlinked to or from this site. Santa Cruz County Bank makes no representation concerning and is not responsible for the quality, content, nature, or reliability of any hyperlinked site and is providing this hyperlink to you only as a convenience. The inclusion of any hyperlink does not imply any endorsement, investigation, verification or monitoring by Santa Cruz County Bank of any information in any hyperlinked site. In no event shall Santa Cruz County Bank be responsible for your use of a hyperlinked site.
Santa Cruz County Bank has no control over information at any site hyperlinked to or from this site. Santa Cruz County Bank makes no representation concerning and is not responsible for the quality, content, nature, or reliability of any hyperlinked site and is providing this hyperlink to you only as a convenience. The inclusion of any hyperlink does not imply any endorsement, investigation, verification or monitoring by Santa Cruz County Bank of any information in any hyperlinked site. In no event shall Santa Cruz County Bank be responsible for your use of a hyperlinked site.
Santa Cruz County Bank has no control over information at any site hyperlinked to or from this site. Santa Cruz County Bank makes no representation concerning and is not responsible for the quality, content, nature, or reliability of any hyperlinked site and is providing this hyperlink to you only as a convenience. The inclusion of any hyperlink does not imply any endorsement, investigation, verification or monitoring by Santa Cruz County Bank of any information in any hyperlinked site. In no event shall Santa Cruz County Bank be responsible for your use of a hyperlinked site.
Santa Cruz County Bank has no control over information at any site hyperlinked to or from this site. Santa Cruz County Bank makes no representation concerning and is not responsible for the quality, content, nature, or reliability of any hyperlinked site and is providing this hyperlink to you only as a convenience. The inclusion of any hyperlink does not imply any endorsement, investigation, verification or monitoring by Santa Cruz County Bank of any information in any hyperlinked site. In no event shall Santa Cruz County Bank be responsible for your use of a hyperlinked site.
Continue to FDIC - Older Adults Helping Relatives Through Financial Support
Santa Cruz County Bank has no control over information at any site hyperlinked to or from this site. Santa Cruz County Bank makes no representation concerning and is not responsible for the quality, content, nature, or reliability of any hyperlinked site and is providing this hyperlink to you only as a convenience. The inclusion of any hyperlink does not imply any endorsement, investigation, verification or monitoring by Santa Cruz County Bank of any information in any hyperlinked site. In no event shall Santa Cruz County Bank be responsible for your use of a hyperlinked site.
Santa Cruz County Bank has no control over information at any site hyperlinked to or from this site. Santa Cruz County Bank makes no representation concerning and is not responsible for the quality, content, nature, or reliability of any hyperlinked site and is providing this hyperlink to you only as a convenience. The inclusion of any hyperlink does not imply any endorsement, investigation, verification or monitoring by Santa Cruz County Bank of any information in any hyperlinked site. In no event shall Santa Cruz County Bank be responsible for your use of a hyperlinked site.
Santa Cruz County Bank has no control over information at any site hyperlinked to or from this site. Santa Cruz County Bank makes no representation concerning and is not responsible for the quality, content, nature, or reliability of any hyperlinked site and is providing this hyperlink to you only as a convenience. The inclusion of any hyperlink does not imply any endorsement, investigation, verification or monitoring by Santa Cruz County Bank of any information in any hyperlinked site. In no event shall Santa Cruz County Bank be responsible for your use of a hyperlinked site.
Santa Cruz County Bank has no control over information at any site hyperlinked to or from this site. Santa Cruz County Bank makes no representation concerning and is not responsible for the quality, content, nature, or reliability of any hyperlinked site and is providing this hyperlink to you only as a convenience. The inclusion of any hyperlink does not imply any endorsement, investigation, verification or monitoring by Santa Cruz County Bank of any information in any hyperlinked site. In no event shall Santa Cruz County Bank be responsible for your use of a hyperlinked site.
Santa Cruz County Bank has no control over information at any site hyperlinked to or from this site. Santa Cruz County Bank makes no representation concerning and is not responsible for the quality, content, nature, or reliability of any hyperlinked site and is providing this hyperlink to you only as a convenience. The inclusion of any hyperlink does not imply any endorsement, investigation, verification or monitoring by Santa Cruz County Bank of any information in any hyperlinked site. In no event shall Santa Cruz County Bank be responsible for your use of a hyperlinked site.
Santa Cruz County Bank has no control over information at any site hyperlinked to or from this site. Santa Cruz County Bank makes no representation concerning and is not responsible for the quality, content, nature, or reliability of any hyperlinked site and is providing this hyperlink to you only as a convenience. The inclusion of any hyperlink does not imply any endorsement, investigation, verification or monitoring by Santa Cruz County Bank of any information in any hyperlinked site. In no event shall Santa Cruz County Bank be responsible for your use of a hyperlinked site.
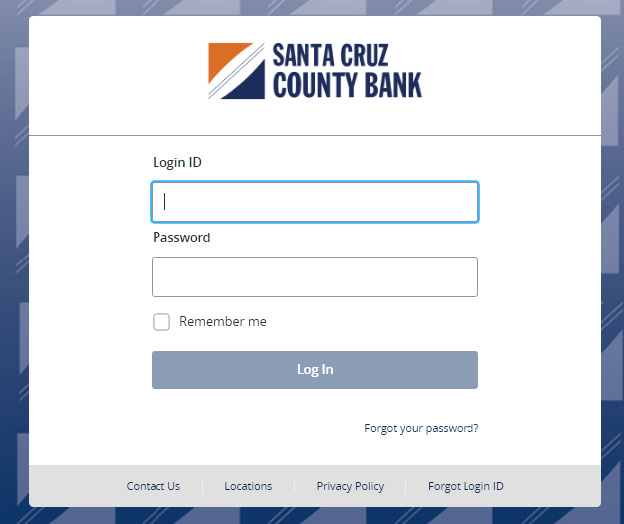
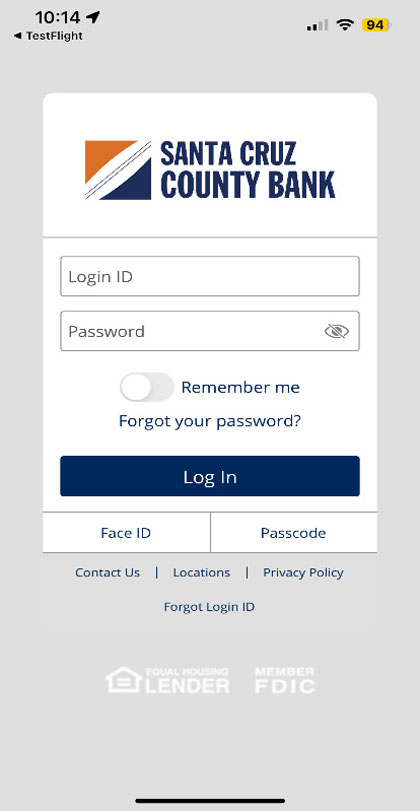
Login Process & Device Registration Guide
1. Enter your 'Login ID' and 'Password'.
2. Select 'Login'.
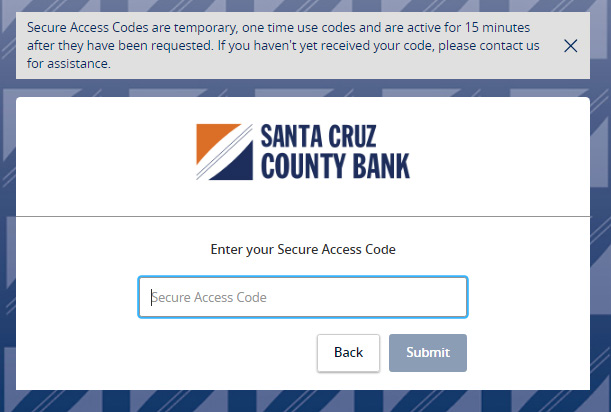
3. Select the delivery method to receive your secure access code.

4. Enter the secure access code in the box once it has been received.
5. Select 'Submit'.
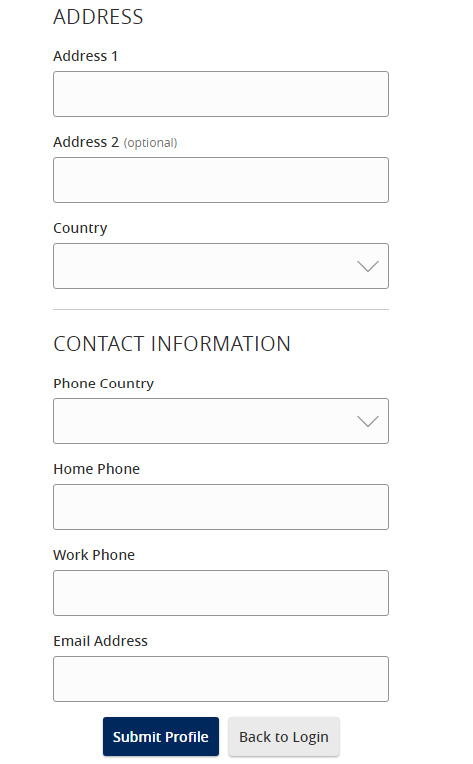
6. Review the User Profile and make any necessary changes.
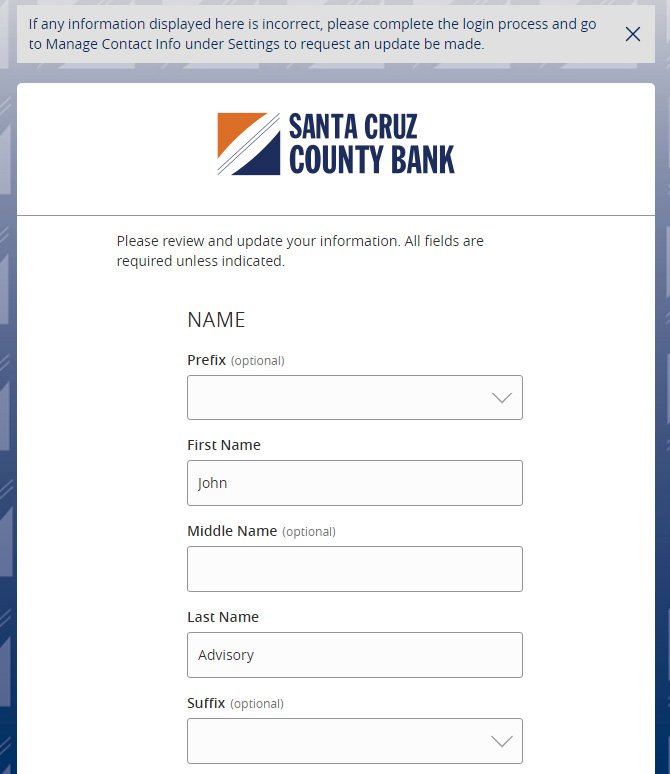
7. Click 'Submit Profile'.
8. Enter your existing password in the top box along with a new password twice for validation.
9. Select 'Submit'.
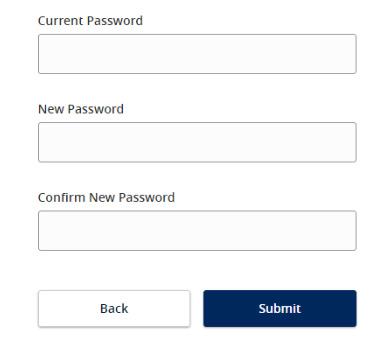
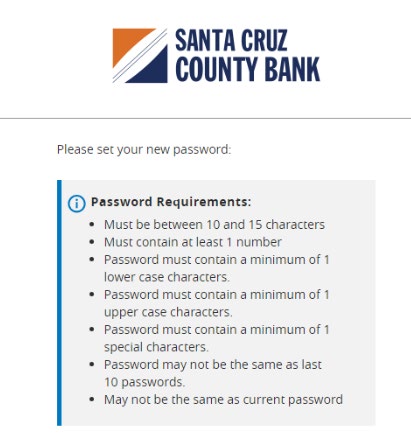
10. Please review the password requirements.
Account Details and History Guide
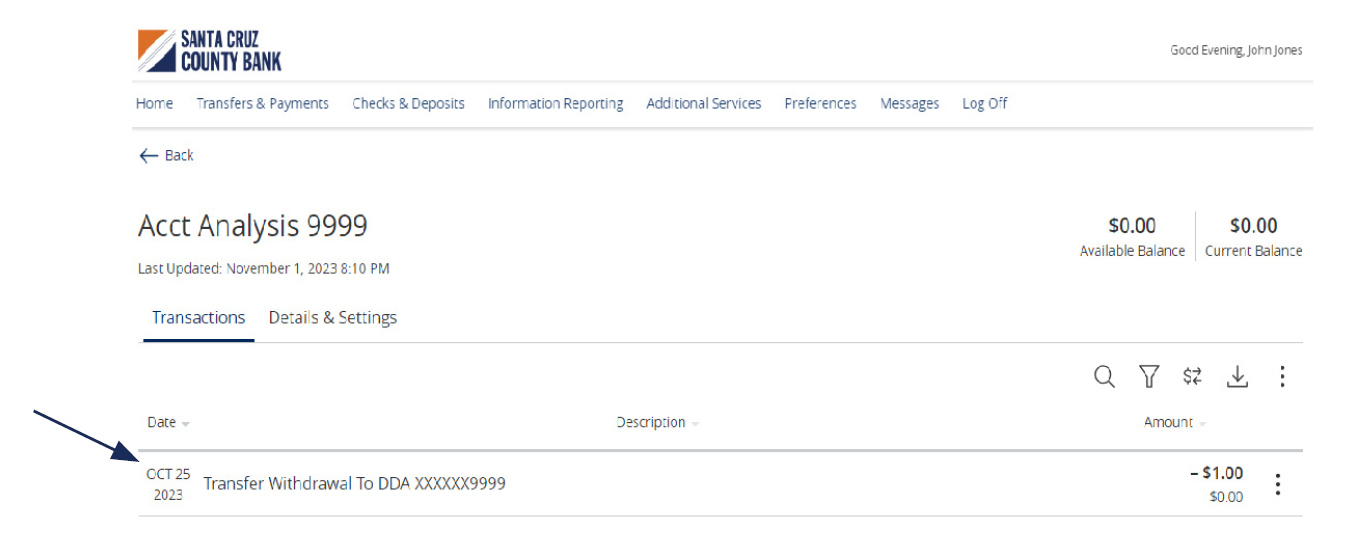
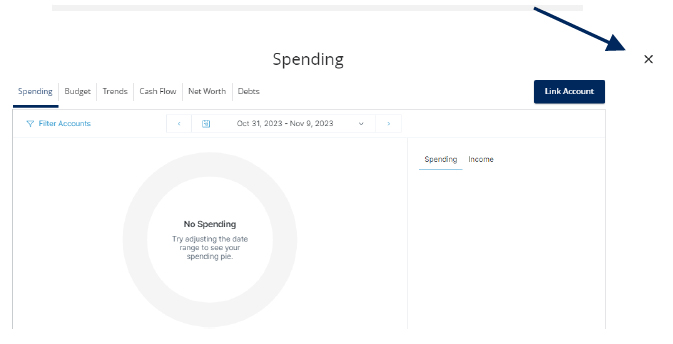
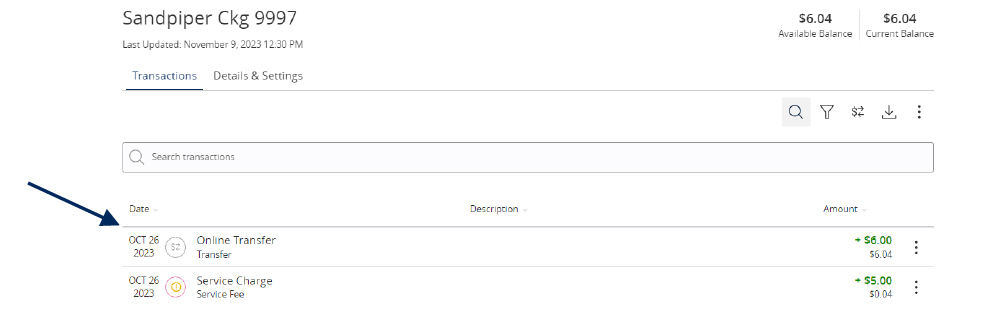
1. On the Home screen, click on an accountto view a listing of the details andtransaction history associated with theaccount.
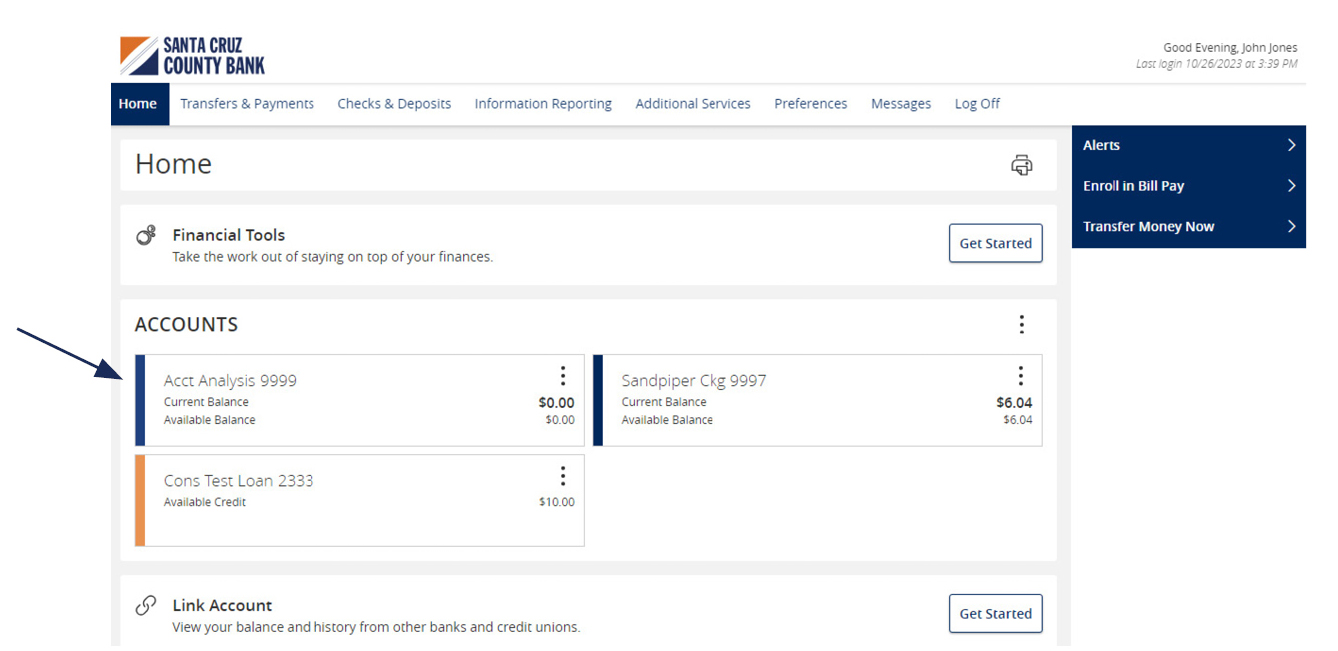
Click the 'Details & Settings' tab to display the account details.
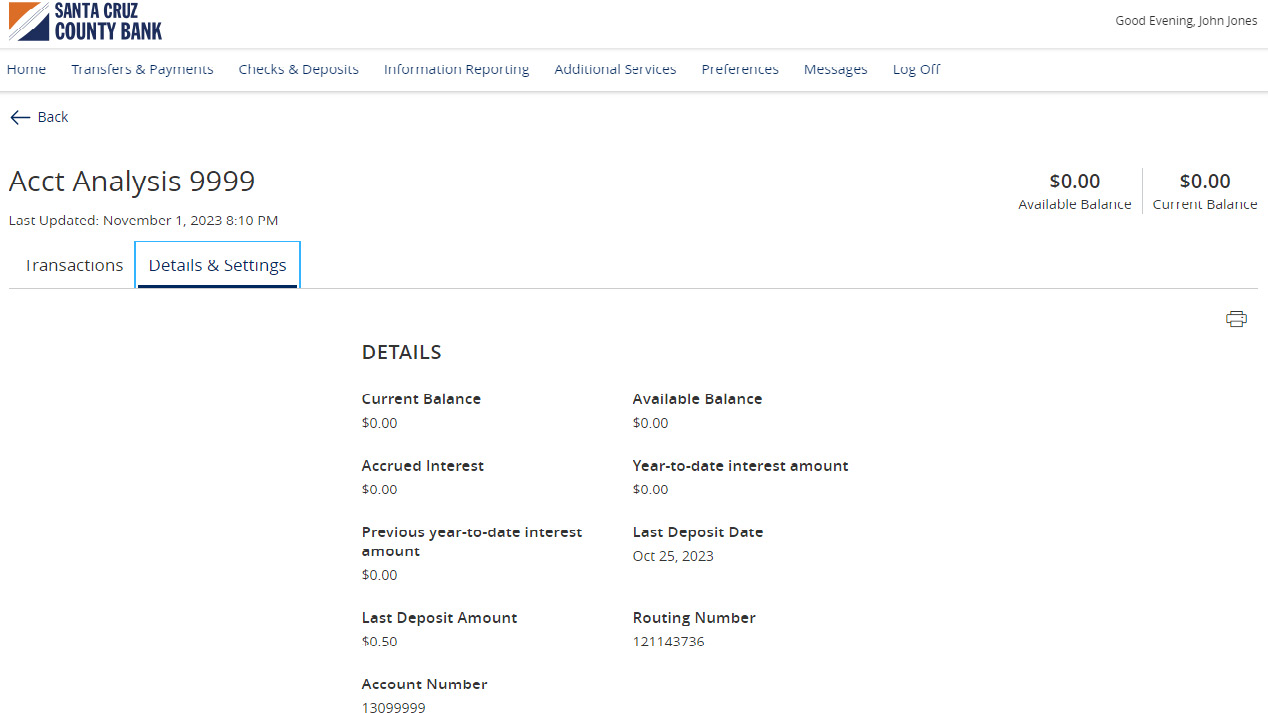
2. Select the 'Filters' icon to view the varioussearch criteria for transaction history.
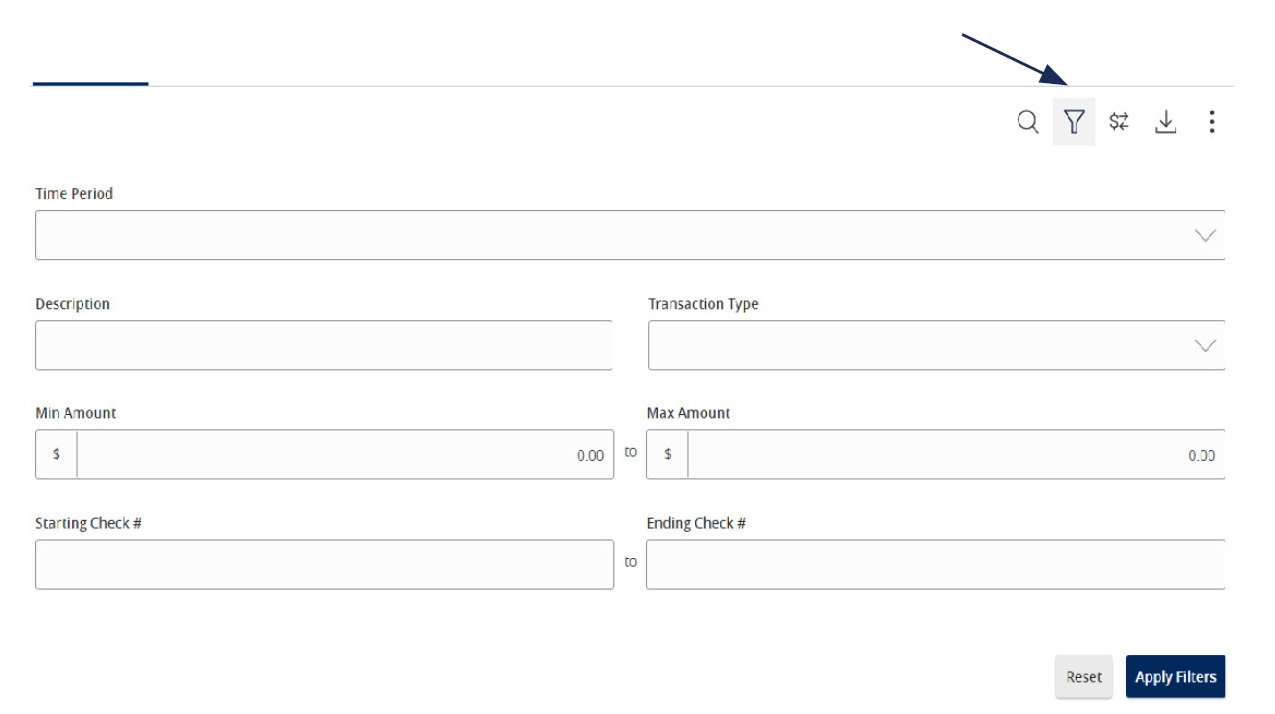
NOTE: A listing of historical transactions associated with the account are listed on the screen.
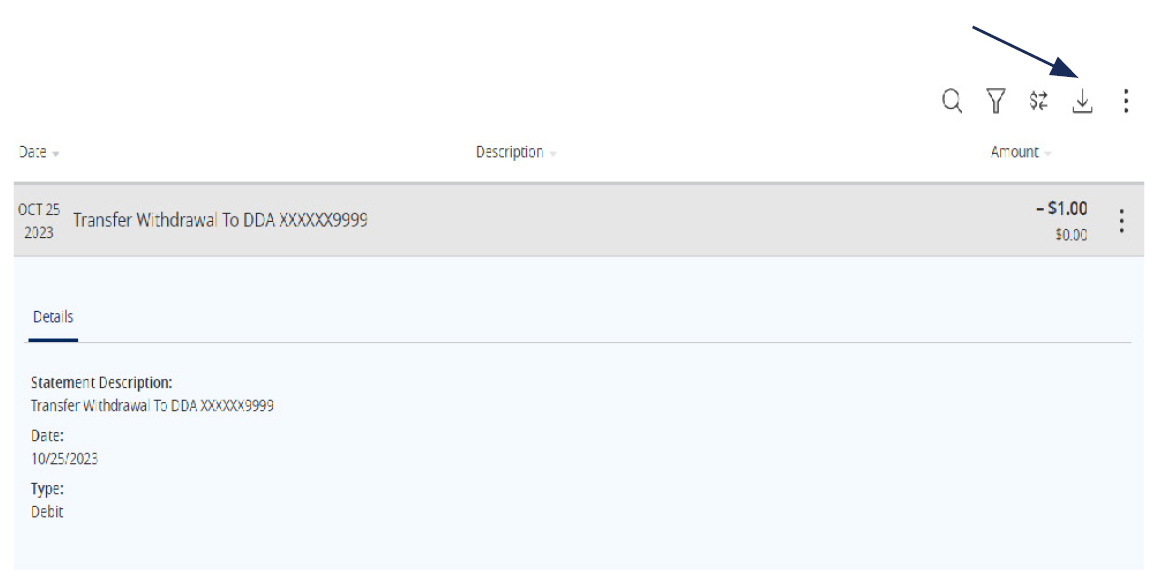
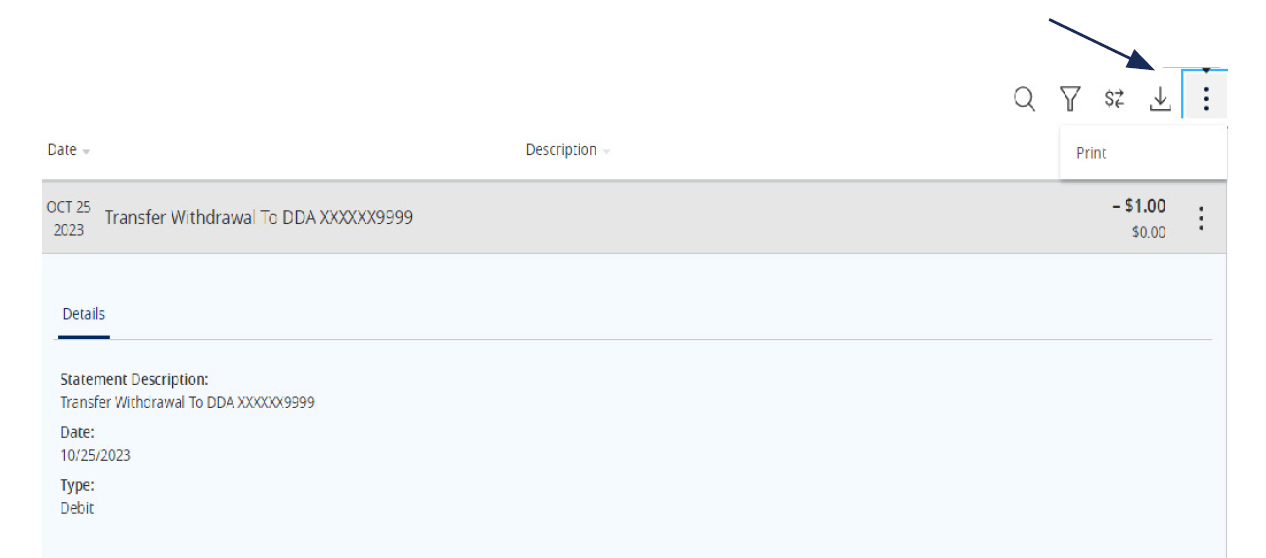
3. Select the Export icon to display a listing ofavailable formats. The export will includeall transactions specified in the filter bythe user
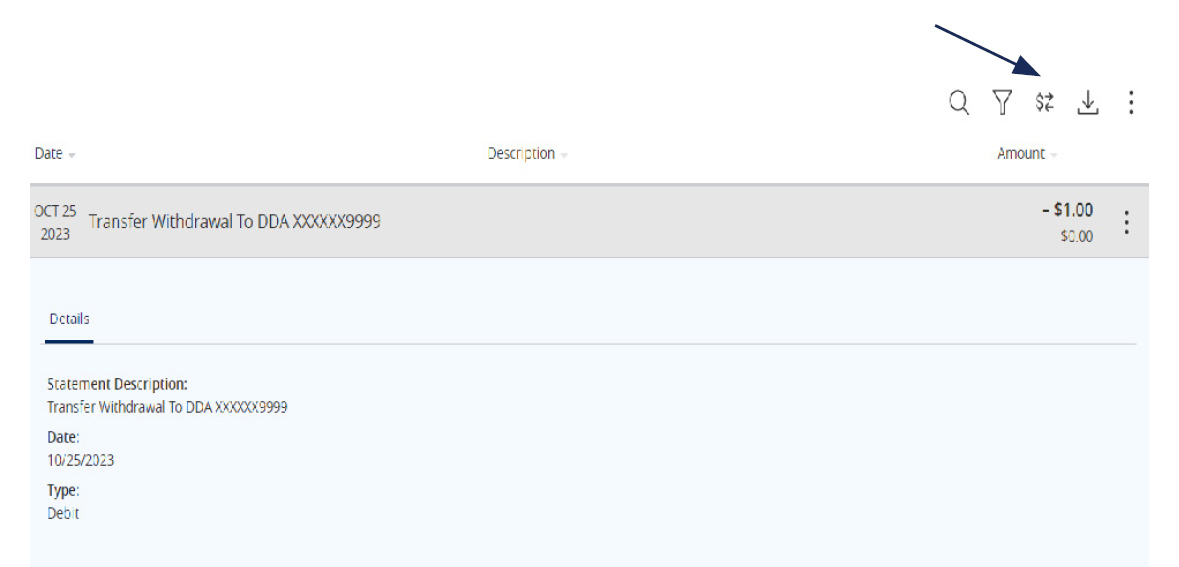
4. Select the 'Quick Transfer' icon to performa quick transfer.
5. Select 'Options' next to a listed transactionto display available actions.
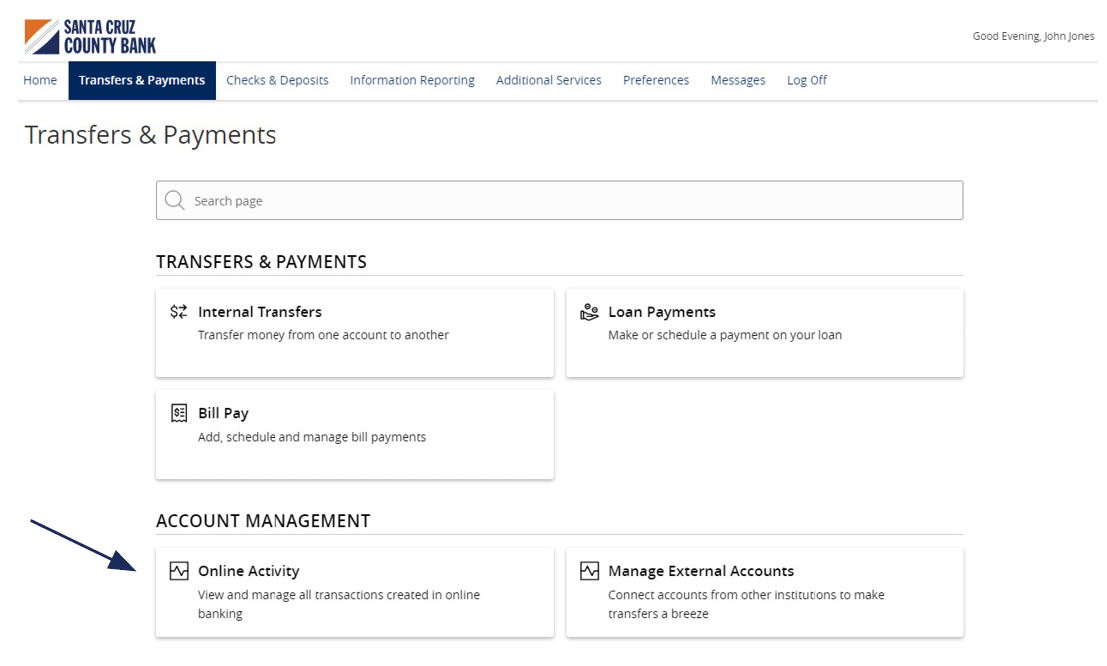
Activity Center Guide
NOTE: 'Activity Center' lists all user activity initiated from within Online Banking.
1. Select 'Transfers & Payments' then 'Online Activity'.
Single Transactions
1. Select the 'Single Transactions' tab on the screen to view one-time online transactions.

2. Select the 'Filters' option to reveal searchable fields.
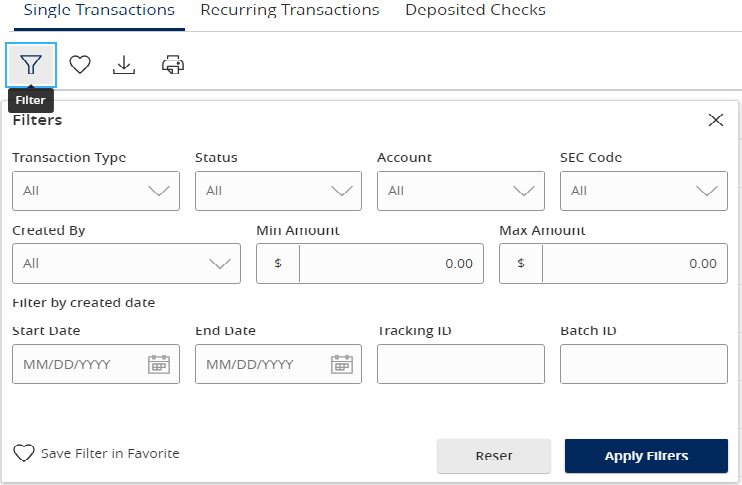
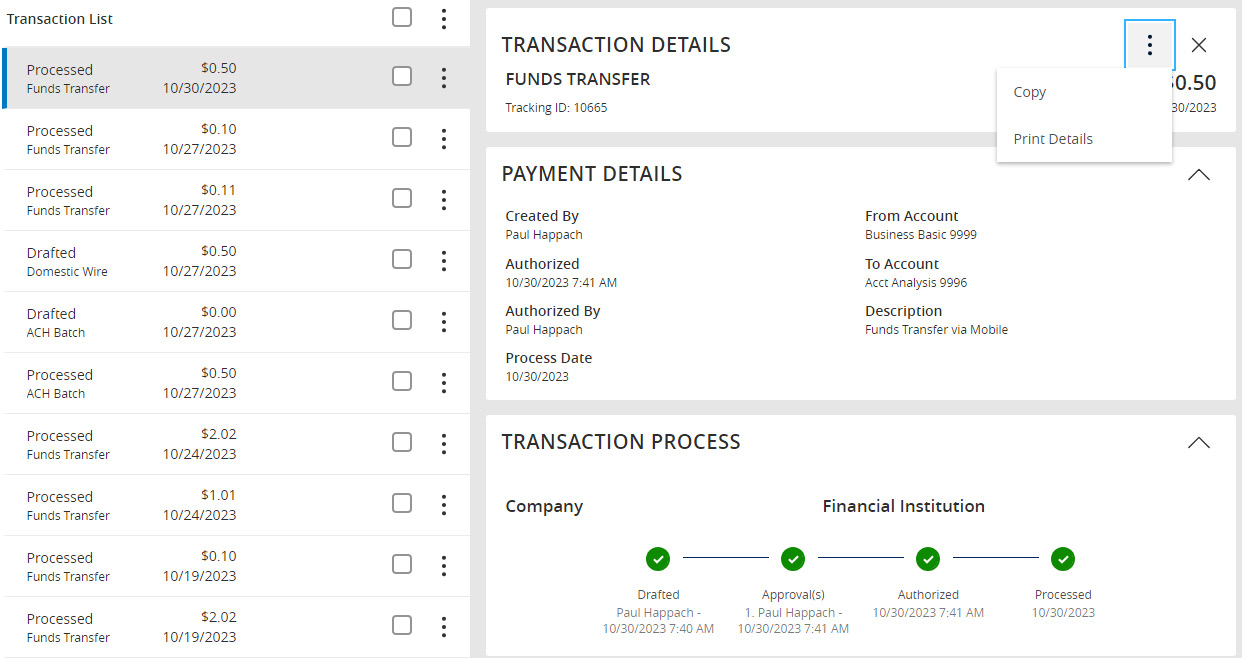
3. Click on a listed transaction to view additional details.
4. Select the 'Actions' icon to unhide a listing of available actions corresponding with the transaction.
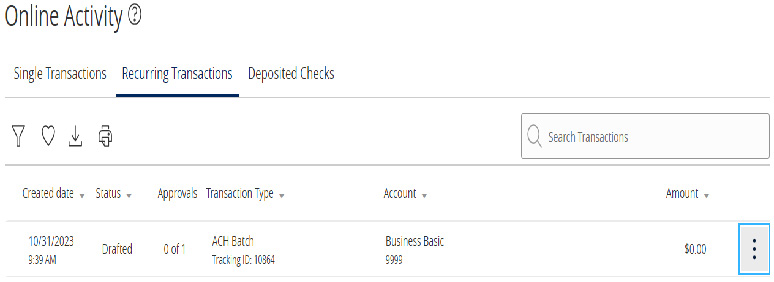
Recurring Transactions
Select the 'Recurring Transactions' tab within the 'Activity Center' to view online transactions which are setup to occur in a series.
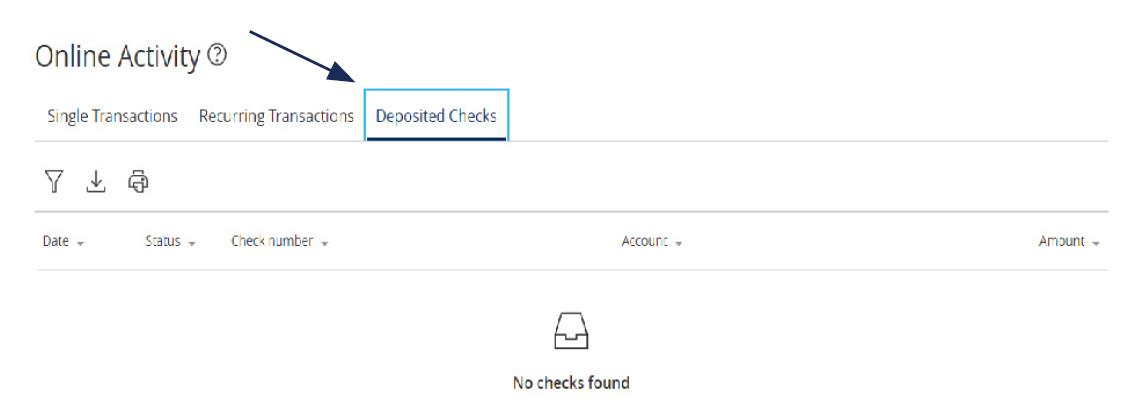
Deposited Checks
Select the 'Deposited Checks' tab within the 'Activity Center' to view historical checks that have been deposited using the Mobile Remote Deposit Capture functionality.
NOTE: You must be enrolled in Mobile Remote Deposit before this tab will appear on the 'Activity Center' screen.
Alerts Guide
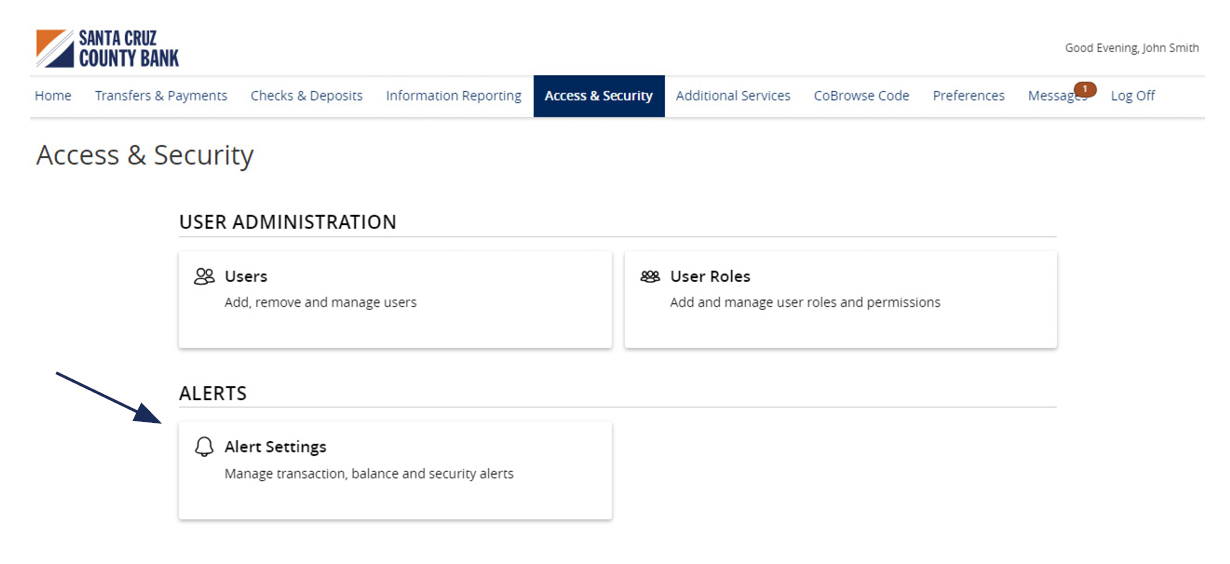
1. Select the 'Access & Security' menu and then select 'Alert Settings'.
2. Click the 'New Alert' button and select the desired type of alert from the drop-down menu.

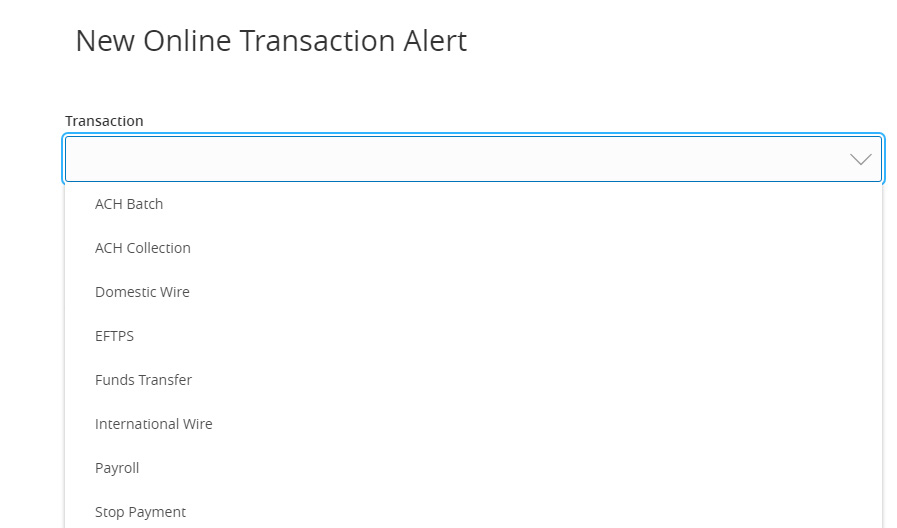
Online Transaction Alerts
1. Select a 'Transaction' type.
2. Select the 'Account'.
3. Select the 'Status' of the transaction

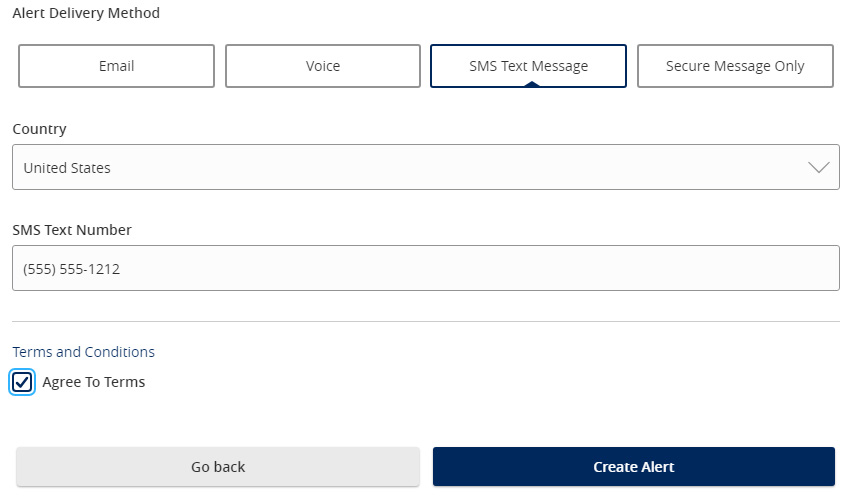
4. Select the desired 'Alert Delivery Method'.
5. Enter the necessary information.
6. Click 'Create Alert'.
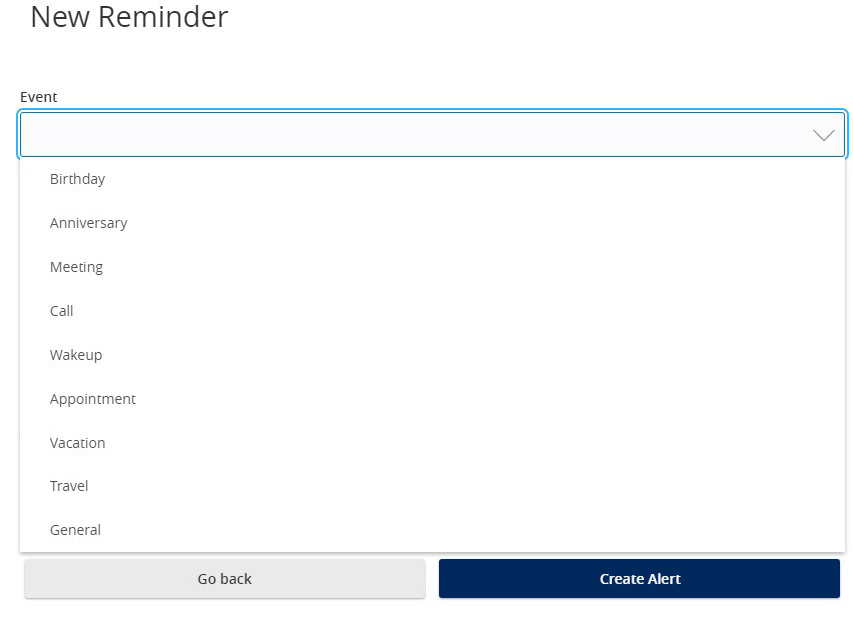
Reminder
1. Select an 'Event'.
Funds Transfer Guide
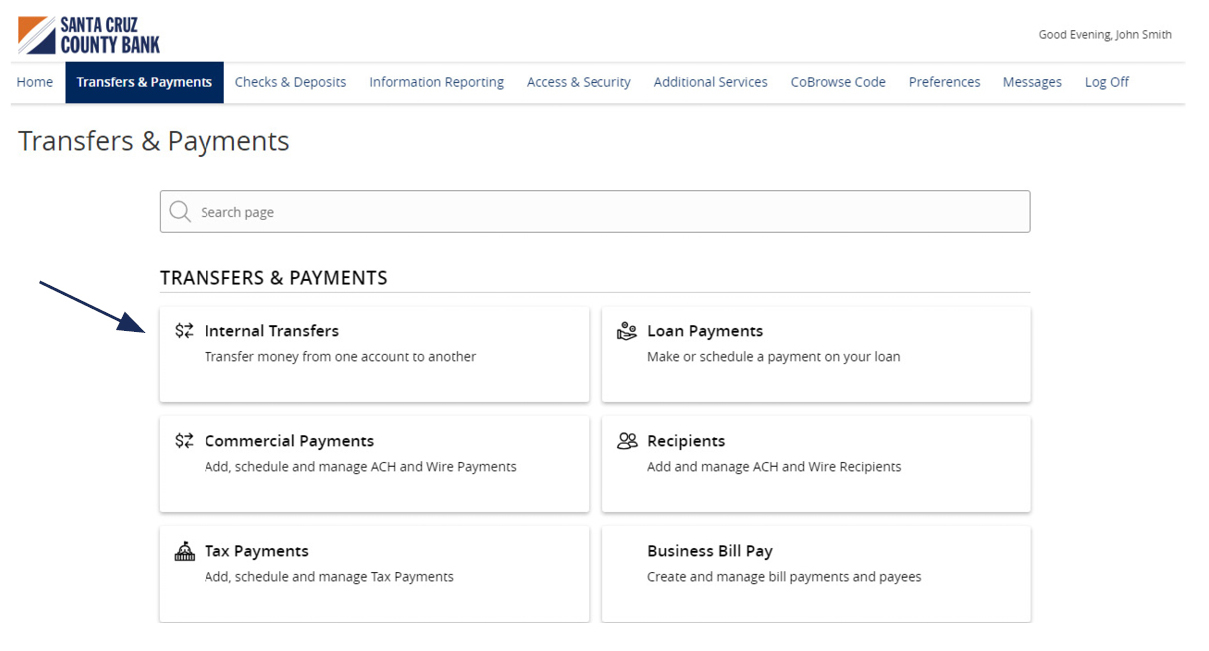
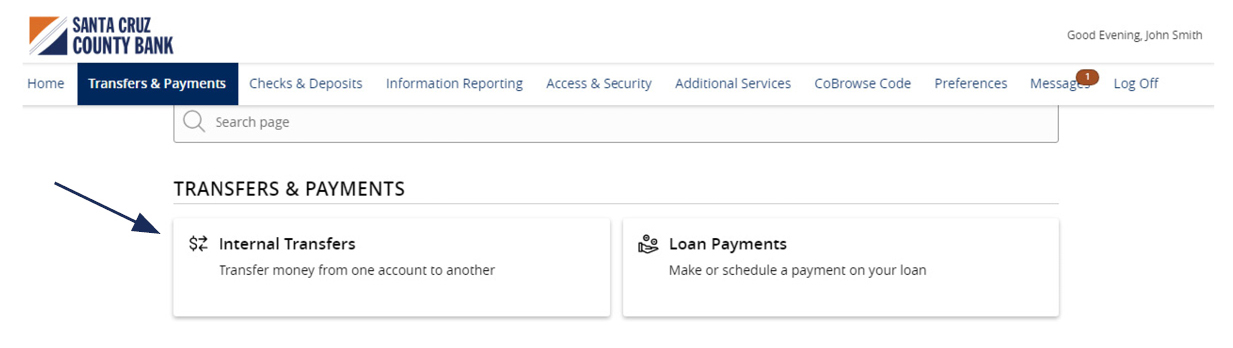
1. Select 'Transfers & Payments' menu and then 'Internal Transfers'.
2. Select a 'From' account
3. Select a 'To' account.
4. Enter a dollar amount.
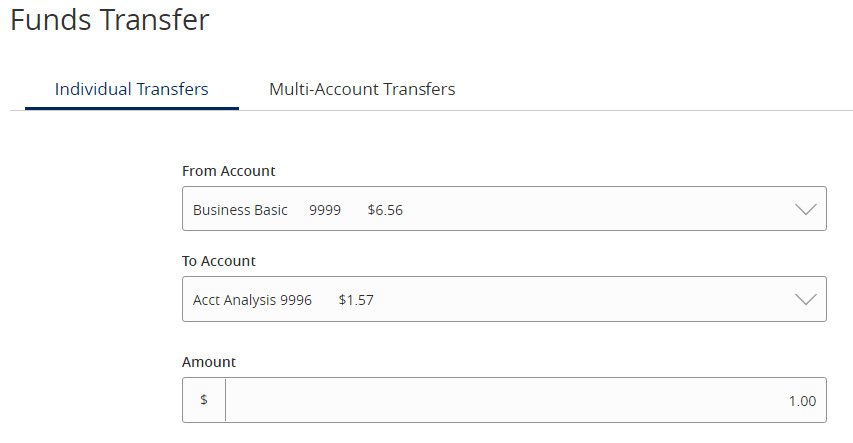
NOTE: To setup a recurring transfer, follow the steps in the 'Recurring Transfers' section beginning on the next page.
5. Select a 'Transfer Date' for the transaction.
6. Enter a Memo for the transaction. (Optional)
7. Click 'Transfer Funds' to complete the transaction.

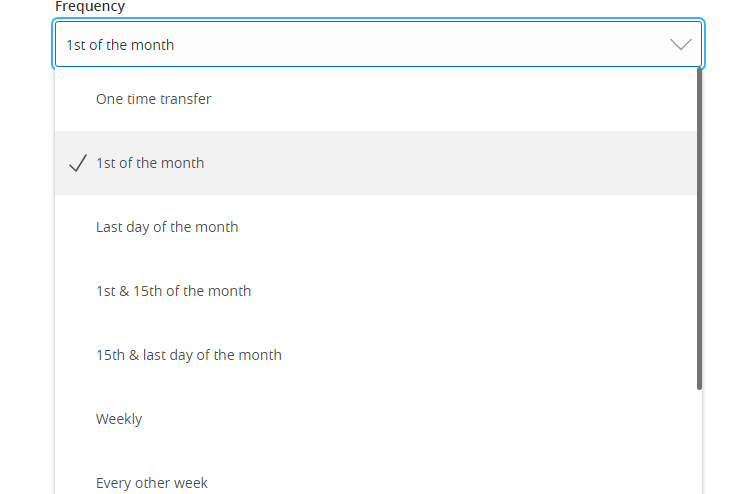
Recurring Transfers
1. Select the desired frequency from the drop-down menu.
2. Select the desired 'Repeat Duration'.
a. Forever (Until I Cancel)
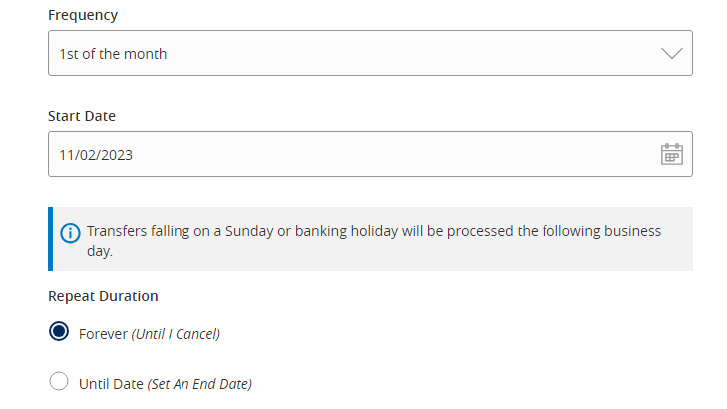
b. Until Date (Set an End Date)

Home Page Guide
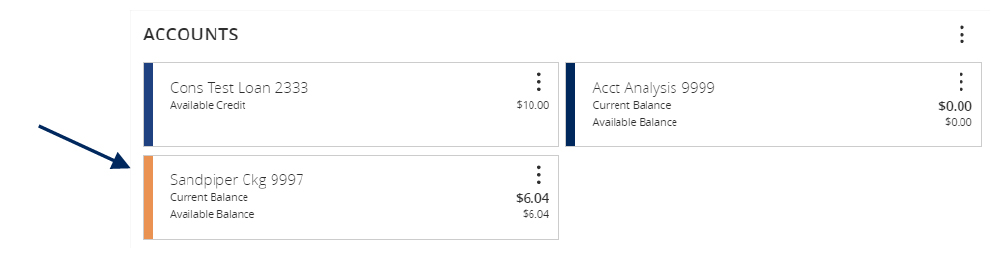
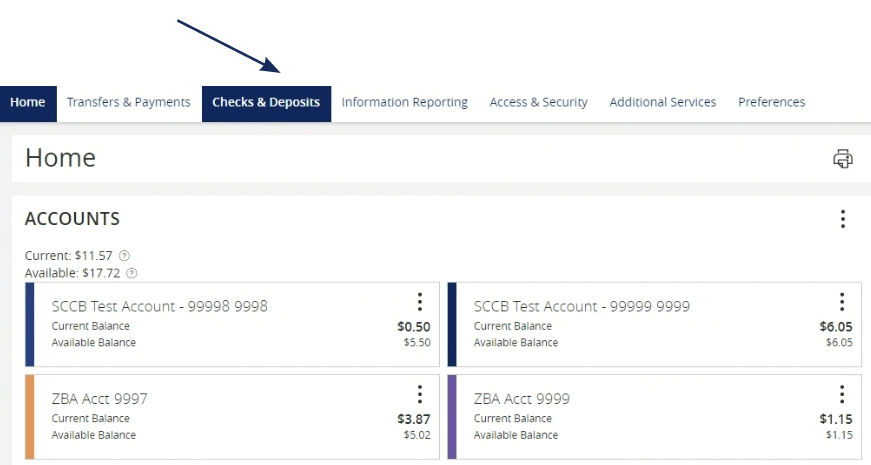
1. View a listing of accounts accessible within Online Banking.
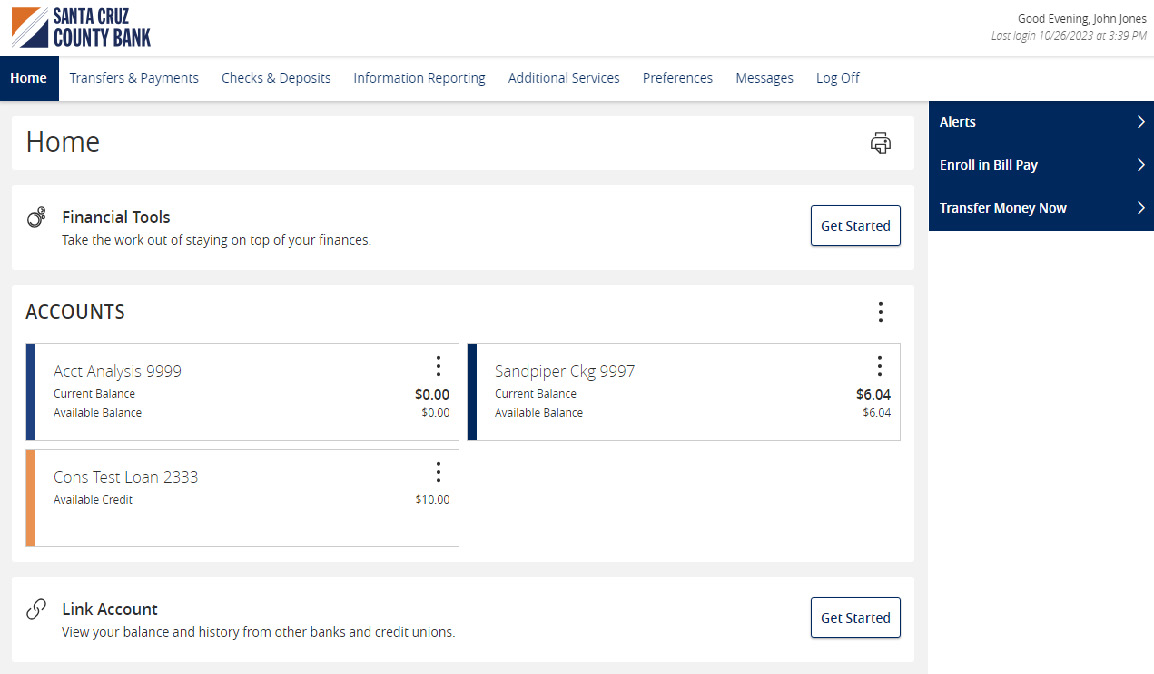
2. Select the 'Options' icon next to each account to reveal multiple available quick actions.

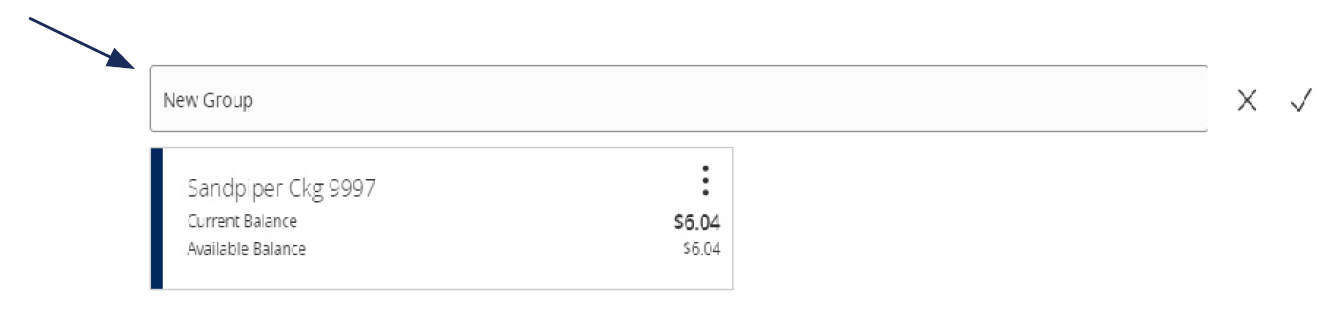
3. Select and drag any account to the envelope icon which appears at the bottom right side of the screen to create a new account group.

4. The new group created can be renamed. Additional accounts may be dragged into the new group or additional groups created.
NOTE: Additional account(s) may be moved into the newly created group or additional group(s) may be created if needed by repeating step 6.
Multi Account Transfers Guide
Transfer Funds
1. Select the 'Transfers & Payments' menu, then select 'Internal Transfers'.
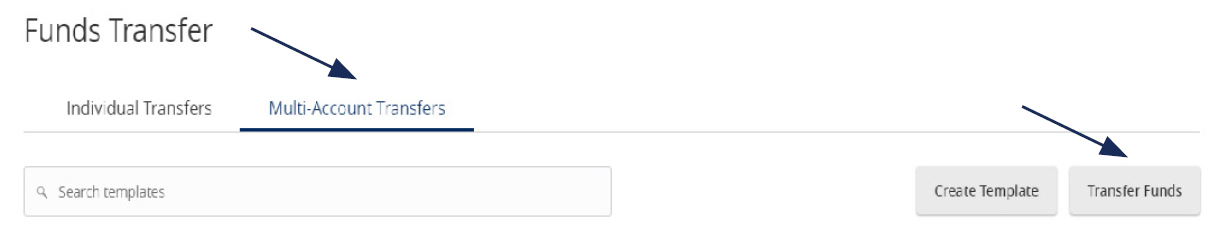
2. Select the 'Multi-Account Transfers' tab.
3. Select 'Transfer Funds
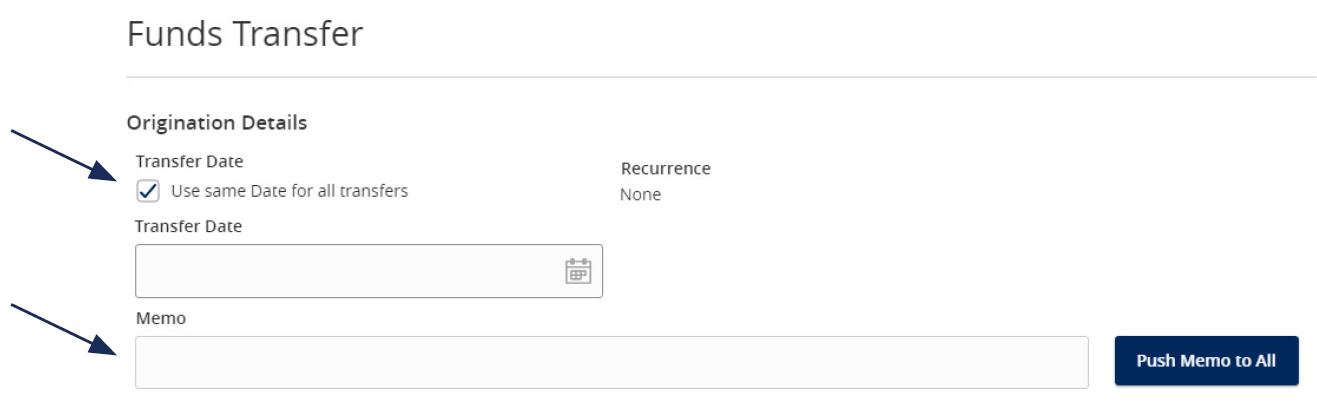
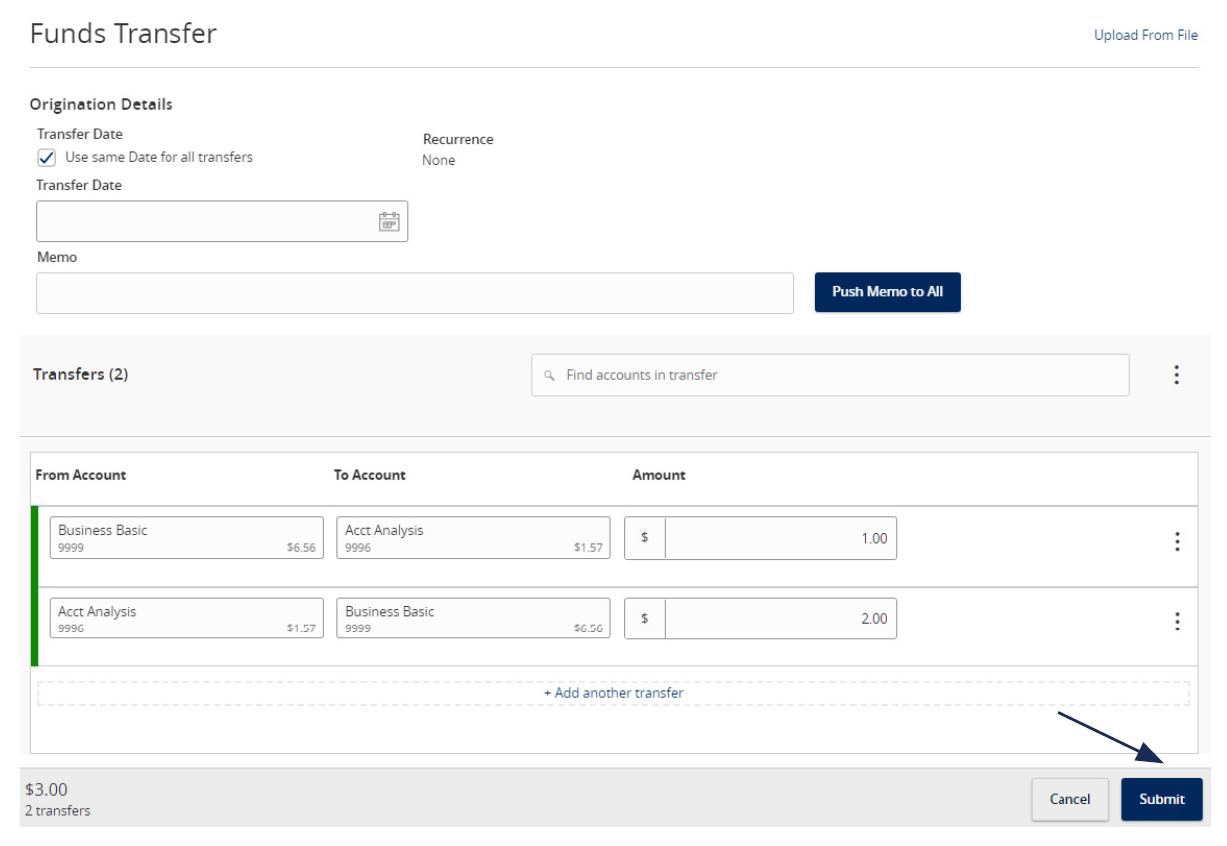
4. Click the 'Use same Date for all transfers' check box to automatically set the same date for all transfers being initiated.
Or leave the 'Use same Date for all transfers' check box unselected to individually set the date for each transfer.
Optional: Enter a memo and click 'Push Memo to All' to automatically push the same memo to all transfers listed.
5. Select the 'From' and 'To' Account for each transfer.
6. Enter the Amount for each transaction

7. Review the information on the screen for accuracy, and select submit. Note: Funds transfers are processed in the order that they appear on the screen.
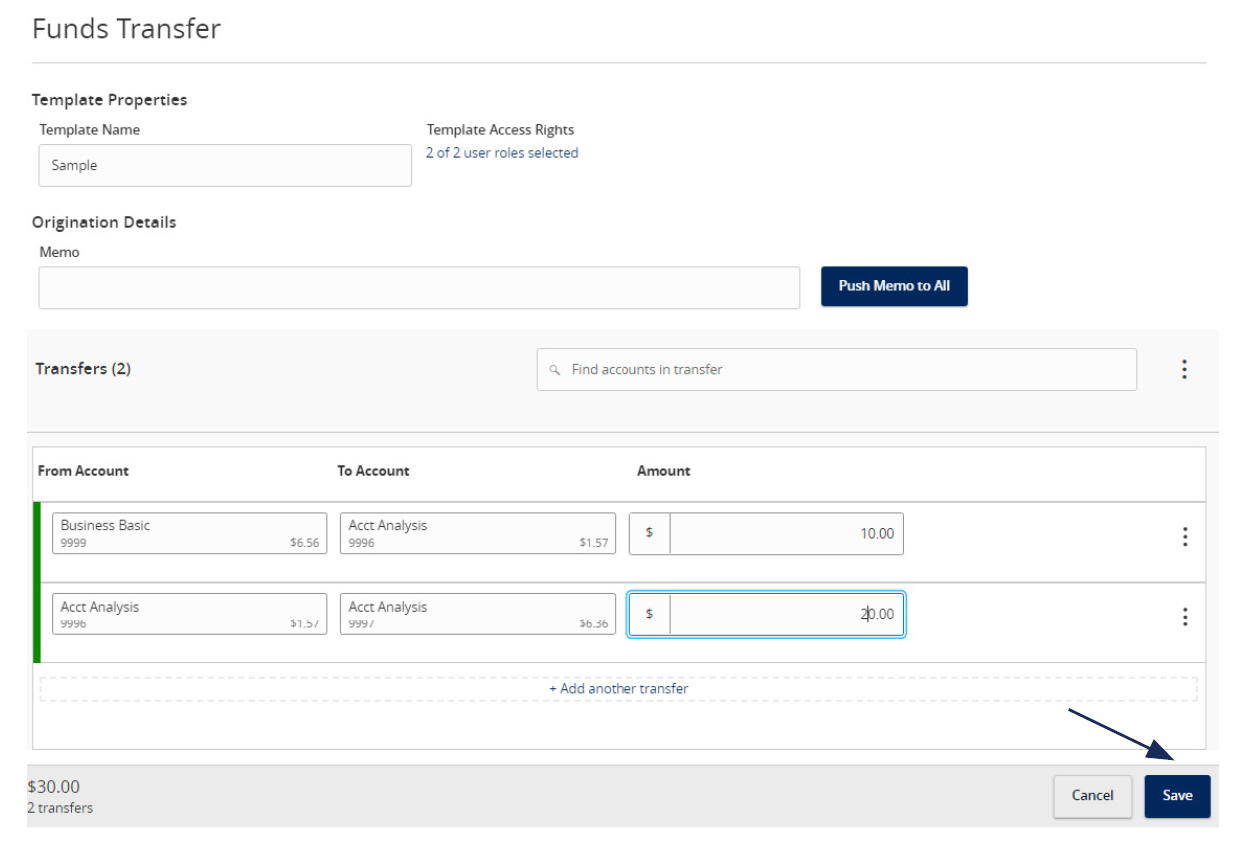
Creating a Template
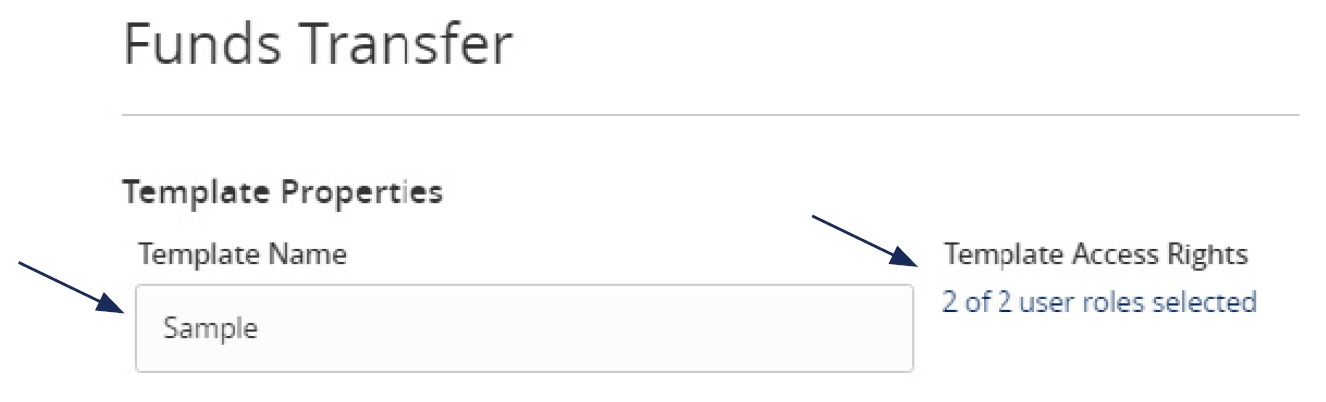
8. To create a transfer template, select 'Create Template'.

9. Enter the 'Template Name'.
10. Select the link below 'Template Access Rights' to designate the users who should have access to the template.
11. Select the 'From' and 'To' Account for each transfer.
12. Enter the Amount for each transaction.
13. Review the information for accuracy. Then select 'Save'.
Note: Funds transfers are processed in the order that they appear on the screen.
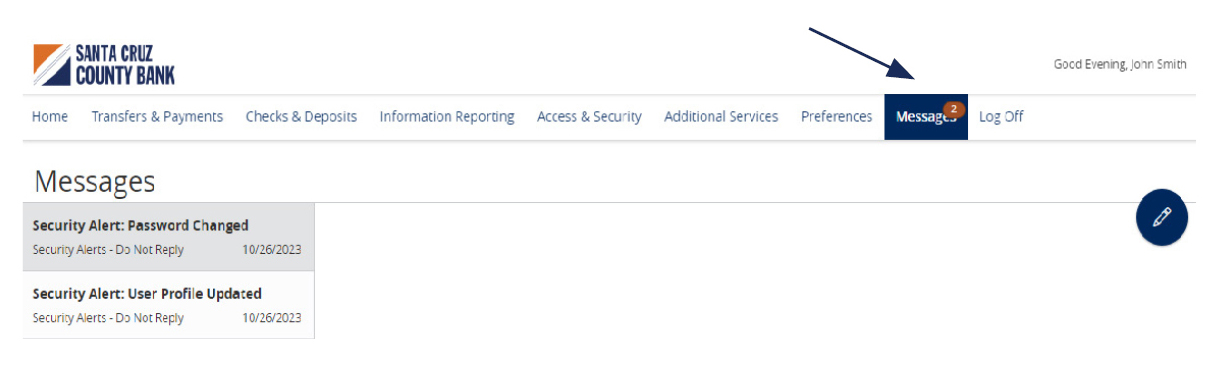
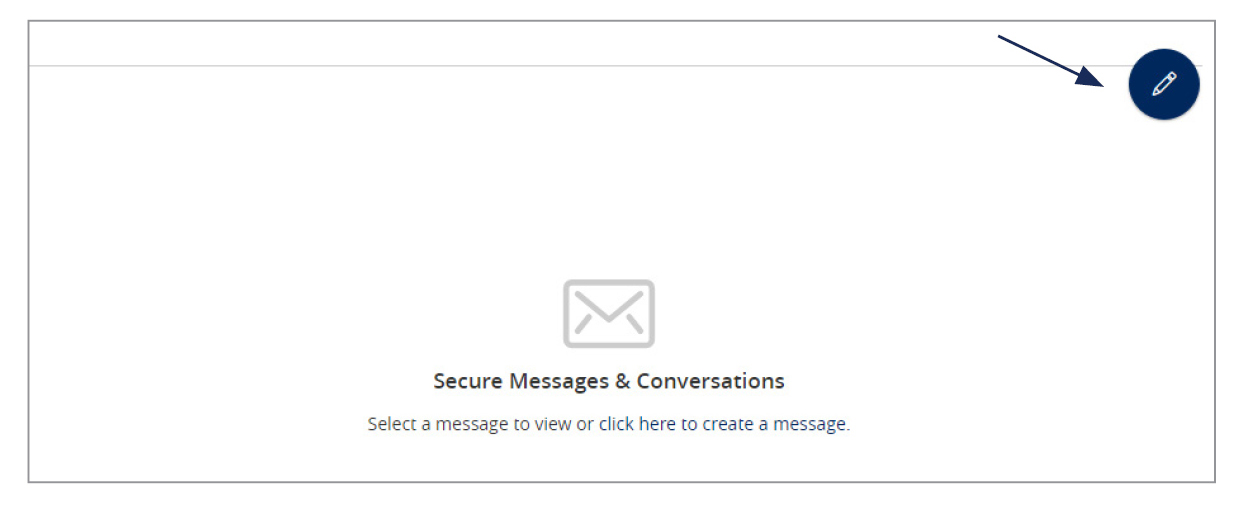
Secure Messages Guide
NOTE: The 'Messages' feature is a secure messaging function which allows for two-way communication between the online banking user and Santa Cruz County Bank. Since the message is delivered securely within the Online Banking system, sensitive material.
1. Select the 'Messages' menu.
NOTE: Both incoming and outgoing messages will appear in the column directly to the right of the menus in descending date order (newest on top).
2. Click pencil icon on the right side of the screen.
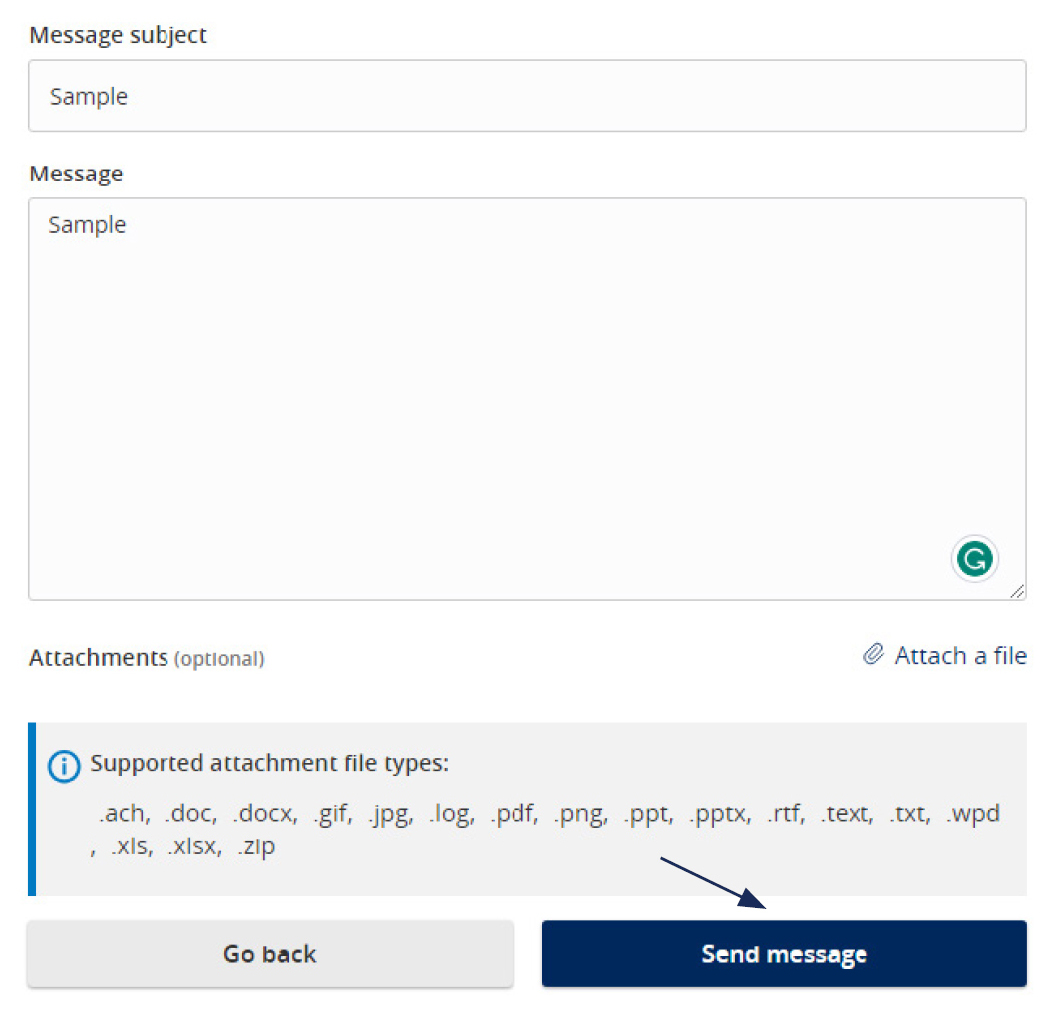
3. Select the appropriate 'Message recipient' from the drop-down menu.

4. Enter the desired 'Message Subject' and 'Message'.
5. Click the 'Attach a file' link to attach a file or document if desired.
6. Click 'Send Message' at the bottom of the screen to submit the message.
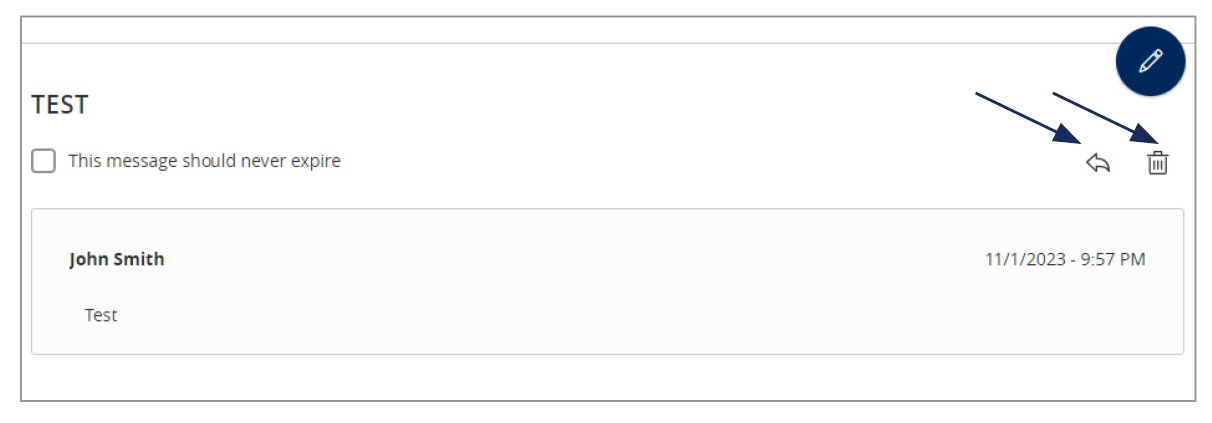
7. Select the arrow icon beneath the pencil to reply to a secure message or the trash bin to delete the message.
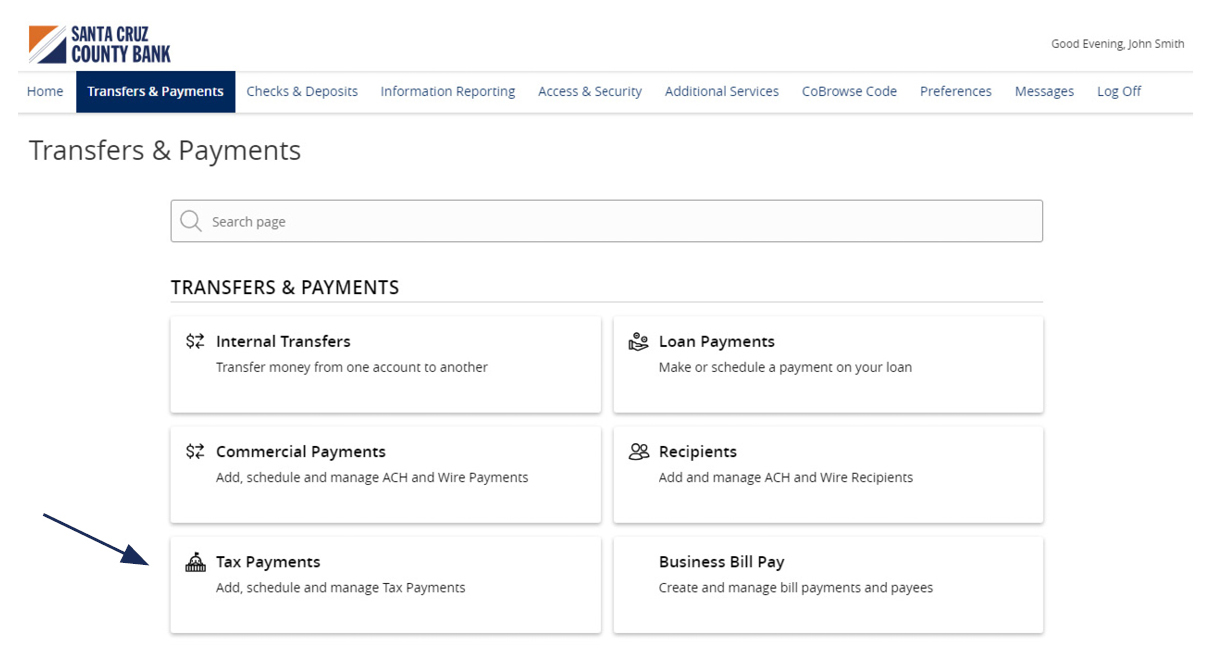
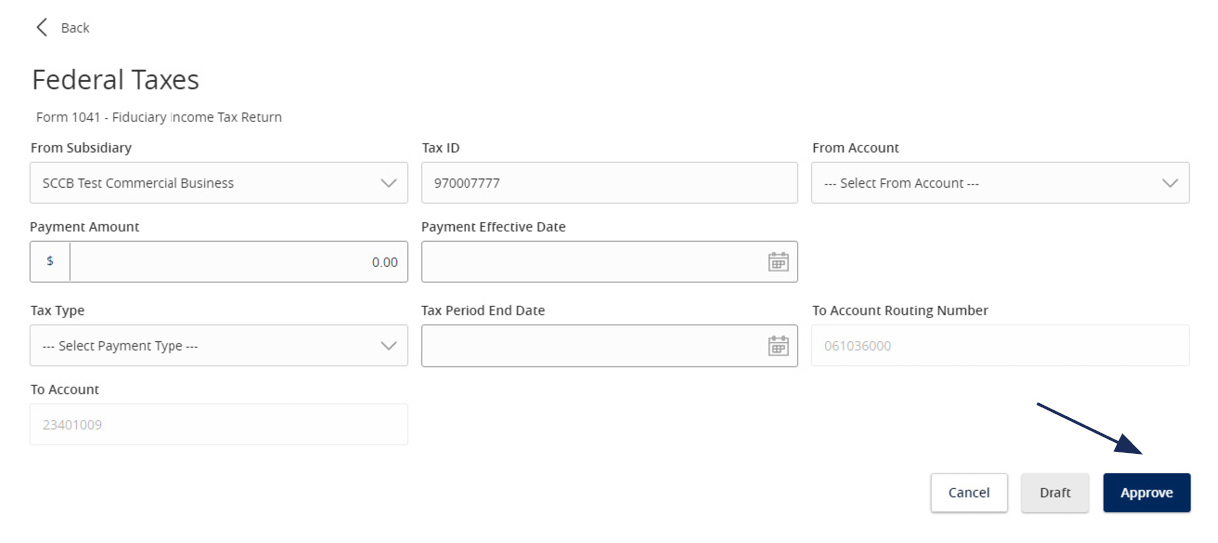
Tax Payments Guide
1. Select the 'Transfers & Payments' menu and then select 'Tax Payments'.
Federal Tax Payments
1. Select 'Federal' in the 'State or Federal Authority' drop down menu.
2. Select the desired tax form.

3. Complete all required fields in the form.
4. Review the information on the screen for accuracy and then select 'Approve' to authorize the payment or 'Draft' to initiate.
State Tax Payments
1. Select the corresponding state from the 'State or Federal Authority' drop down menu.
2. Select the desired tax form.

3. Complete all required fields in the form.
4. Review the information on the screen for accuracy and then select 'Approve' to authorize the payment or 'Draft' to initiate.

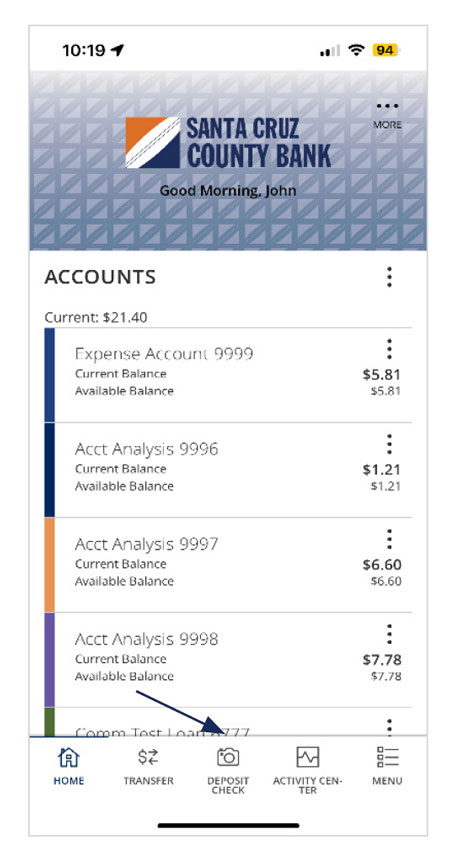
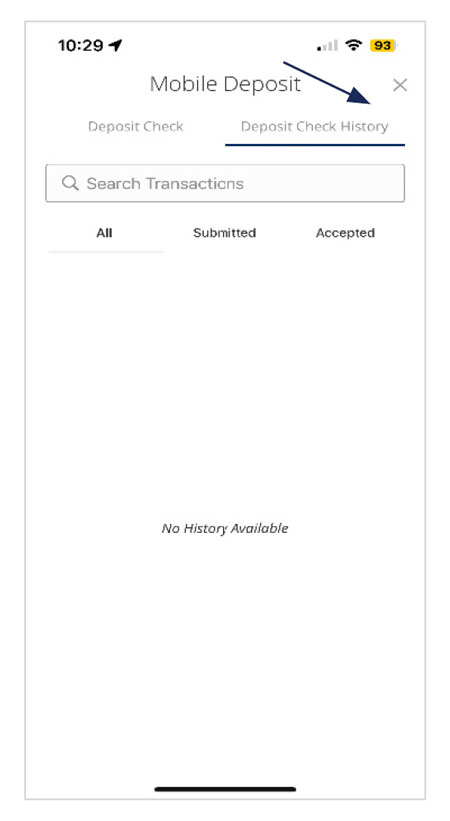
Mobile: Remote Deposit Capture Guide
1. To deposit a check through Mobile Deposit, log into the Santa Cruz County Bank app on your Apple or Android device. Be sure to write "For Mobile Deposit Only" on the back of the check before taking the picture.
2. On the homepage select 'Deposit Check'. If this is your first time using the feature, scroll down and click 'I Accept' to accept the Mobile Remote Deposit Terms and Conditions.
3. Select the Deposit Account from the drop-down menu.
NOTE: Once you have completed the deposit process put the date of deposit on the back of the check. Do not destroy the original check for at least 30 days.
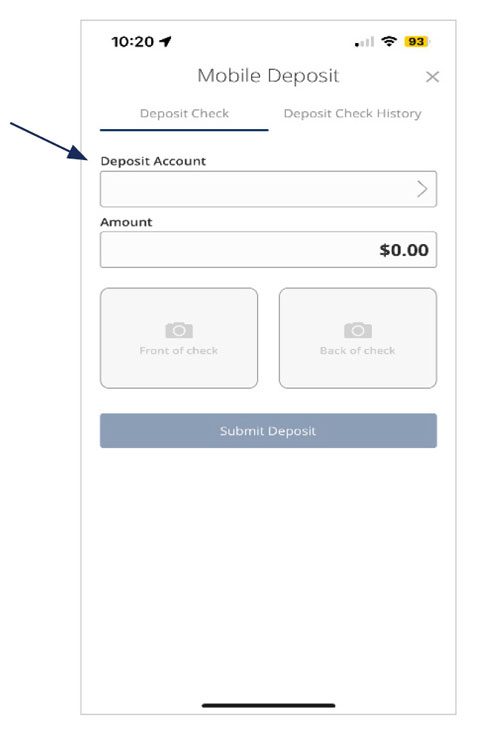
4. Select the 'Deposit Check History' tab to view a listing of previous checks deposited through Mobile Deposit.
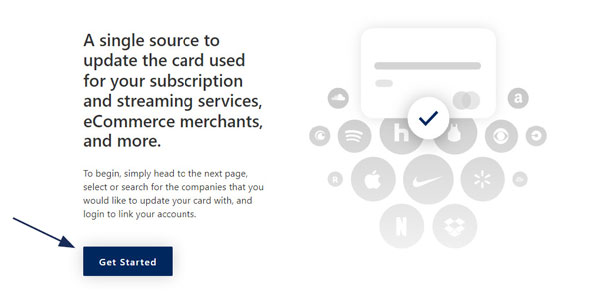
Card Swap Guide
1. Select the 'Additional Services' menu then 'Card Swap'.
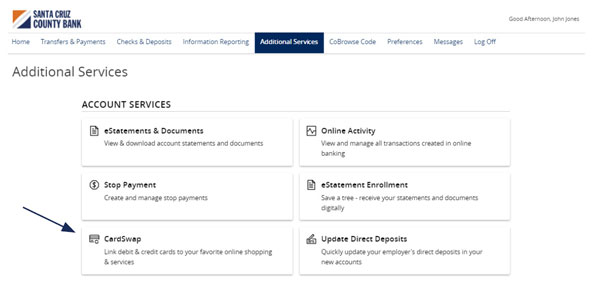
2. Click 'Get Started'.
3. Click each of the brands that you pay from the listing on the screen.
4. Click 'Next Step' when done
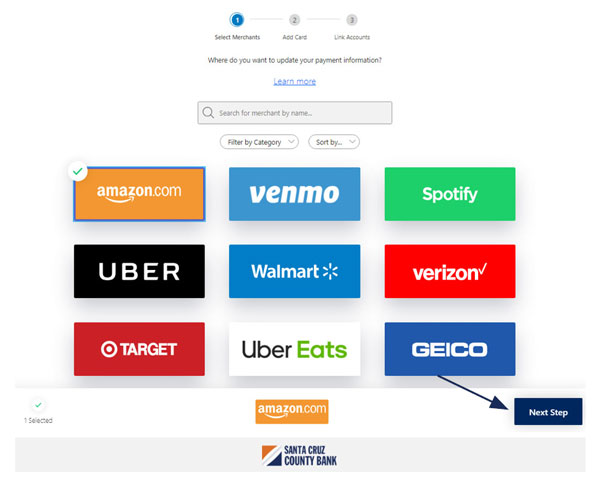
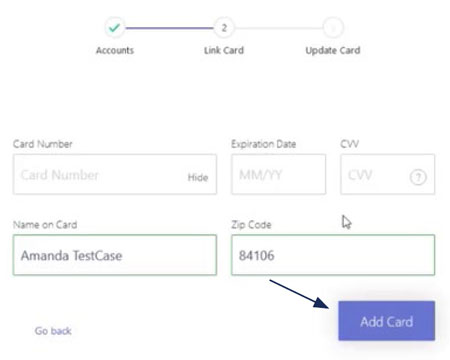
5. Enter your Santa Cruz County Bank card information and click 'Add Card' when done to begin the linking process.
NOTE: You will notice the card that was entered in the previous steps appears below each biller.
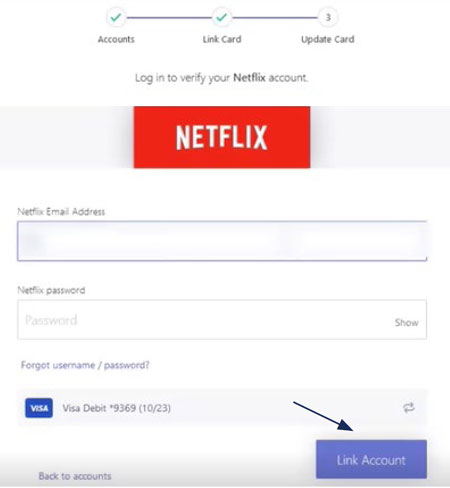
6. Enter the login credentials, then click 'Link Account' for each provider you would like to verify.
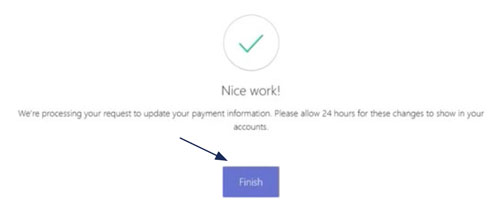
7. Once your account has been successfully linked, click 'Finish'.
Check Search Guide
Use the Check Search page to search for specific transactions.
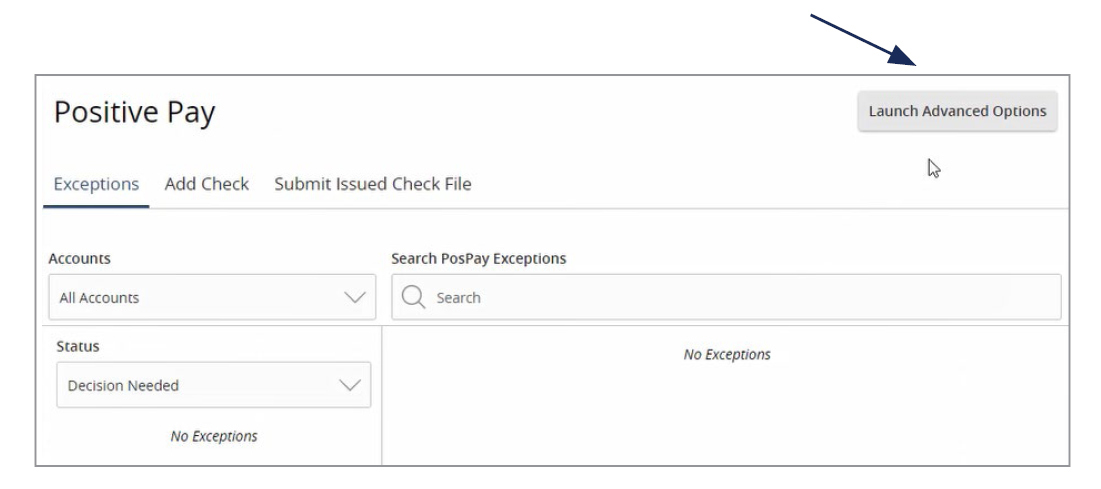
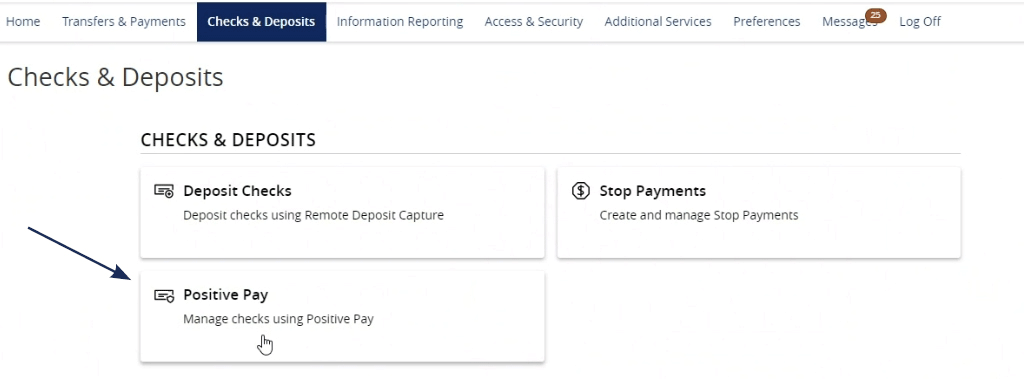
1. Select the 'Checks & Deposits' menu then 'Positive Pay'.
NOTE: Checks can be searched by specifying various criteria listed on the screen according to need.

2. Click 'Launch Advanced Options' button to visit the full Positive Pay site.
3. Select the 'Transactions Processing' menu, then select 'Check Search'.
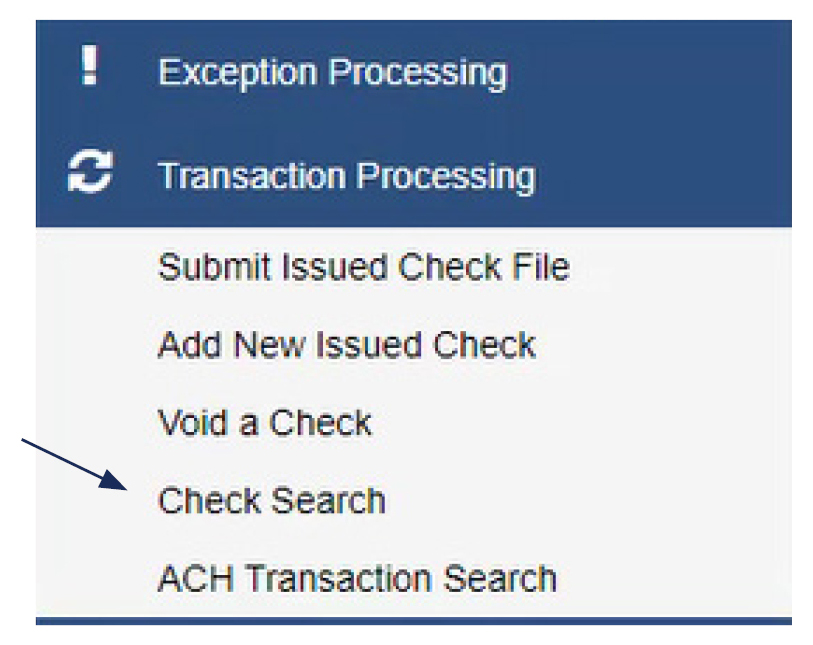
4. Select the desired Account Nickname from the drop-down menu. This specifies which Account or Accounts should be included in the search.

5. The following fields are optional and may be utilized to narrow down the corresponding search.
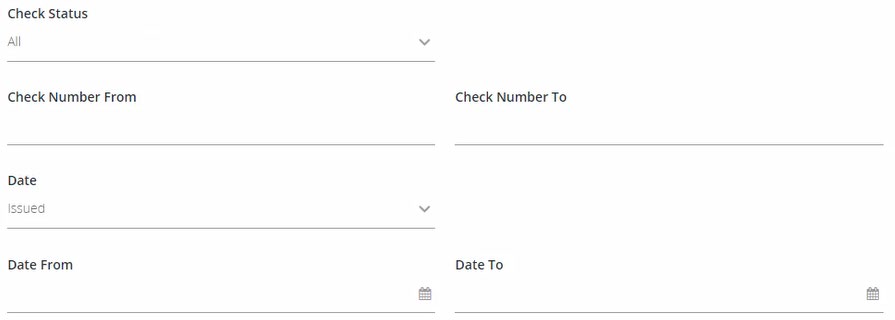
7. Select a decision from the list based on whether the check was paid or returned.
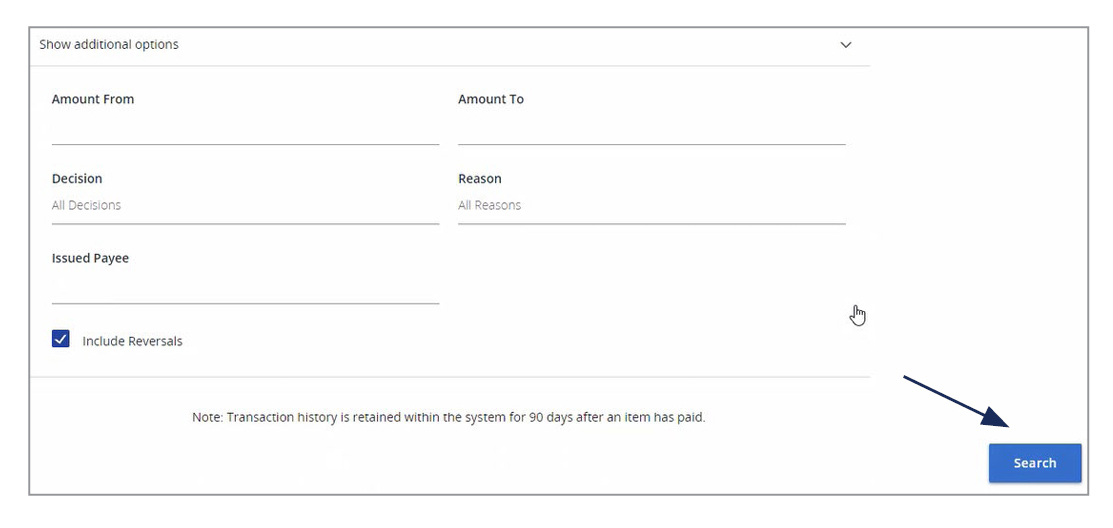
8. Select a reason from the list based on the reason that was selected.
9. Indicate whether reversals should be included in the search by clicking the check box.
10. Click 'Search' once all desired criteria have been specified.

11. The resulting checks will appear on the screen.
12. Drag a column header to reorder.
13. Select the search filter (or spyglass icon) to filter and search all results or select a specific column to search within.
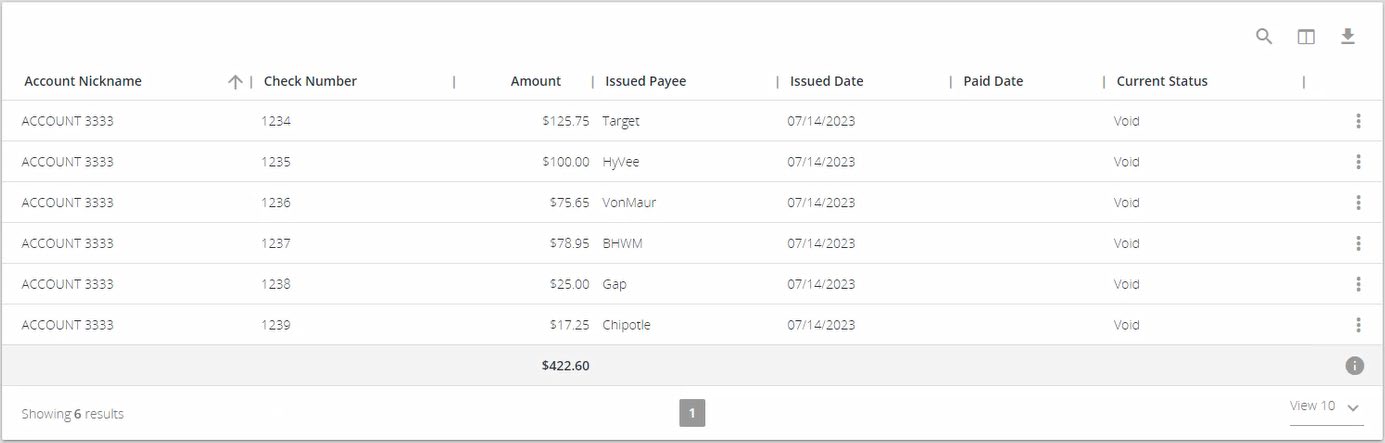
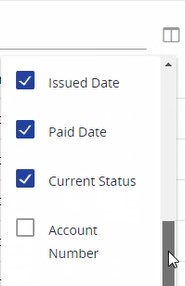
14. Select the columns icon to select or remove columns from the report.
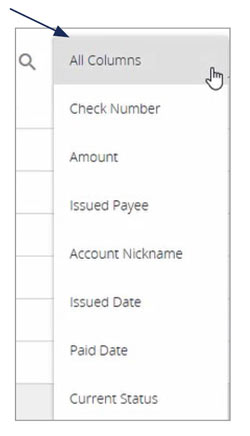
15. Select the export icon to export the search results to a Microsoft Excel or PDF file.
16. Select the Kabob icon on an individual search result to perform various actions.

External Transfer Guide
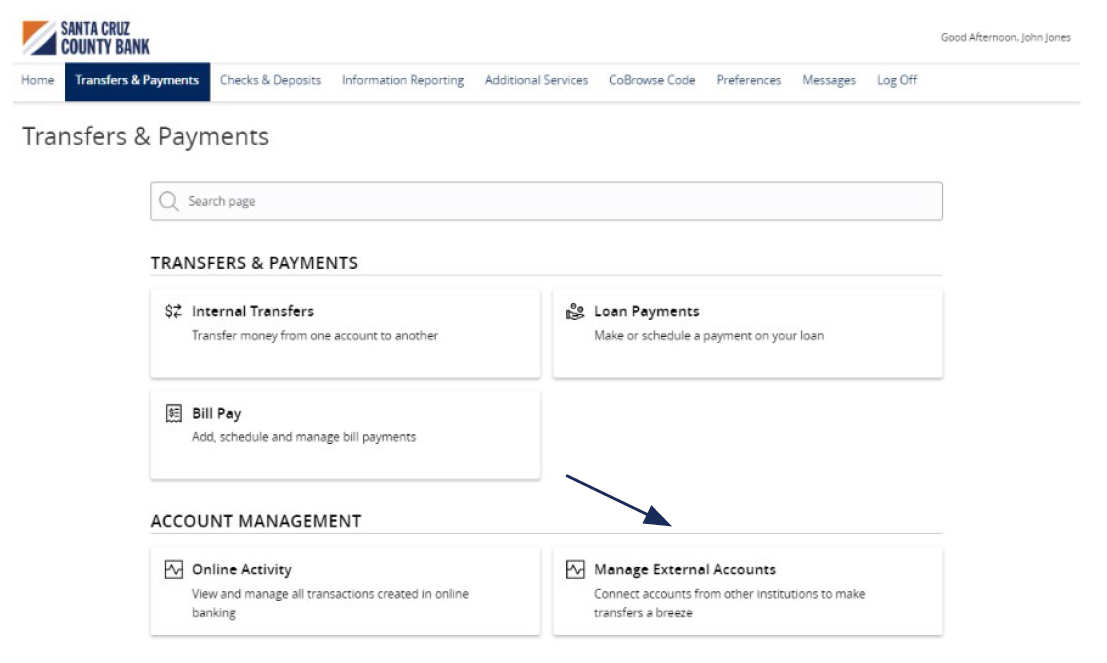
1. To add an External Account, select the 'Transfers and Payments' menu then 'Manage External Accounts'.
2. Enter the Account Number for the external account you wish to add.
3. Select the corresponding Account Type.
4. Enter the Routing Number for the external account.
5. Click 'Submit'.
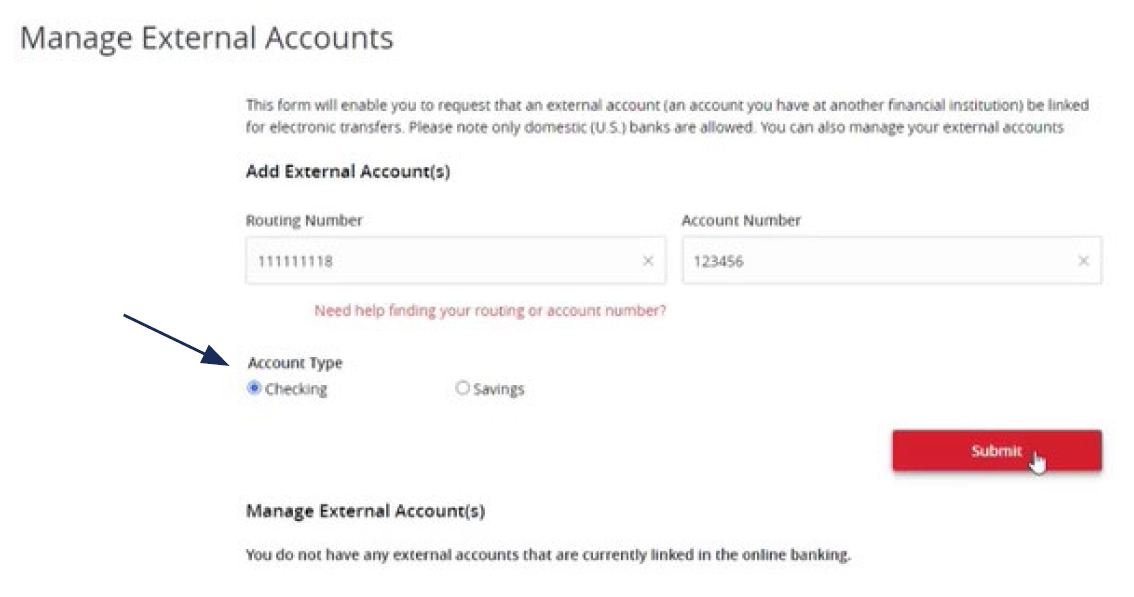
NOTE: Once the external account request has been processed by Santa Cruz County Bank, you will receive two micro deposit amounts in the external account being added.
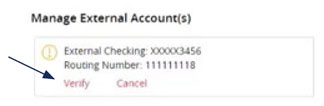
6. To verify the external account, select the 'Transfer' menu then 'Manage External Account'.
7. Scroll to the bottom of the page and select the 'Verify' link for the account to be verified.
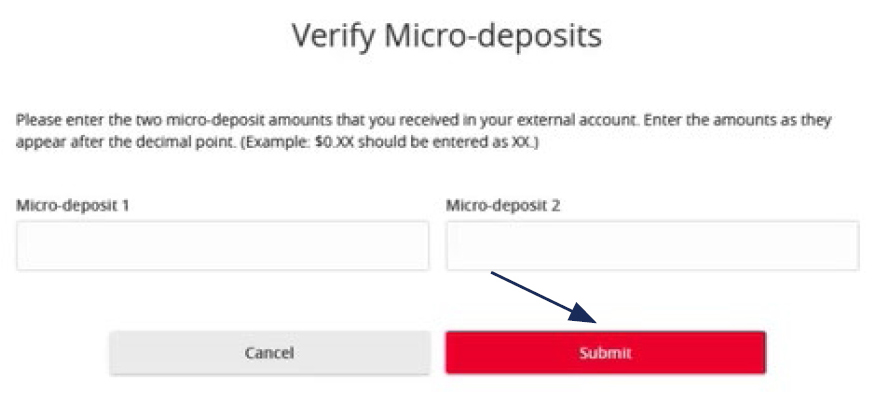
8. Enter the two deposit amounts received in the external account.
9. Click 'Submit'.
Initial Access to the System
ACH and Check Positive Pay Guide

ACH File Import Guide
NOTE: Supported file types include the following:
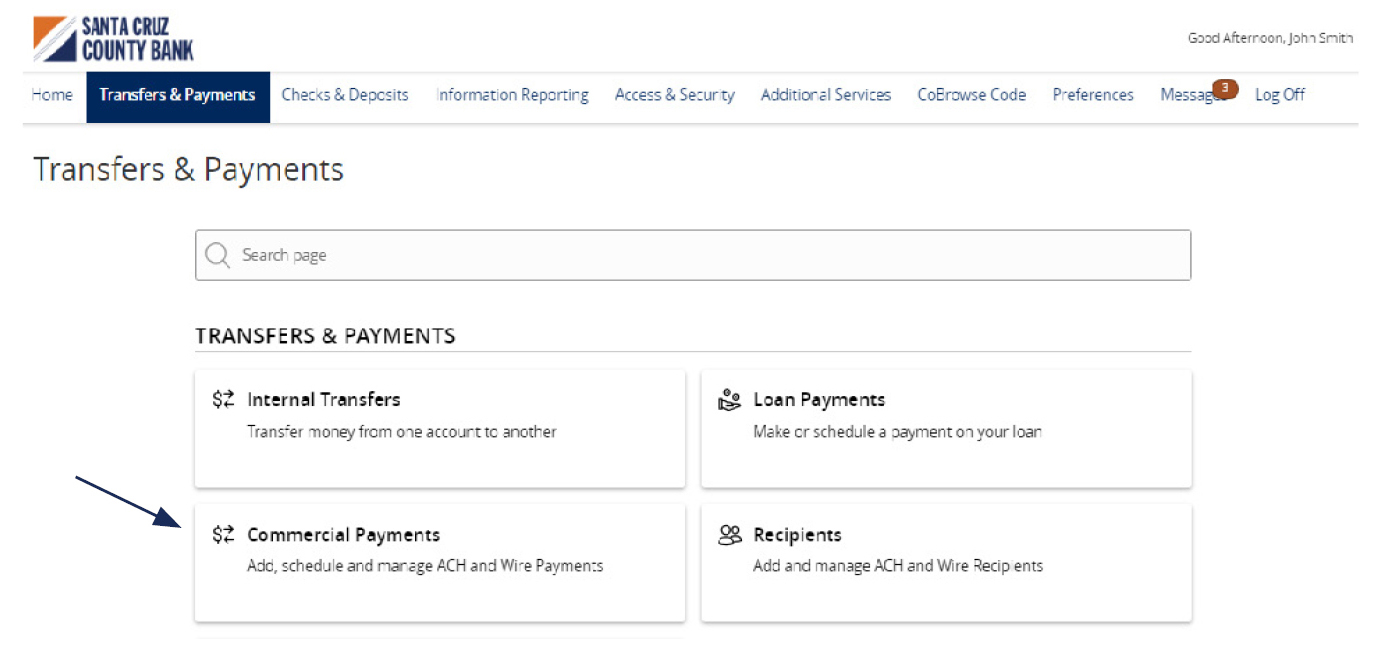
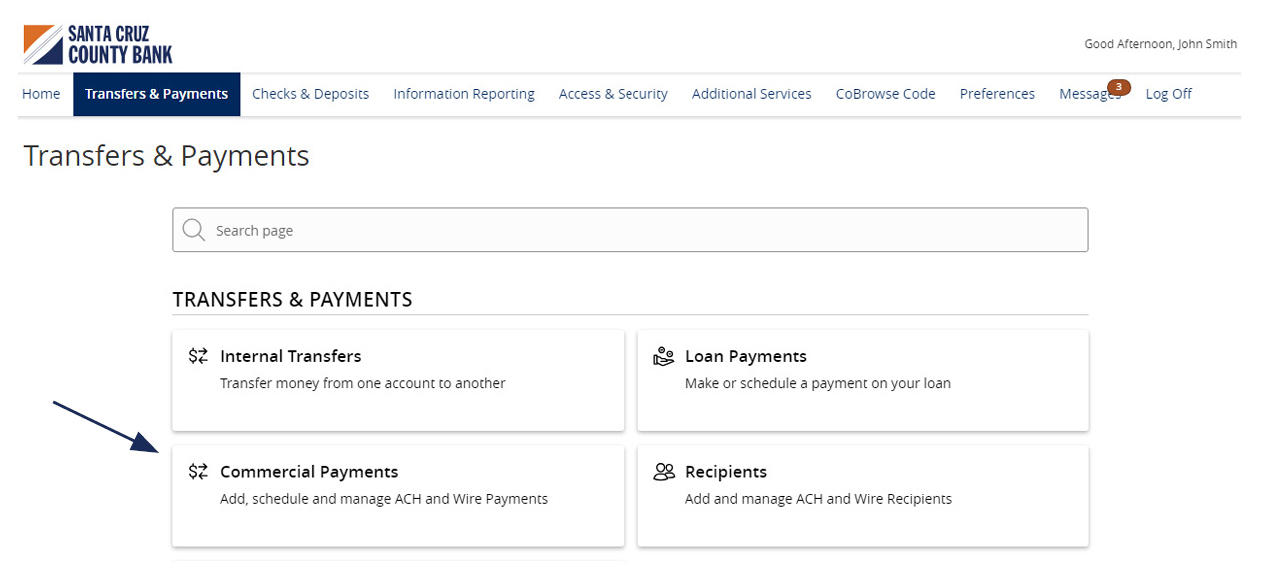
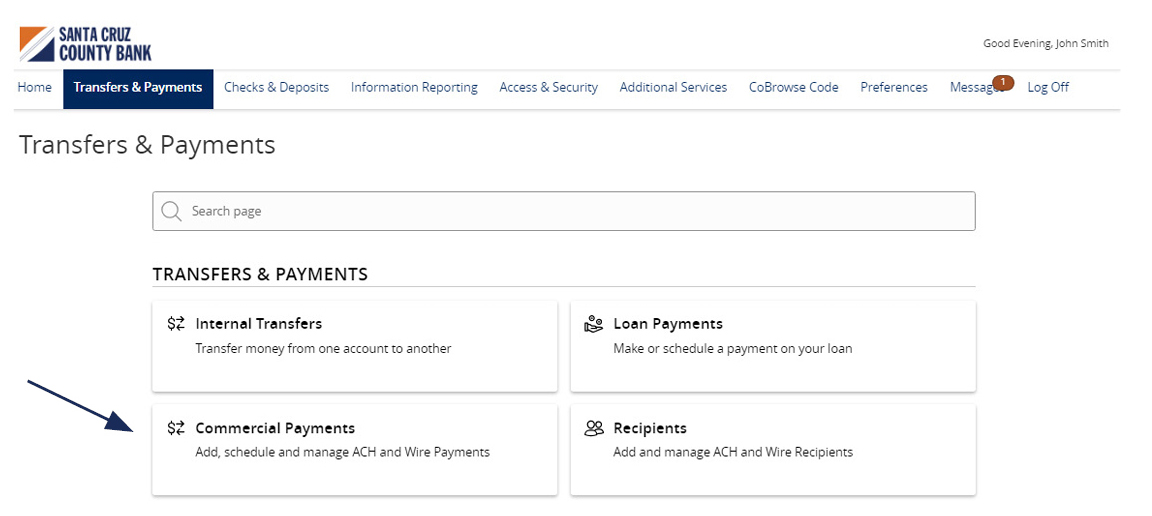
1. Select the 'Transfers & Payments' menu and then select 'Commercial Payments'.
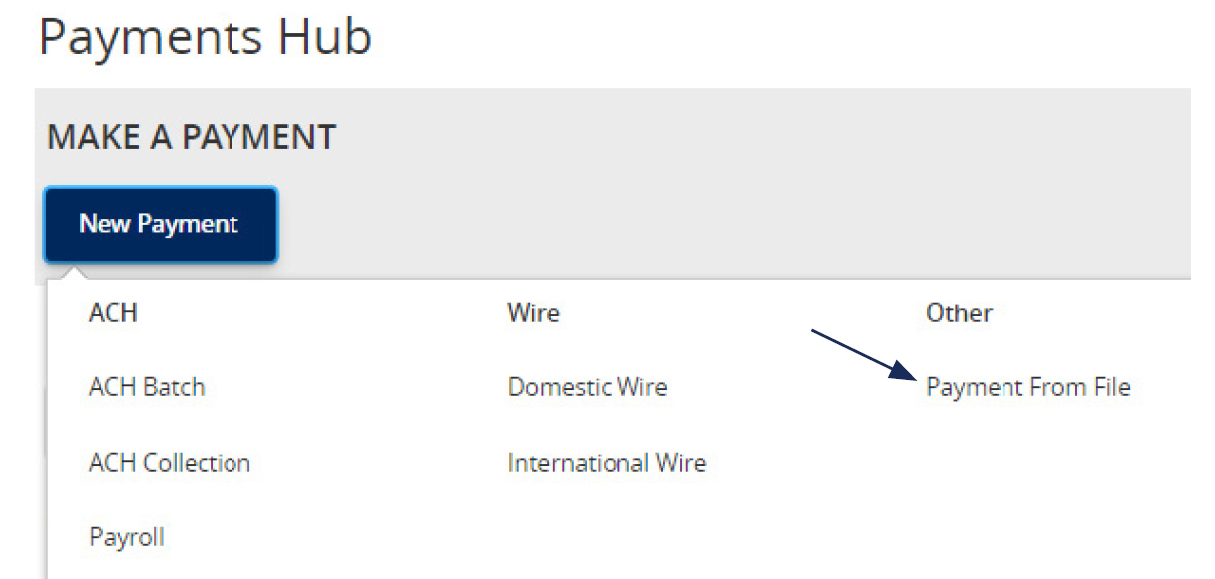
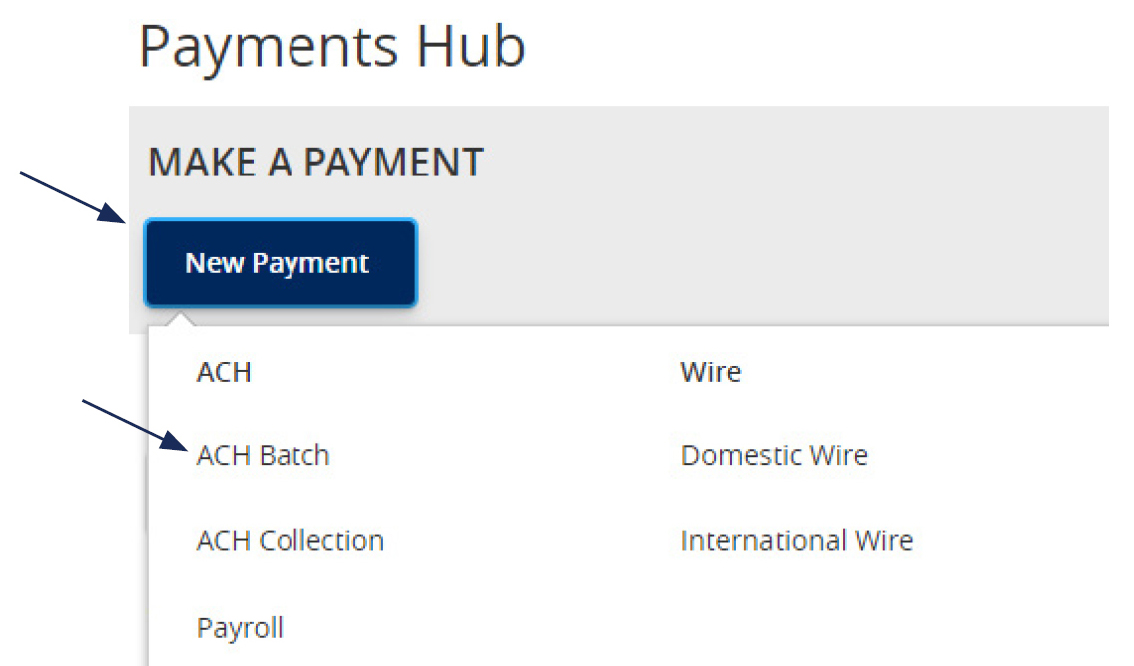
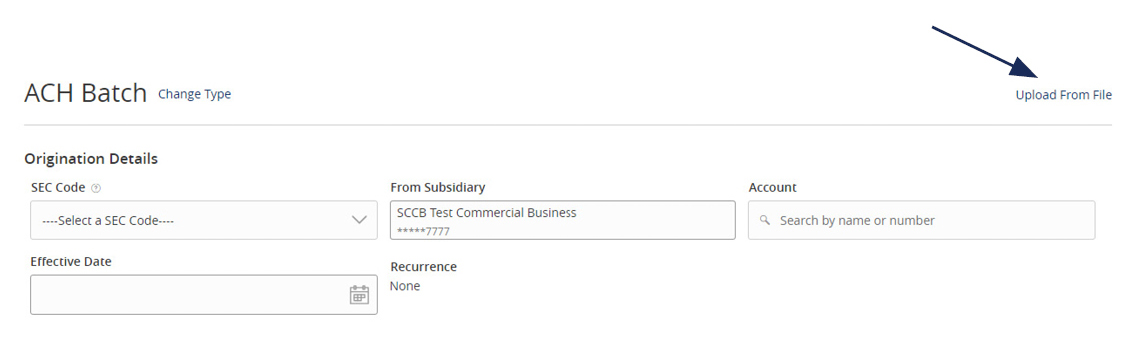
2. Select 'New Payment' and then 'Payment from File'.
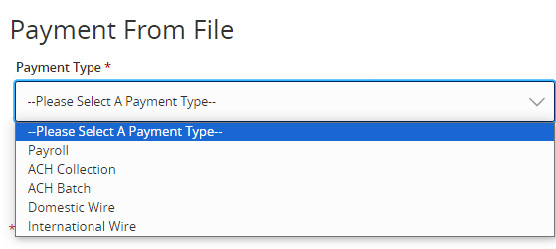
3. Select the desired 'Payment Type' from the drop-down menu.
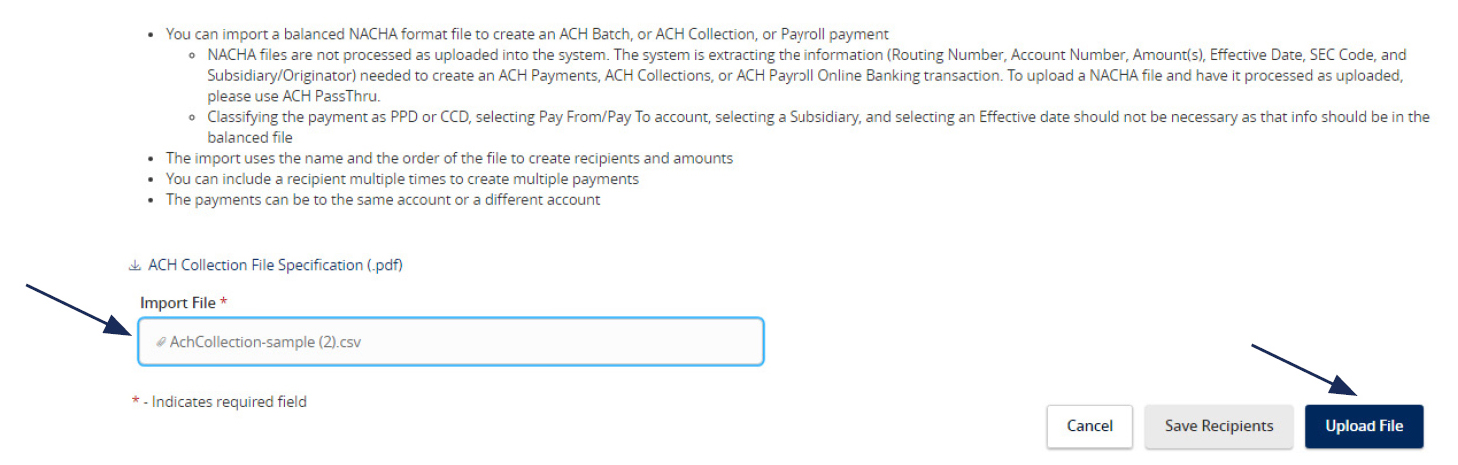
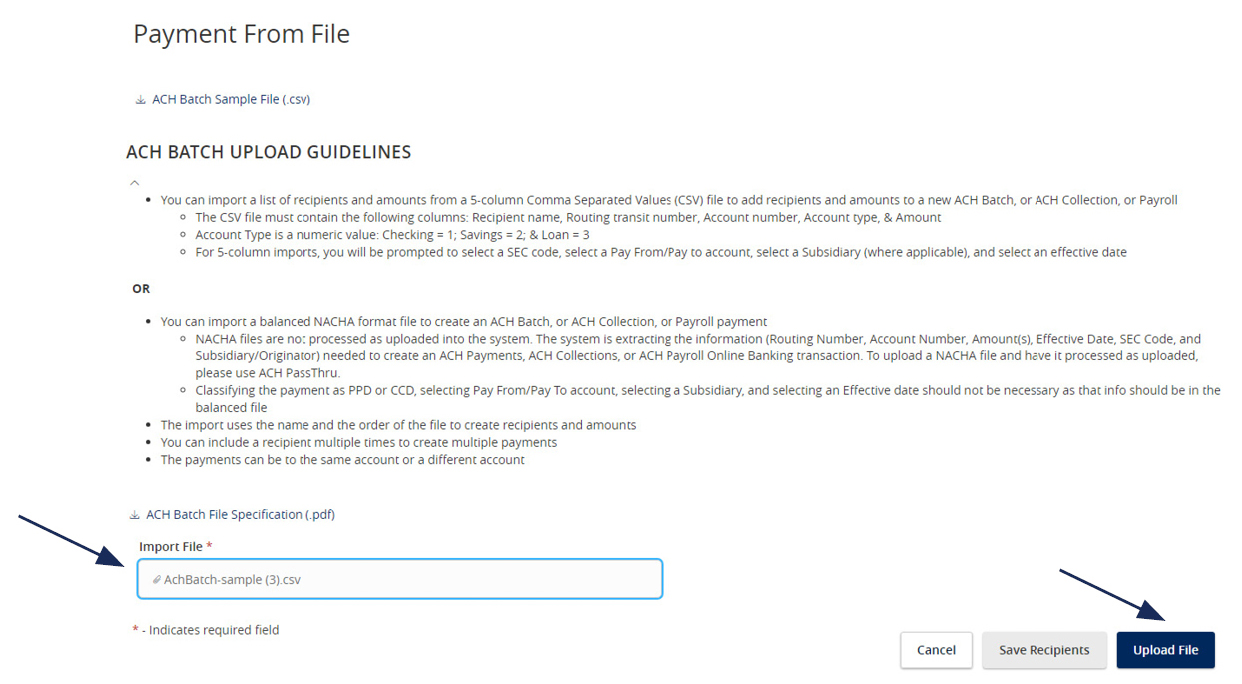
4. Click in the 'Import File' box to select a file to upload. Browse your computer for the file you would like to upload.
5. Select 'Upload File' to upload the selected file into Online Banking for processing.
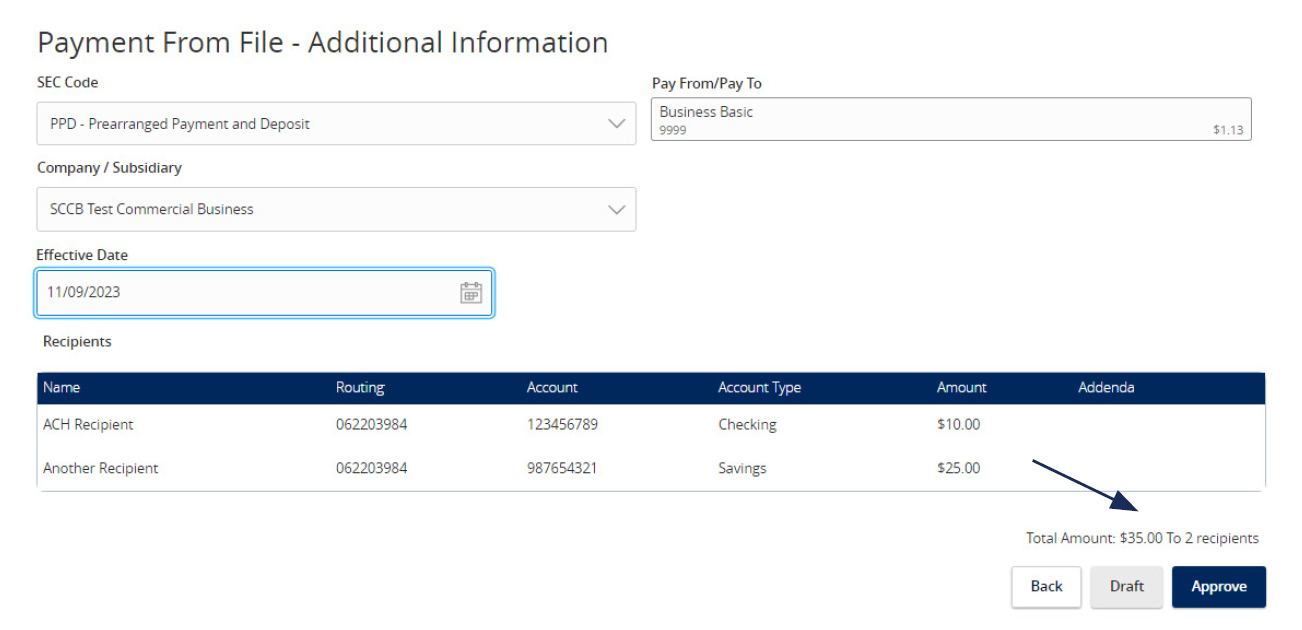
NOTE: If the imported file is a 5-Column CSV, a second screen will be presented as part of the process. This screen requests additional information so a complete ACH file can be generated for processing based on the information designated.
6. Select the required fields from the corresponding drop-down menu.
7. Review the information on the screen for accuracy and then select 'Approve' to authorize the wires or 'Draft' to only draft.
ACH or Wire Recipient Guide
NOTE: A 'Recipient' is an individual or company which is either debited or credited via ACH or wire.
1. Select the 'Transfers & Payments' menu and then select 'Recipients'.

New Recipient
2. Click the 'New Recipient' button.
3. Enter 'Display Name and 'Email Address'.
NOTE: 'Send e-mail notifications' generates an e-mail to the recipient at the time the ACH or wire transaction is processed by Santa Cruz County Bank. The email message does not contain confidential information.


4. Select the 'Payment Type' which designates the transaction type(s) for which the account is eligible.
a. Payment Type 'ACH and Wire' displays fields corresponding with both ACH and wires. Complete all required fields designated with an asterisk.
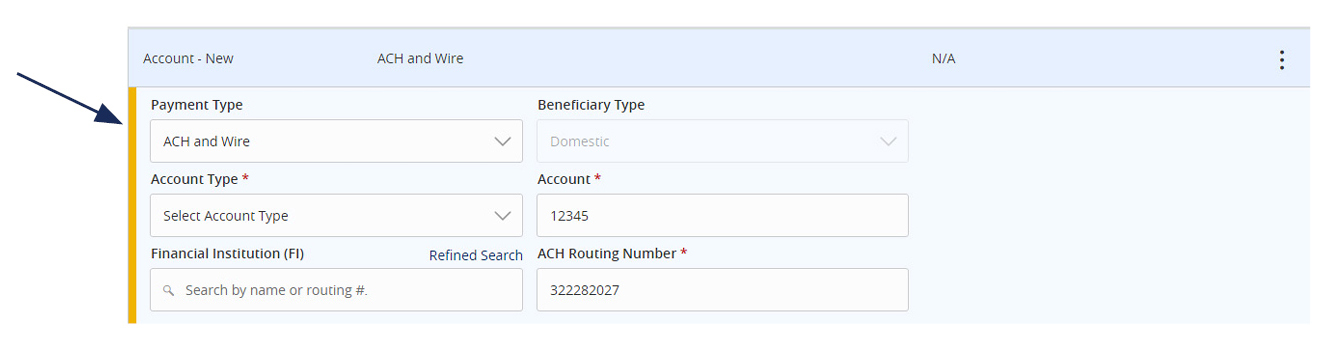
NOTE: The Financial Institution (FI) search function allows for the dynamic search of domestic banks and credit unions. Enter the FI name or ABA number in the field. When the desired FI has been selected, the corresponding ACH Routing Number and Wire Beneficiary FI information will automatically populate.
b. 'Payment Type 'ACH Only' displays fields corresponding with only ACH. Complete all required fields designated with an asterisk.
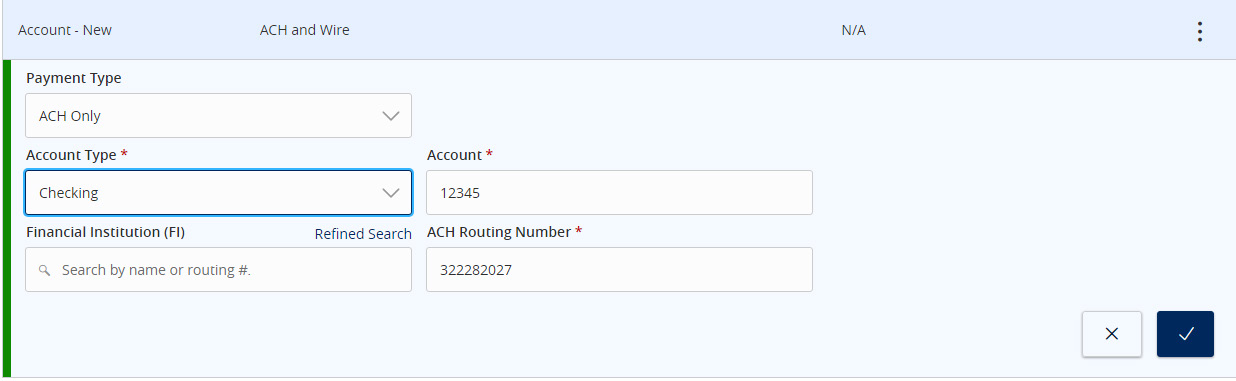
c. Payment Type 'Wire Only' displays fields corresponding with only wires. Complete all required fields
d. designated with an asterisk.

5. Click the check mark when the account setup is complete.

6. Select 'Add another account' to add an additional account or select 'Save Recipient' to complete the setup.

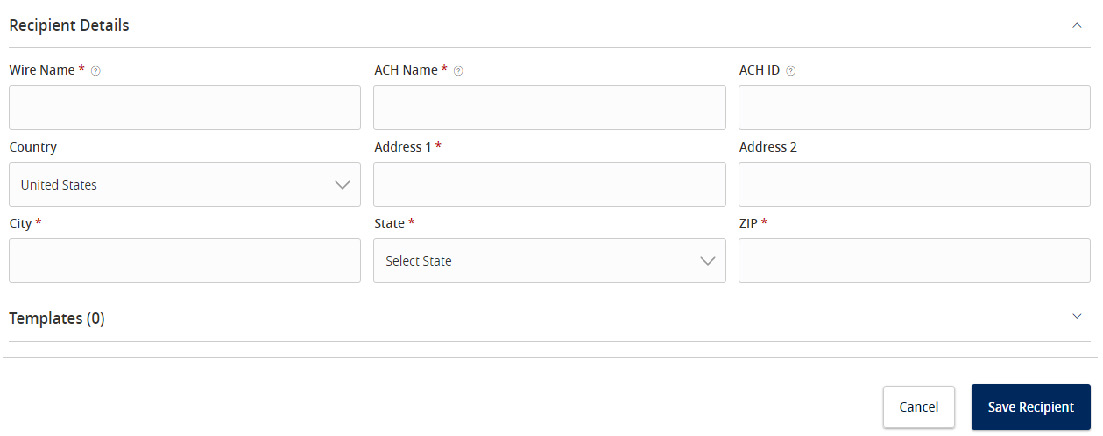
7. Complete all required fields in the 'Recipient Details' section.
NOTE: Address fields within 'Recipient Details' are for the recipient's address. This is required for Wire Transfers.
ACH Payroll Transactions Guide
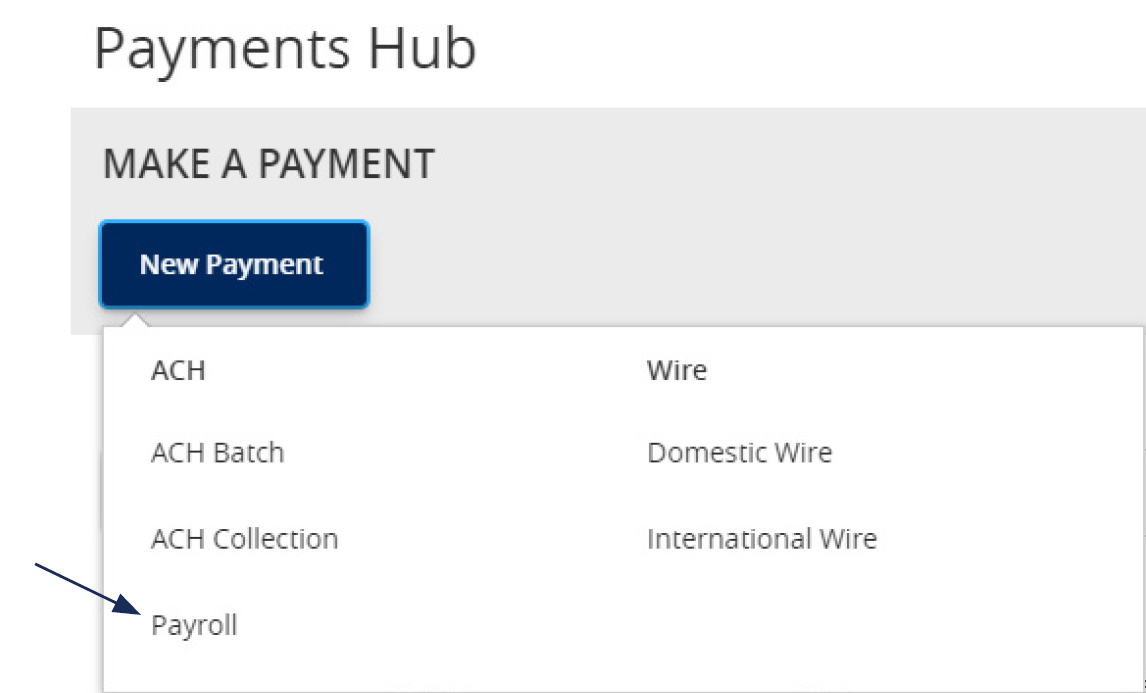
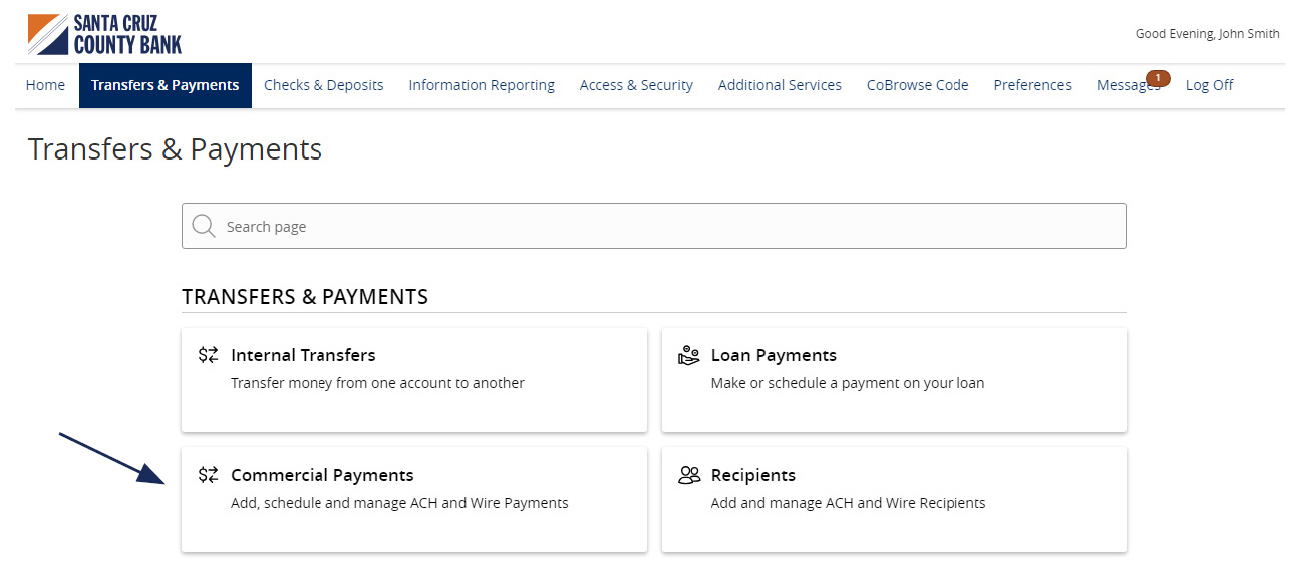
1. Select the 'Transfers & Payments' menu and then select 'Commercial Payments'.
NOTE: The 'Split Payments' option is only available for Payroll transactions.

2. Three options are available.
a. Click 'New Payment' and select 'the 'Payroll' option to create a new payroll transaction.
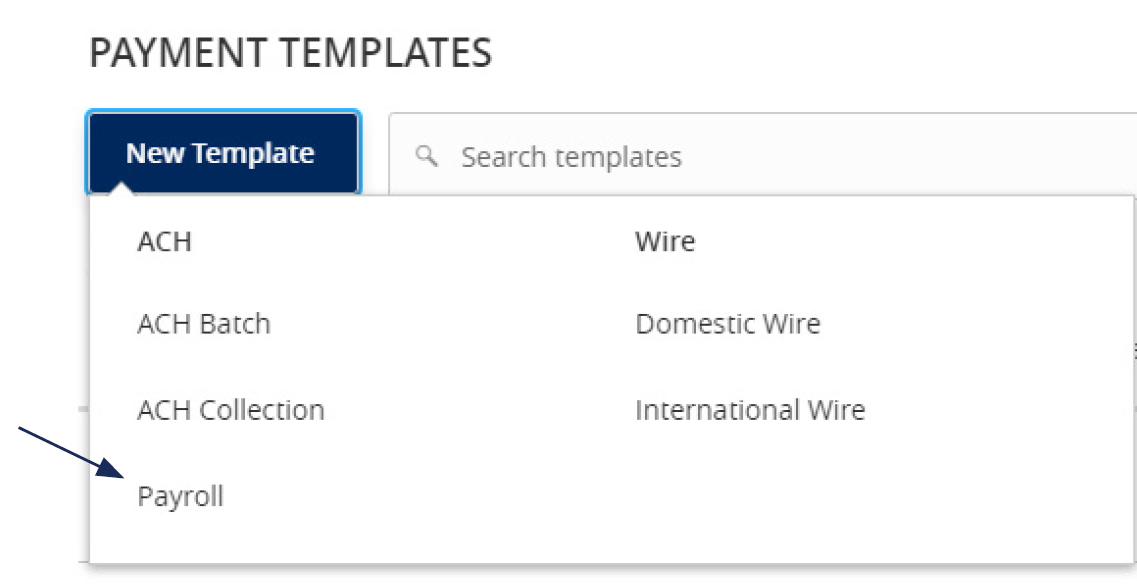
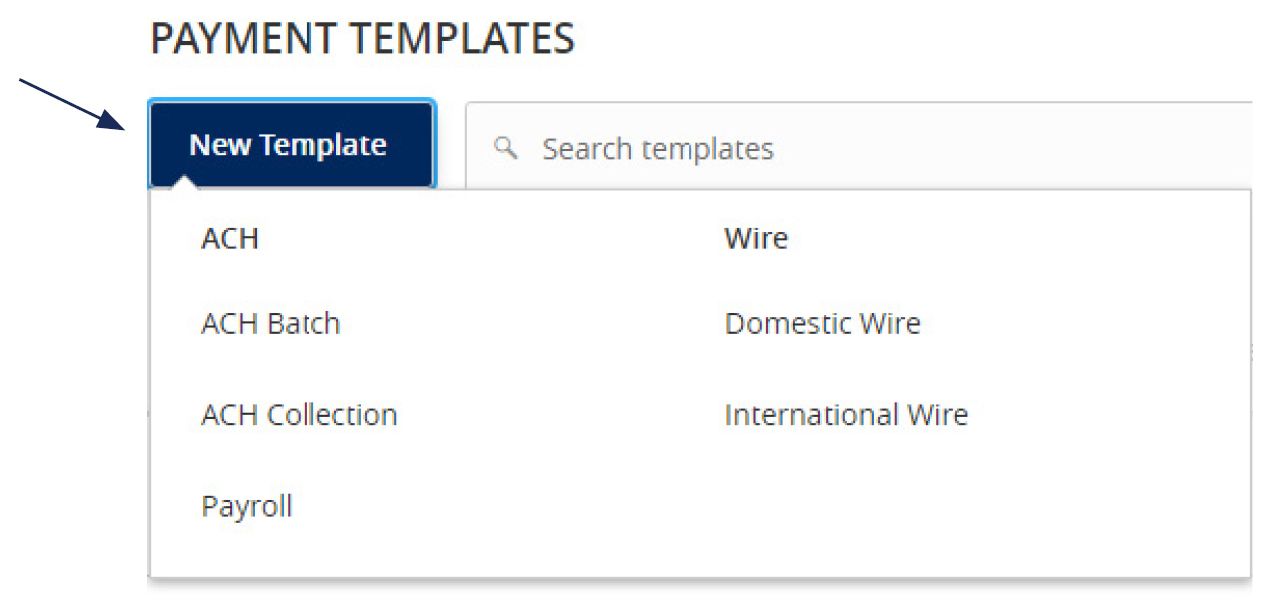
b. Click 'New Template' and select the 'Payroll' option to create a new payroll template.
c. Click the 'template actions' icon and select 'Edit' to work with an existing Payroll template

3. Select the desired recipient's primary account from the drop down list of existing recipients.
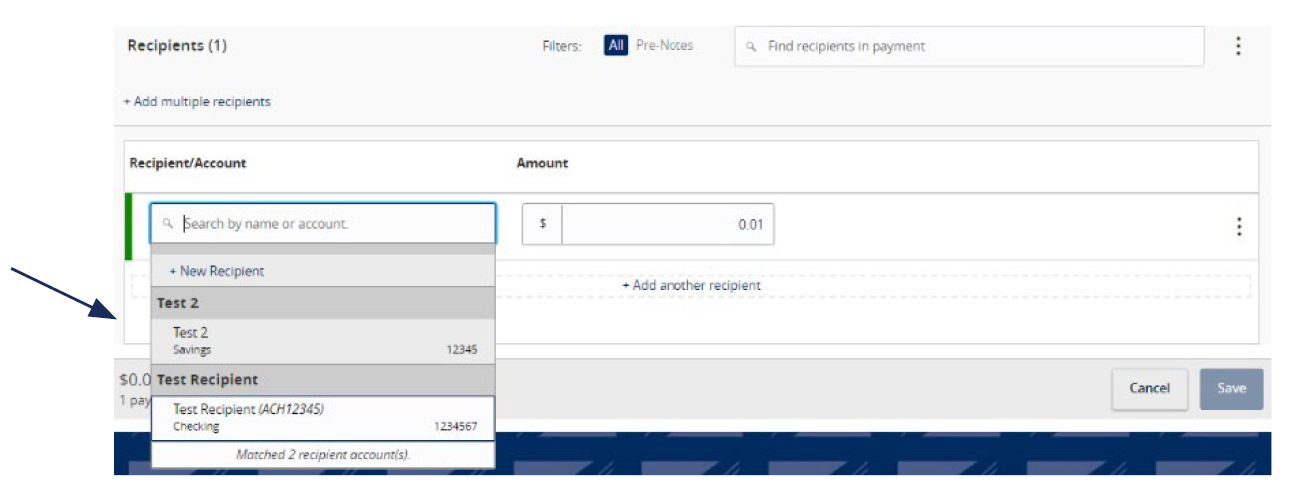
4. Enter total dollar amount of the payroll transaction.

5. Click the 'Show payment actions' icon and select the 'Split Payment' option.
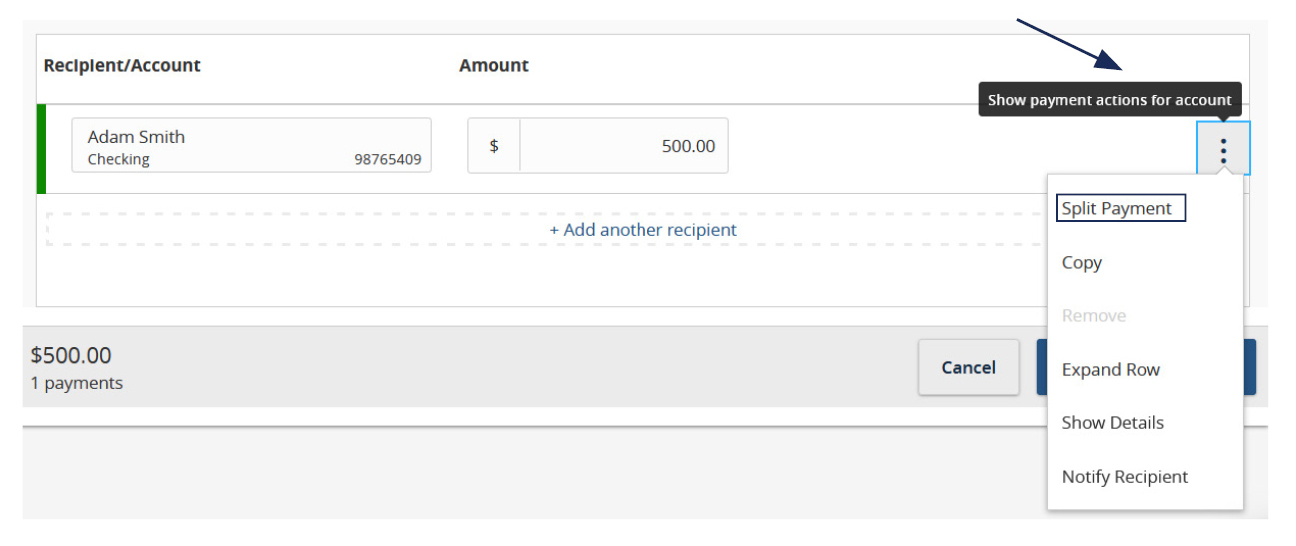
6. Select the recipient's secondary account from the drop-down list.
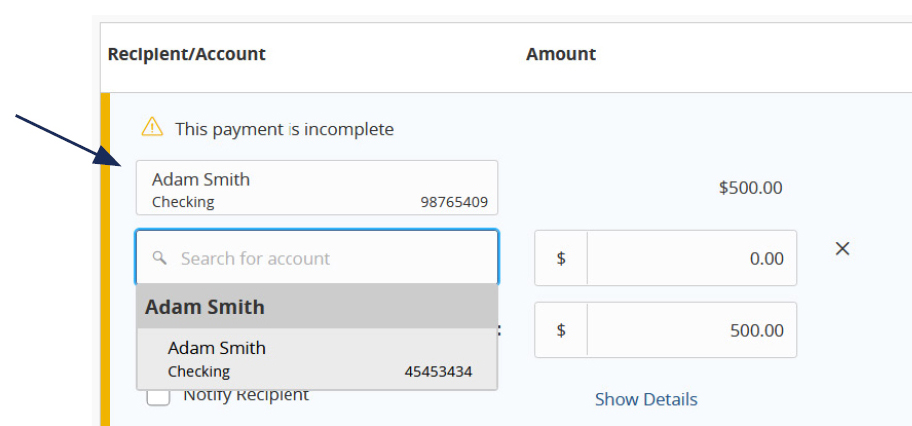
7. Enter the desired dollar amount to be allocated to the secondary account. Then select 'Draft or Approve', depending on user entitlement.
NOTE: The dollar amount allocated to the primary account will be automatically reduced in accordance with the total dollar amount of the payroll transaction.

ACH Template Creation Guide
NOTE: A Commercial Template allows you to save payment information that can be accessed in the future.
1. Select the 'Transfers & Payments' menu and then select 'Commercial Payments'.
2. Select 'New Template' and the desired payment type.
3. Designate a 'Template Name'.
4. Select an 'SEC Code'.
5. Select a 'Subsidiary'.
6. Select an offset 'Account'.
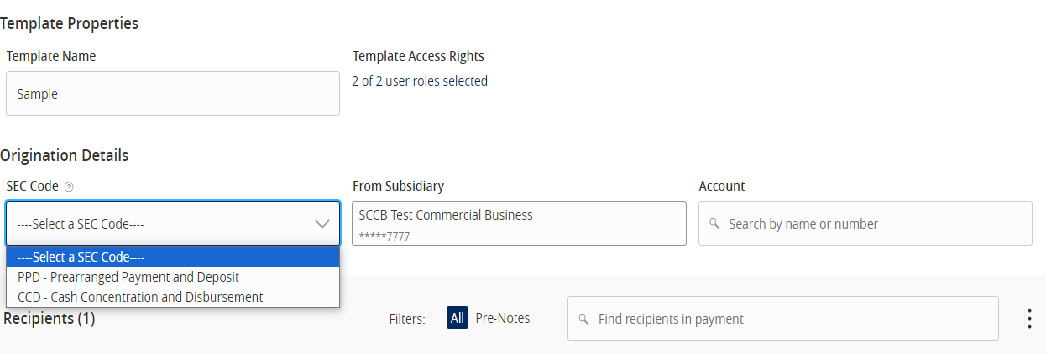
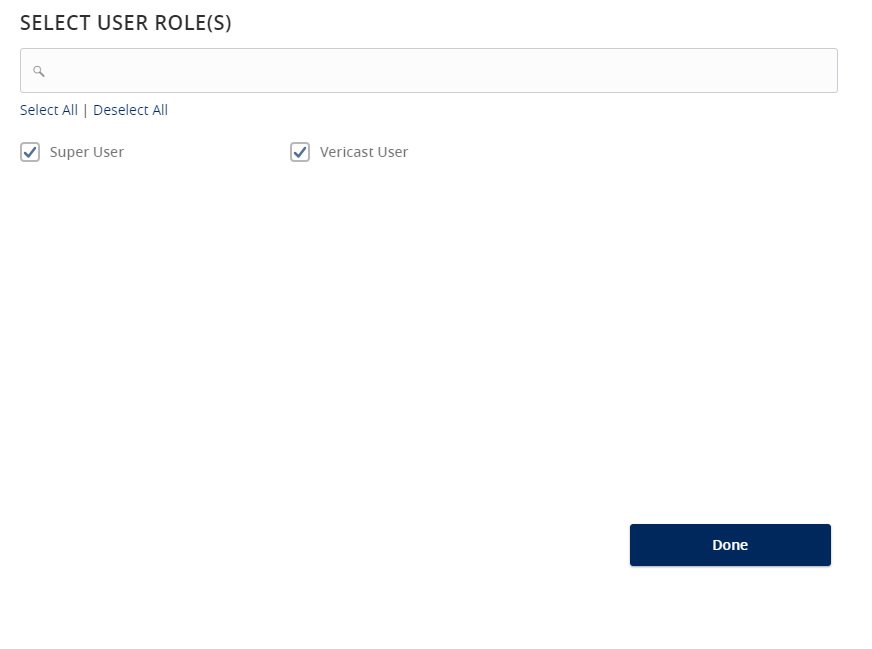
7. Click the link below 'Template Access Rights'.
8. Select the 'User Role(s)' who should have access to the template.
NOTE: A User Role will appear as greyed out if the feature allowing access to all templates is enabled. This overrides the ability to remove template access from the corresponding User Role.
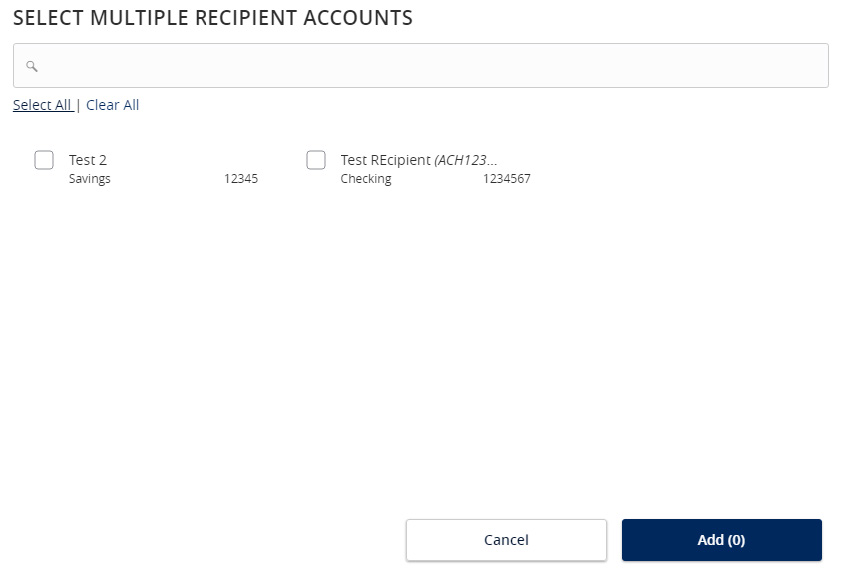
9. Click the '+Add multiple recipients' link to add multiple recipients to the template.

10. Select the desired recipients and click the 'Add' button when done.
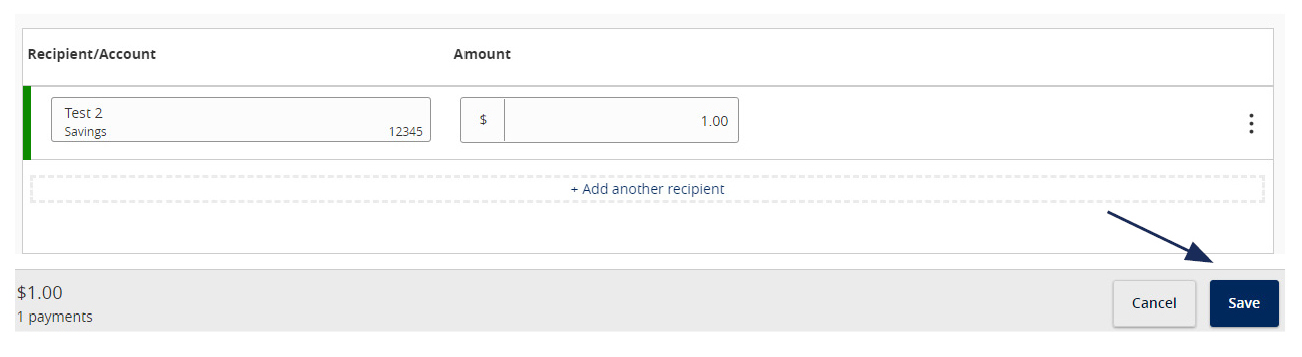
11. Enter a dollar amount for each linked recipient.
NOTE: The amount may be left as $0.00 if the amount will differ from file to file.
12. Review the information on the screen for accuracy and then select 'Save'.
Information Reporting Guide
Reports Setup Process
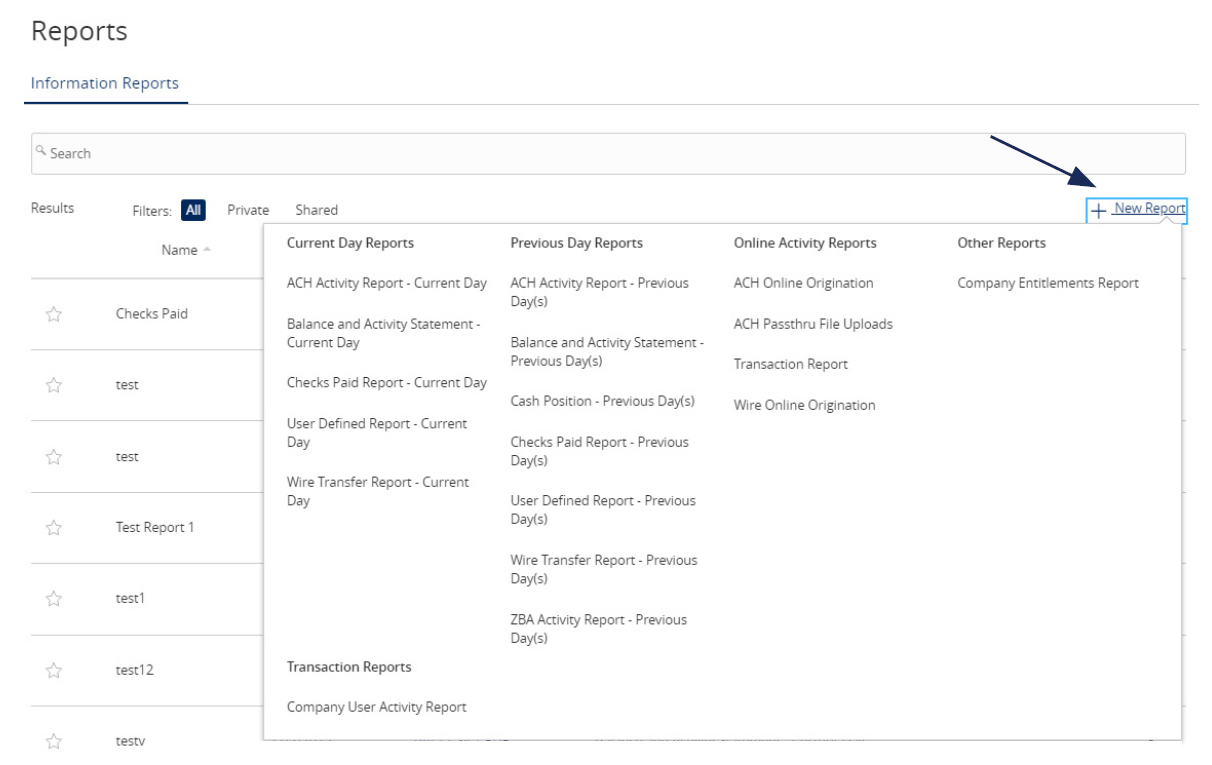
1. Select the 'Information Reporting' menu, then select 'Advanced Reporting'.

2. Click the 'New Report' link and select the desired report from the list.
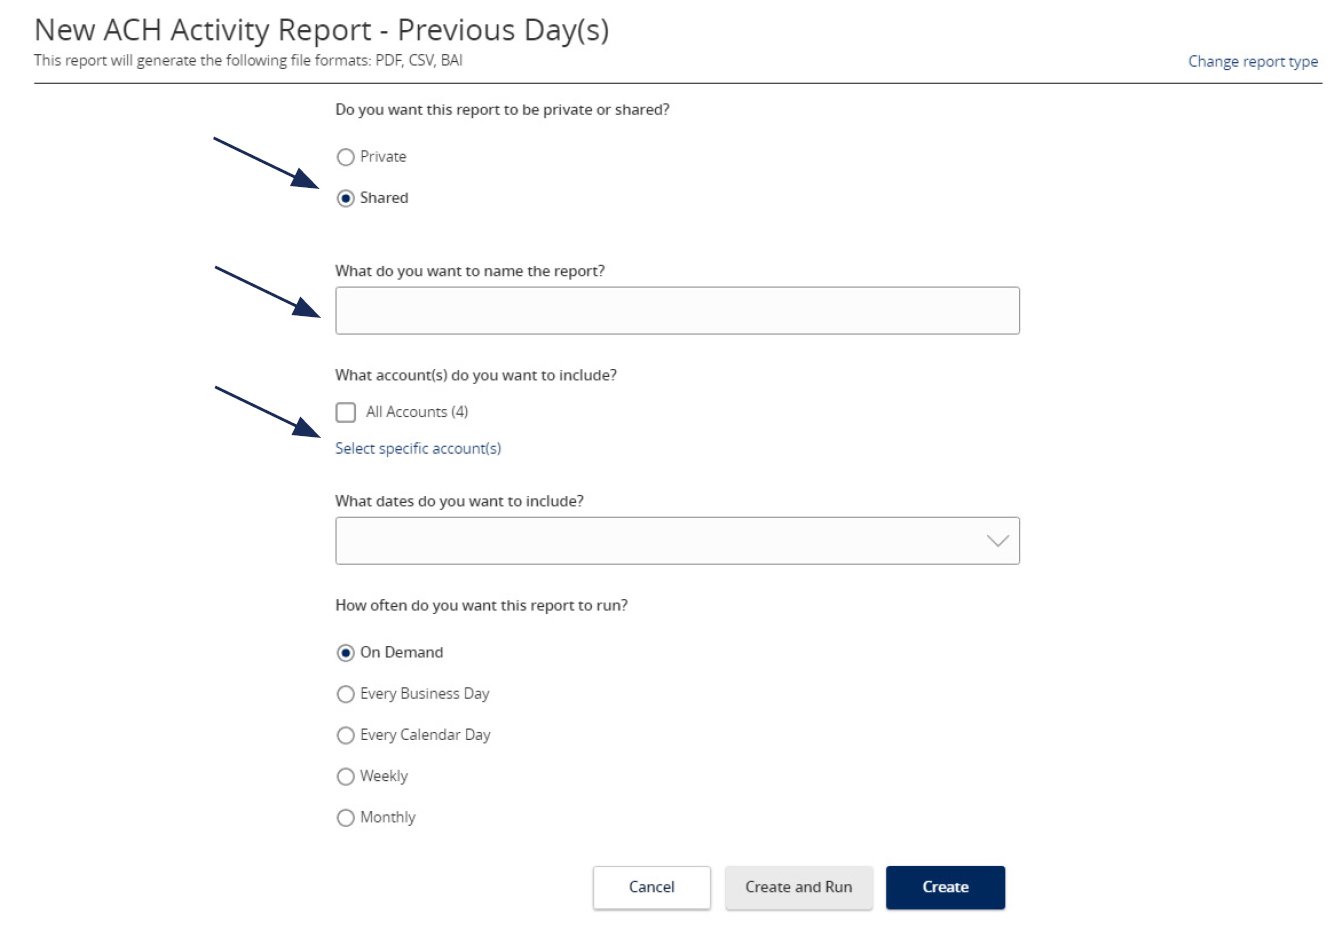
3. Indicate whether the report is Private or Shared.
4. Enter the desired name for the report.
5. Indicate which accounts need to be included in the report.
NOTE: This step only corresponds with reports associated with account information.
a. Click the 'All Accounts' box to include all available accounts in the report.
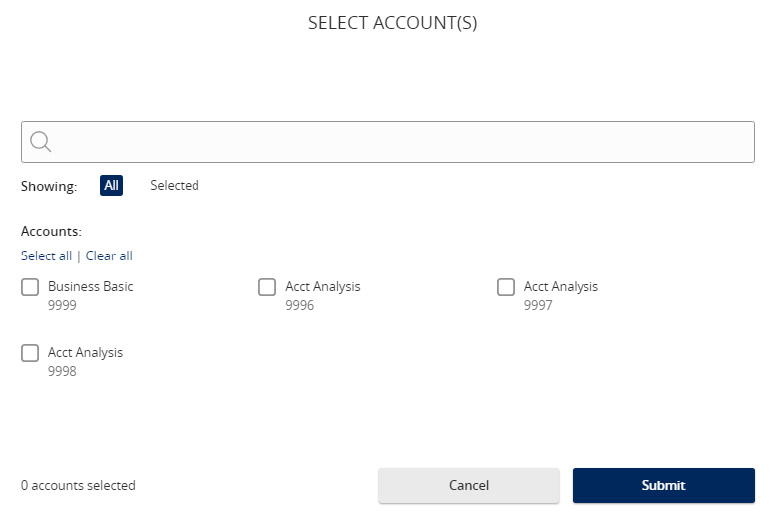
b. Click the 'Select specific account(s)' link to choose individual accounts to be included in the report.
Select the accounts to be included in the report. Either select by label or by individual account.
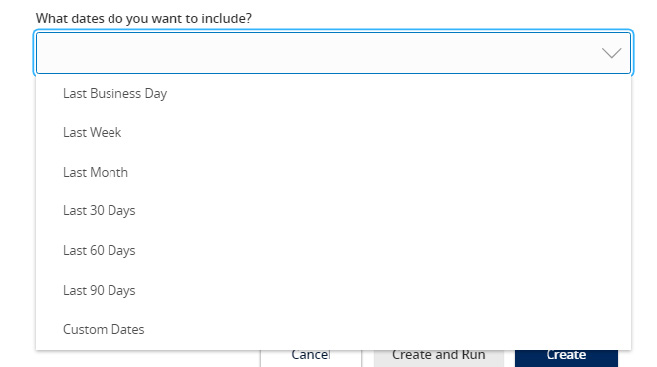
6. Select the date(s) to be included in the report.
a. Select one of the dynamic date range options. (A rolling date range that shifts in accordance with the current day)
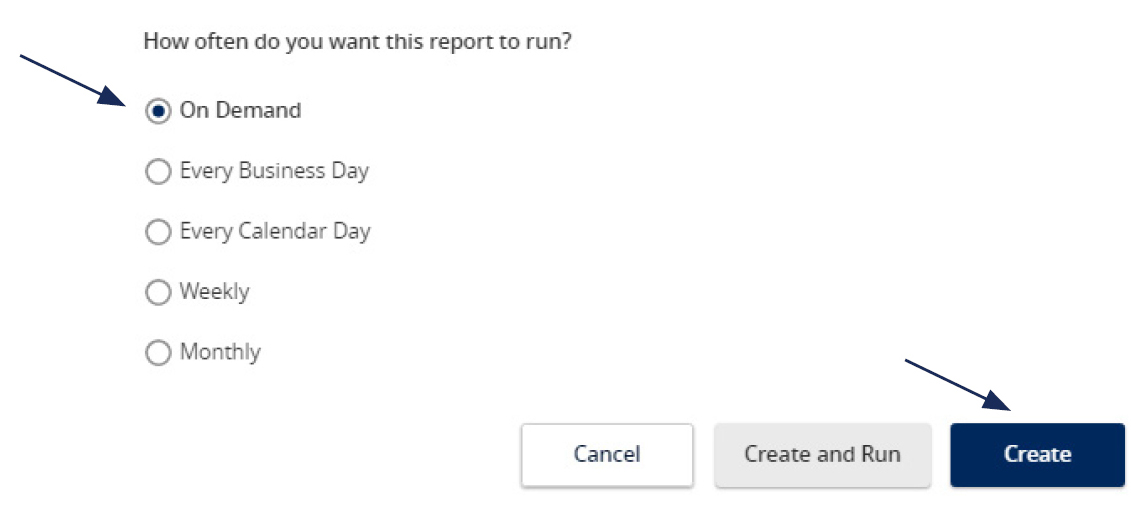
NOTE: Information can be pulled as far back as the oldest transaction that exists within Online Banking for the respective account(s).
7. Select how often the report should run.
8. Select 'Create and Run' to run the report immediately and to save the recurrence. Or select 'Create' to schedule the report without immediately running it.
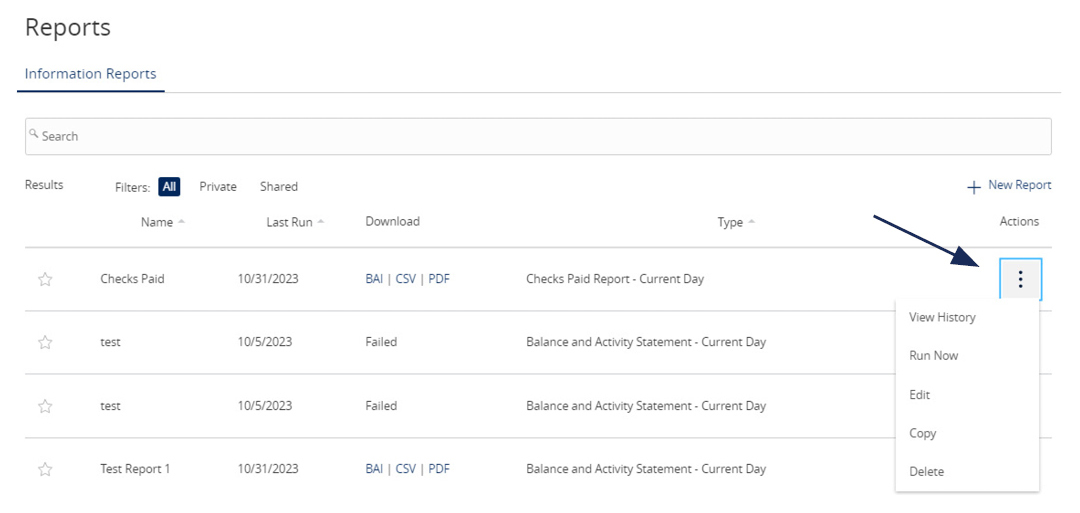
9. The report will display as either 'Queued' or 'In Progress' while it is being generated, depending on how many reports are currently being generated.
10. Click the 'Actions' option to View History, Run On-Demand, Edit, Copy, or Delete the specific report.
One Time Commercial Payments Guide
1. Select the 'Transfers & Payments' menu and then select 'Commercial Payments'.
2. Select 'New Payment' and then select the desired Payment Type.
3. Select 'Upload from File'.
4. Select the 'Import File' box to browse and select the file to be uploaded on the computer.
5. Select 'Save Recipients' to automatically add the recipients into the master recipient list. A confirmation will pop up on the screen once the file has been uploaded successfully.
NOTE: Select 'Upload File' if the ACH or wire file will need to be processed.
NOTE: If there is a problem with the file being imported, an overlay message will appear on the screen with a notification.
Potential examples may include:
Recipient Upload from Batch Guide
1. Select the 'Transfers & Payments' menu and then select 'Commercial Payments'.
2. Select 'New Payment' and then select the desired Payment Type.
3. Select 'Upload from File'.
4. Select the 'Import File' box to browse and select the file to be uploaded on the computer.
5. Select 'Save Recipients' to automatically add the recipients into the master recipient list. A confirmation will pop up on the screen once the file has been uploaded successfully.
NOTE: Select 'Upload File' if the ACH or wire file will need to be processed.
NOTE: If there is a problem with the file being imported, an overlay message will appear on the screen with a notification.
Potential examples may include:
User Management Corporate Guide
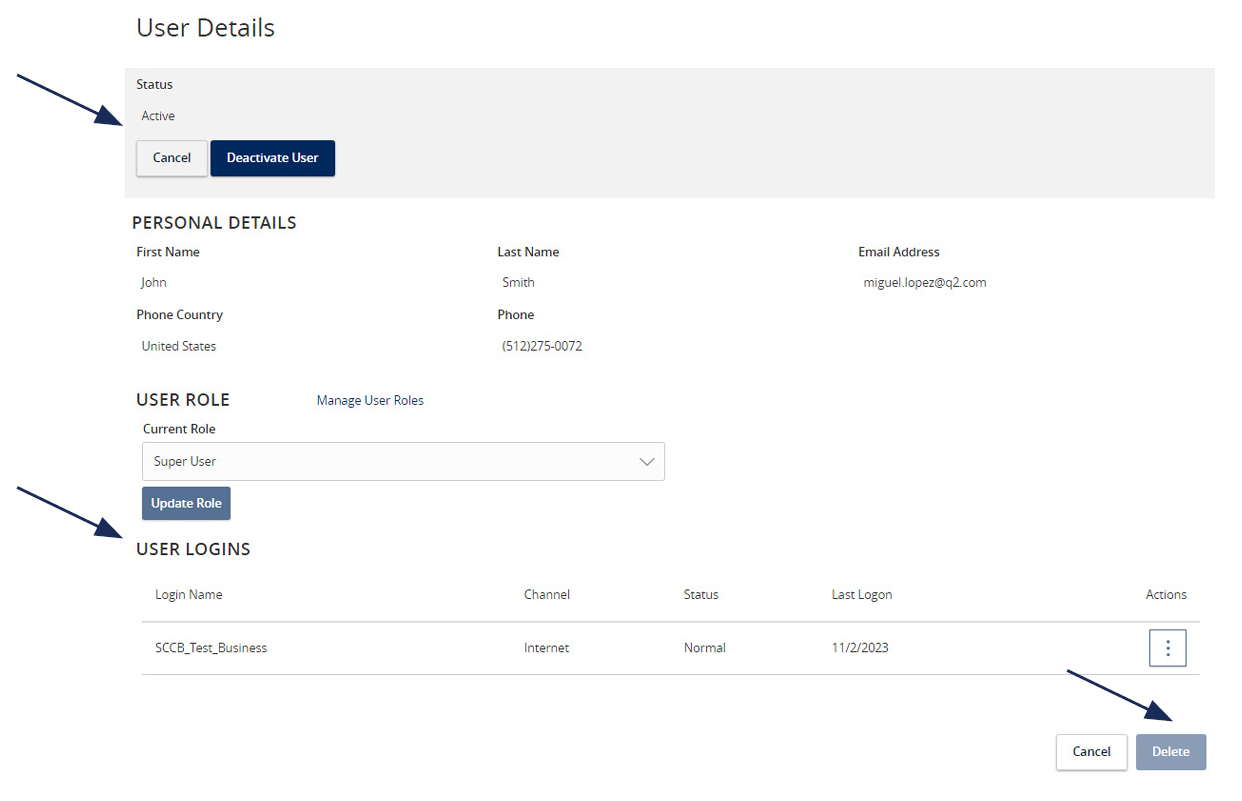
Managing Existing Online Users
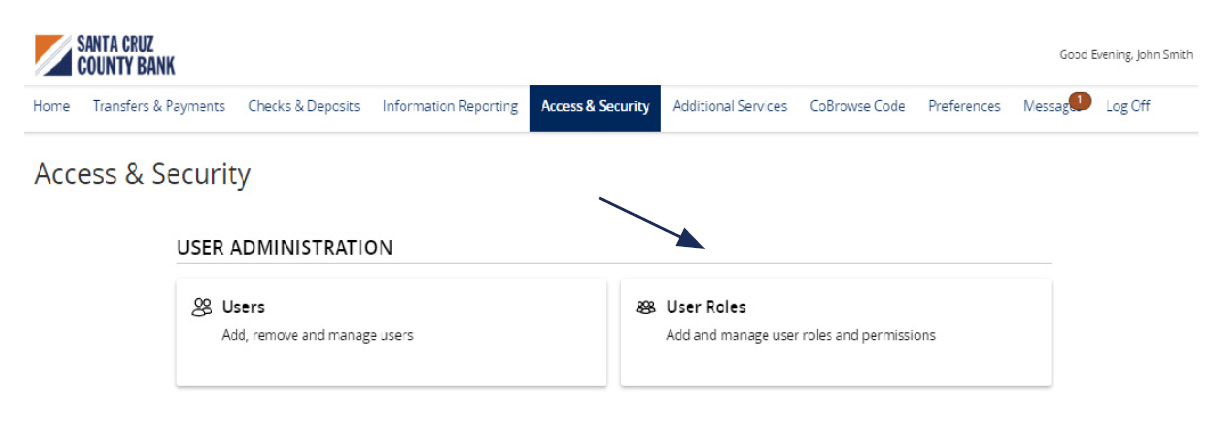
1. Select 'Access & Security' menu and then select 'Users'
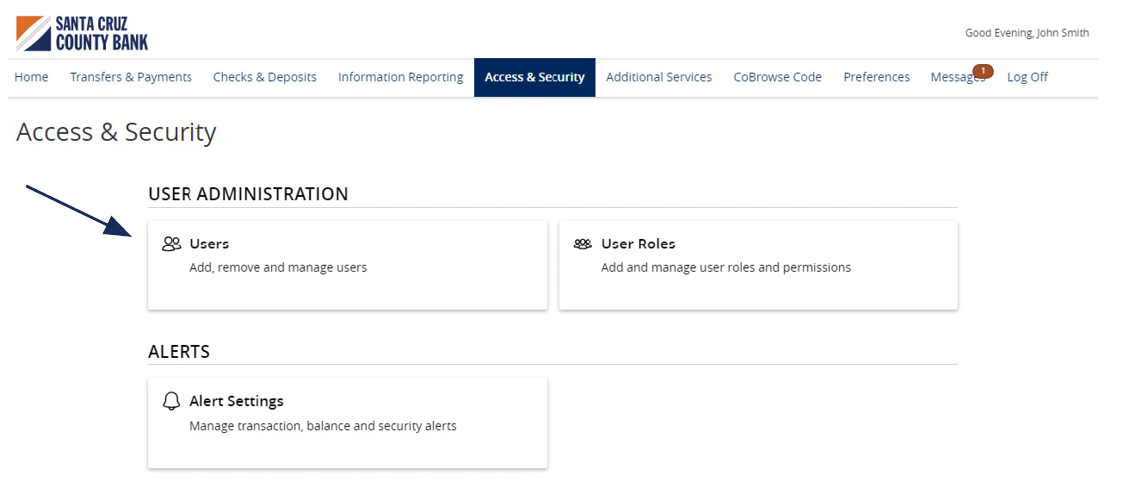
2. Click on the pencil icon next to the user you wish to edit.
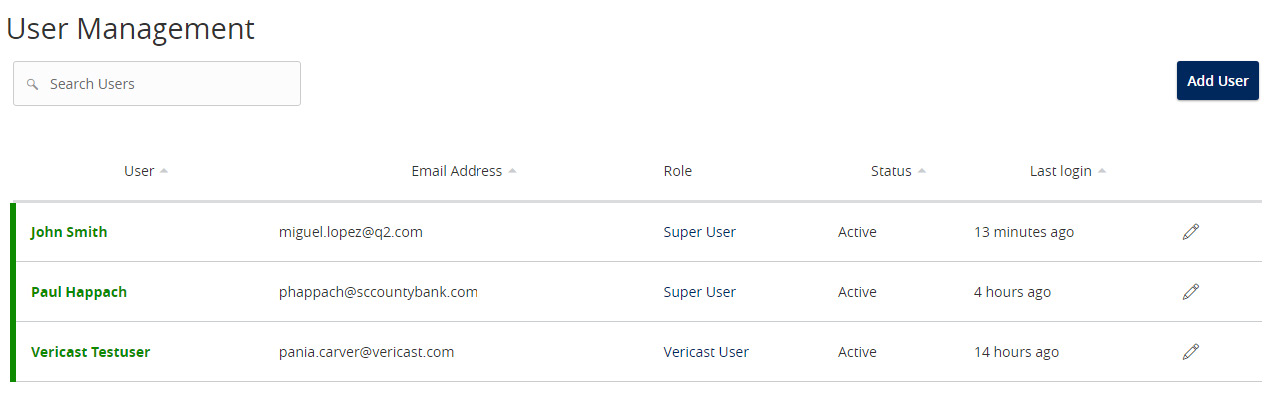
3. One of three update actions may be made to an existing user:
NOTE: The User Role update will go into effect upon the user's subsequent log on after the change has been made.
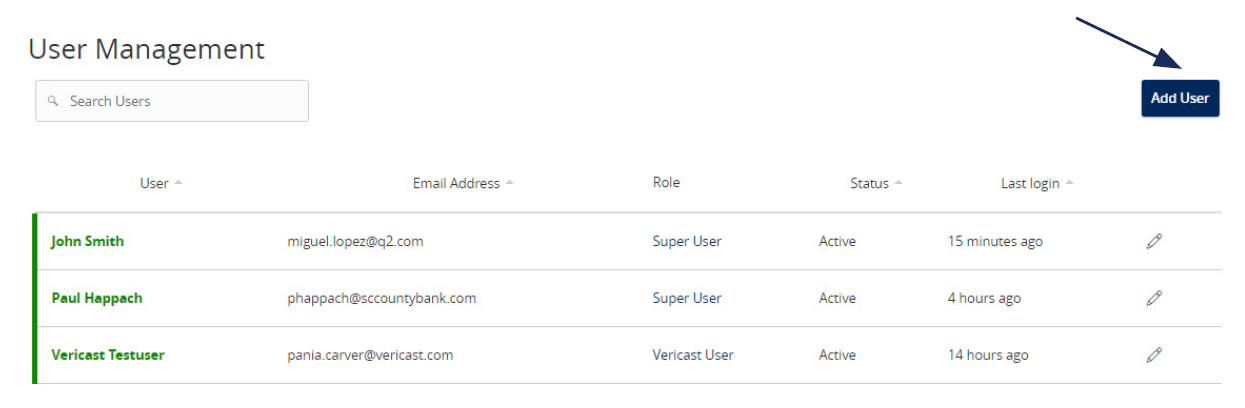
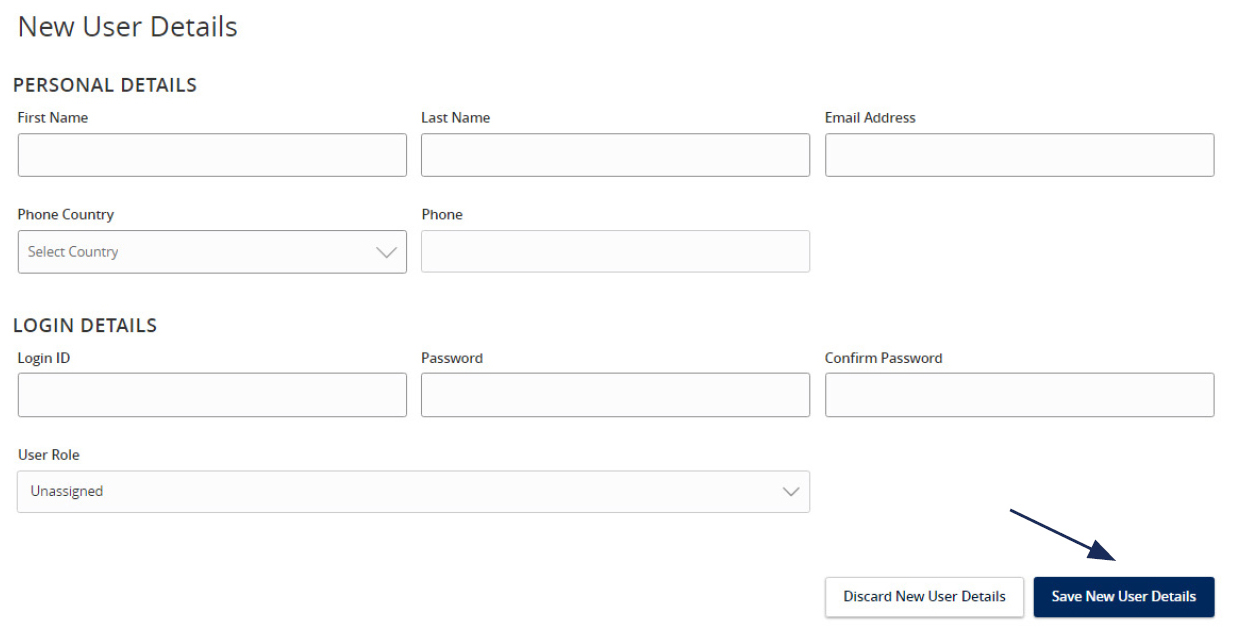
Creating New Online Users
1. Click the 'Add User' button.
2. Complete all fields.
3. Click the 'Save New User Detail' button when done.
NOTE: Reference the User Roles setup guide for assistance with setting up a 'User Role'.
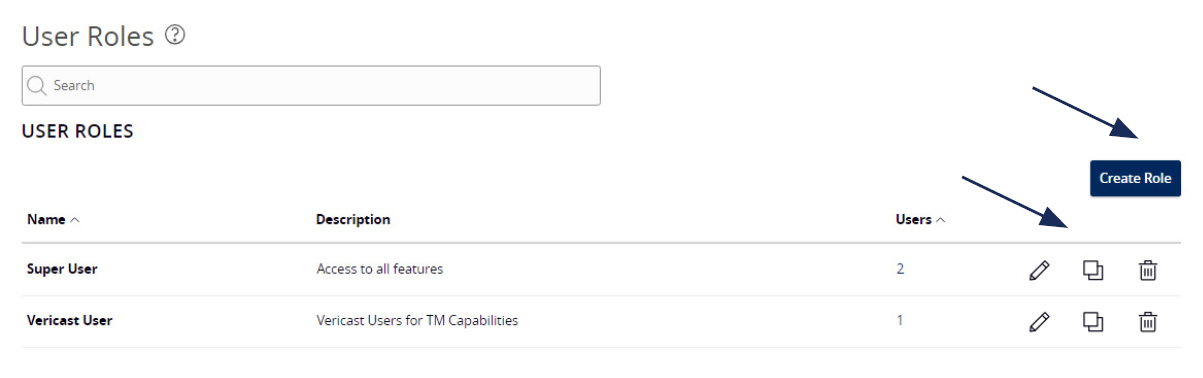
User Roles Guide
NOTE: User Roles are created to control feature entitlements and dollar limits for one or more company users.
1. Select the 'Access & Security' menu, then select 'Users Roles'.
2. Click on 'Create Role' to create a new user role.
NOTE: Three actions can be performed on an existing User Role.
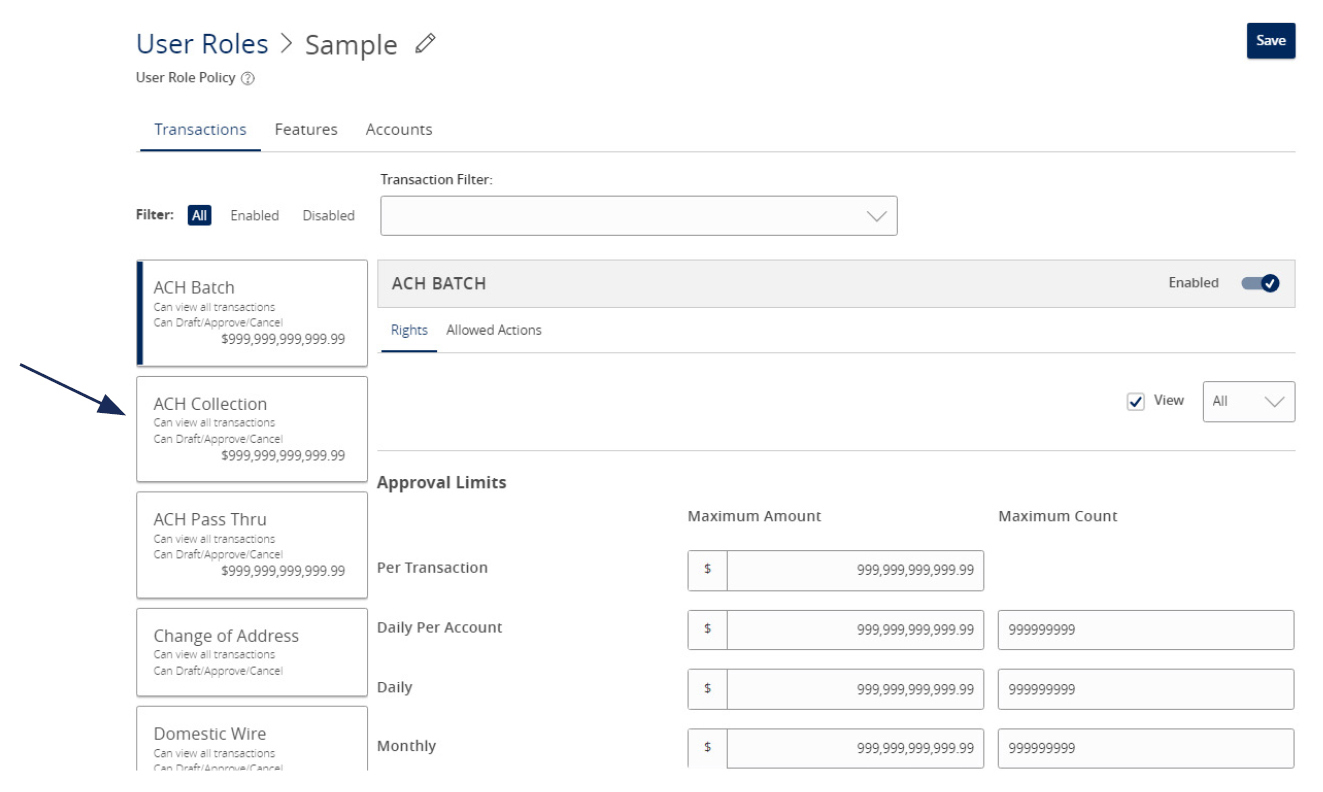
3. Select a transaction type that you would like to set parameters around by clicking on the transaction name.
4. Now select 'Allowed Actions'.
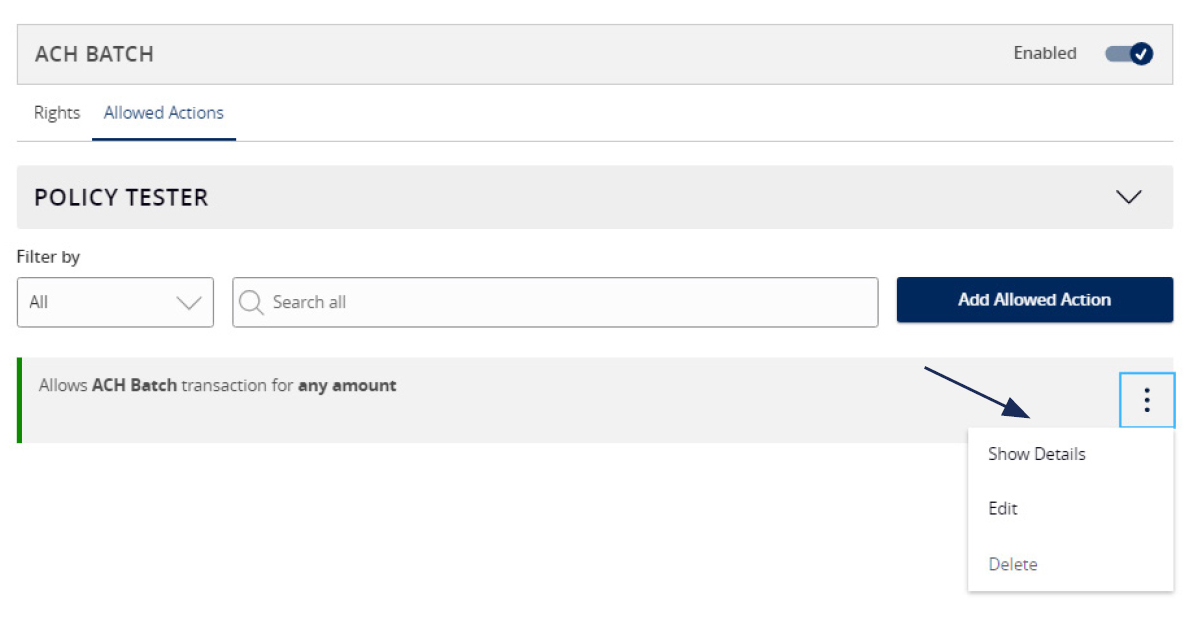
Allowed Actions
NOTE: One or multiple levels may be set up to establish general or specific user limitations.
5. To specify the allowed operation(s) for the selected transaction type, click the vertical dot icon and select 'Edit'.
Operations

Amount
7. Select the 'Any allowable amount' option or 'Specific Amount' to enter the amount for the allowed action.

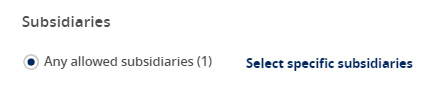
Subsidiaries
8. Select the 'Any allowed subsidiaries' option or choose 'Select specific subsidiaries' to view the subsidiary or subsidiaries allowed for this transaction type. This step applies only to organizations with more than one Tax ID number.
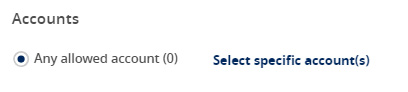
Accounts
9. Select the 'Any allowed accounts' option or choose 'Select specific accounts' to specify the account(s) allowed for this transaction type.
Draft Hours
10. The 'Draft Hours' option allows you to restrict hours and days of the week when transactions can be drafted.
11. Select 'Submit'.

Rights
12. On the Rights tab, select the appropriate right for the user role's ability to view transactions in the 'Activity Center'.
All: View transactions initiated by any user within the company
Role: View transactions initiated by users with the same role
Account: View online activity of accounts the user has access to
Own: View only your own transactions
None: Cannot view transactions
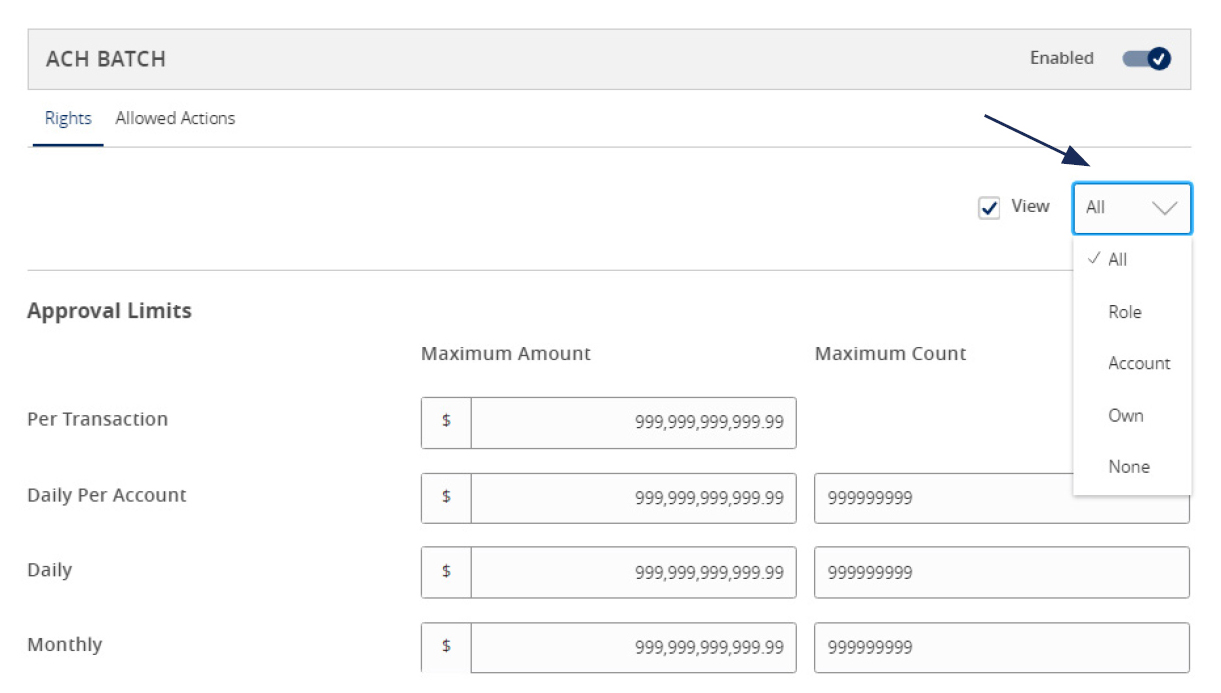
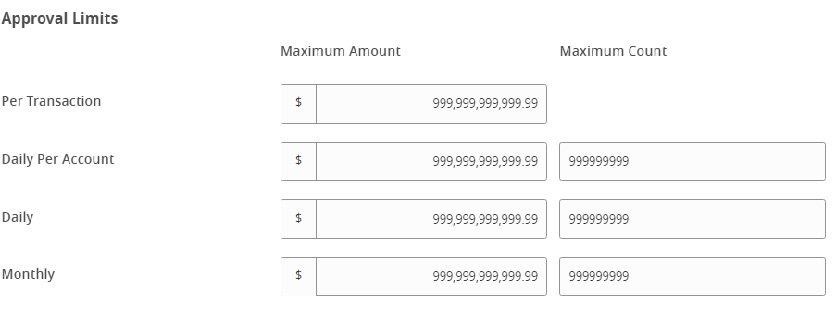
Approval Limits
13. Select the 'Approval Limits' tab to view and modify the dollar and count limits assigned by Boston Private.
14. Repeat the previous steps for each transaction type.
Features
15. Select the 'Features' tab to view and modify the non-transactional features. Select features you wish to enable or disable.
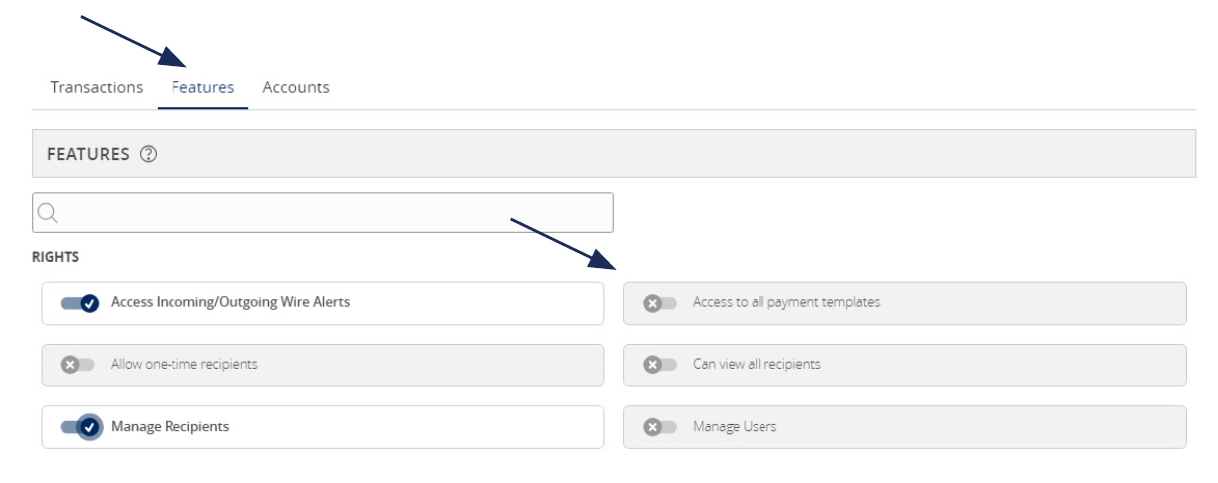
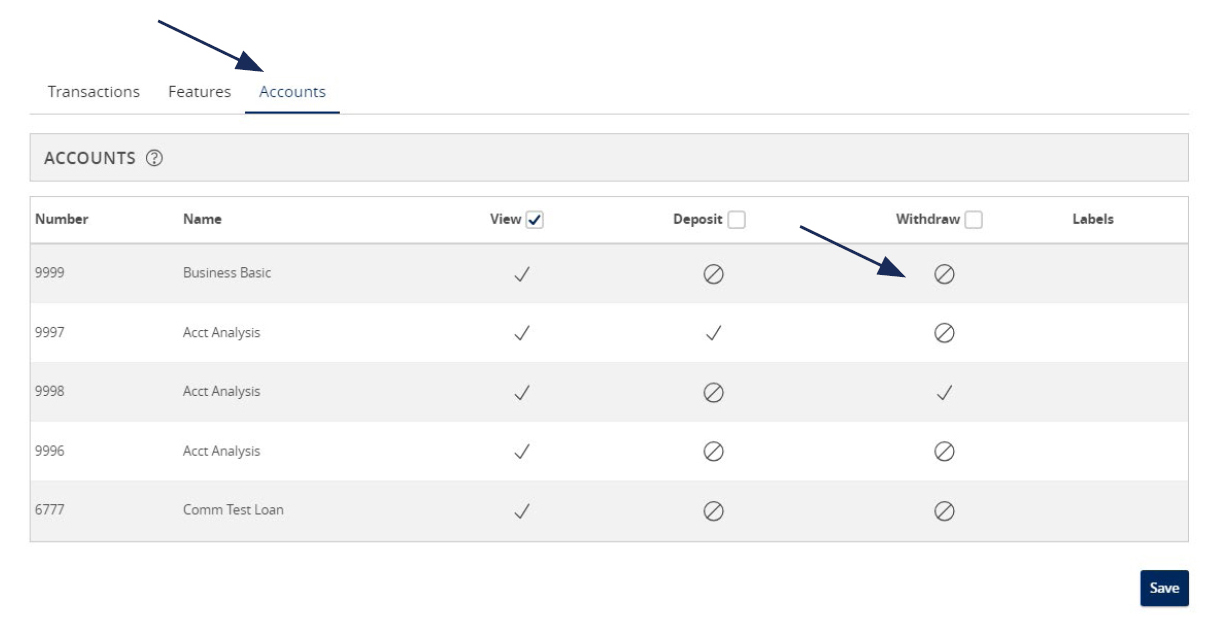
Accounts
16. Select the 'Accounts' tab to view and modify the account entitlements by selecting the checkmark or circle with a slash under 'View', 'Deposit' or 'Withdraw'.
17. Save the User Role by selecting the 'Save' button.
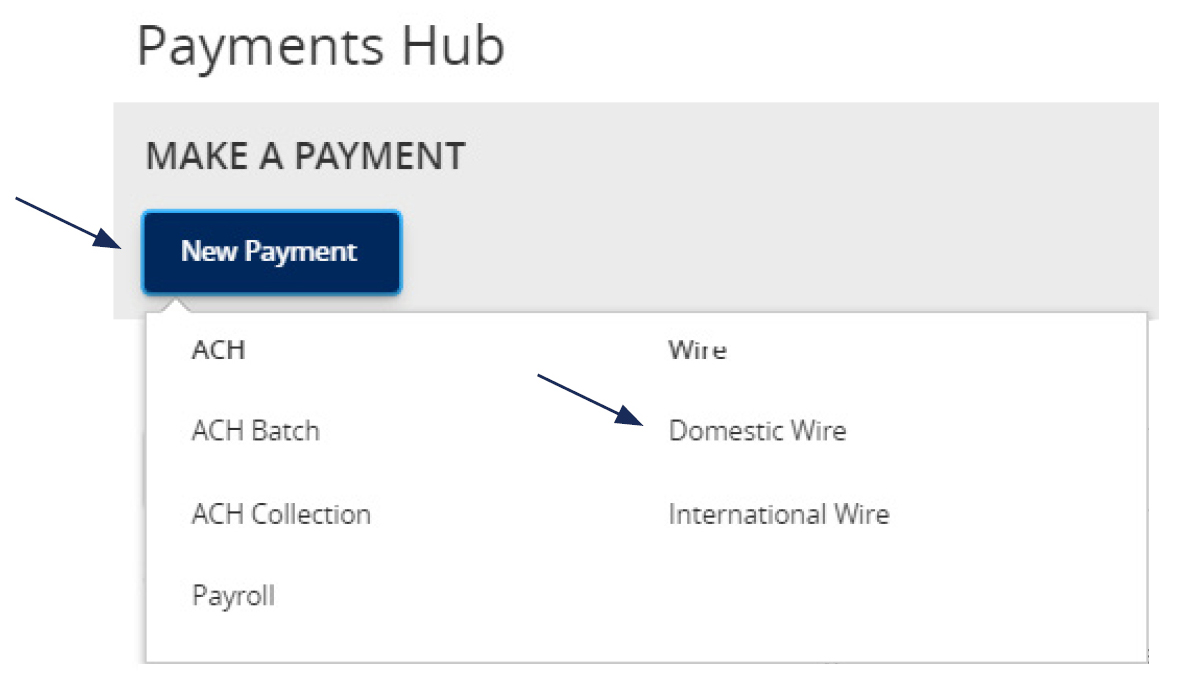
Wire Origination Guide
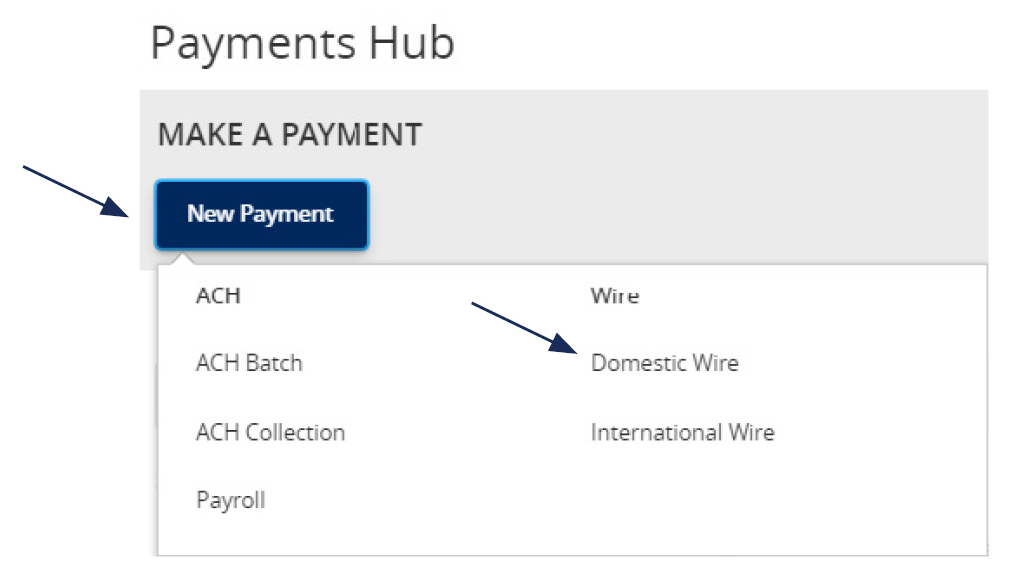
1. Select the 'Business Banking' menu, then select 'Commercial Payments'.

2. Select 'New Payment' and then 'Domestic Wire' from the dropdown menu.
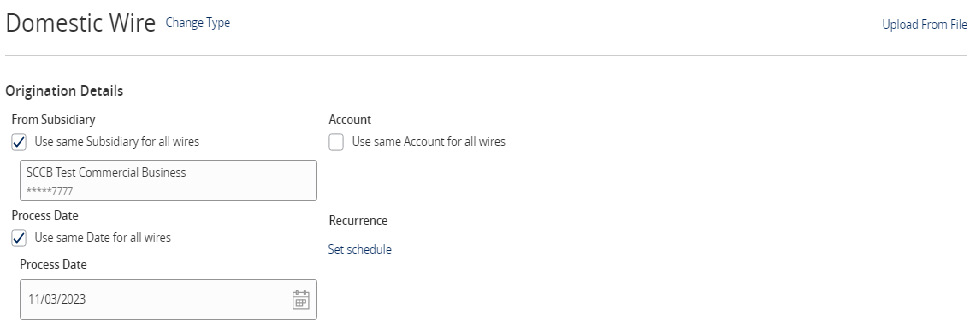
3. Select the checkbox next to 'Use same Subsidiary for all wires' if all wires should contain the same subsidiary. Or leave the checkbox empty to specify the subsidiary individually.
4. Select the checkbox next to 'Use same Account for all wires' if all wires should contain the same Account. Or leave the checkbox empty to specify the subsidiary individually.
5. Select the checkbox next to 'Use same Date for all wires' and enter a date if all wires will be processed on the same date. Or leave the checkbox empty to specify each date individually.

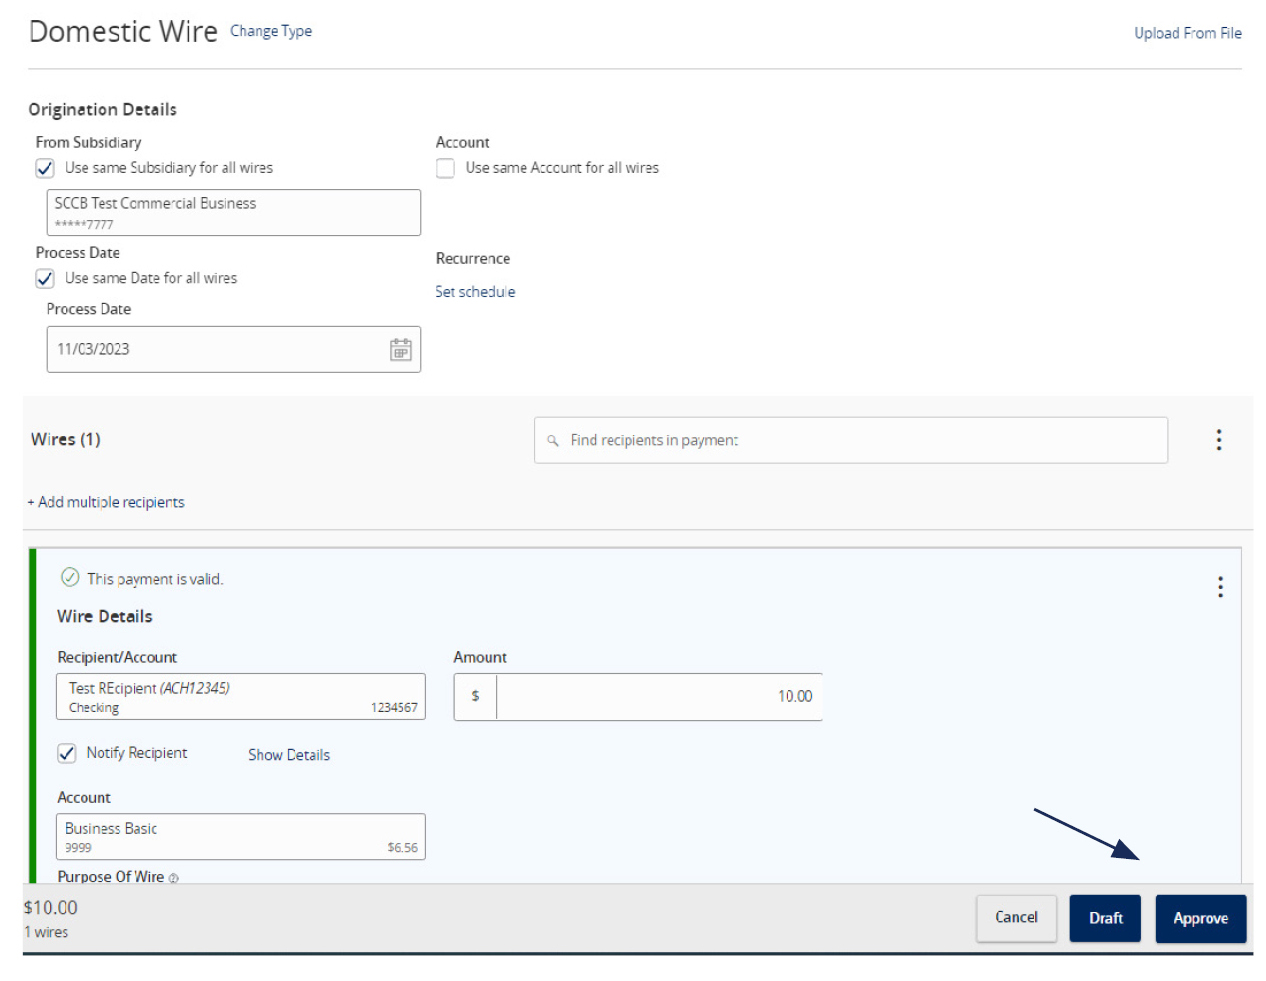
6. Select the 'Add multiple recipients' link to setup multiple wires to existing recipients.

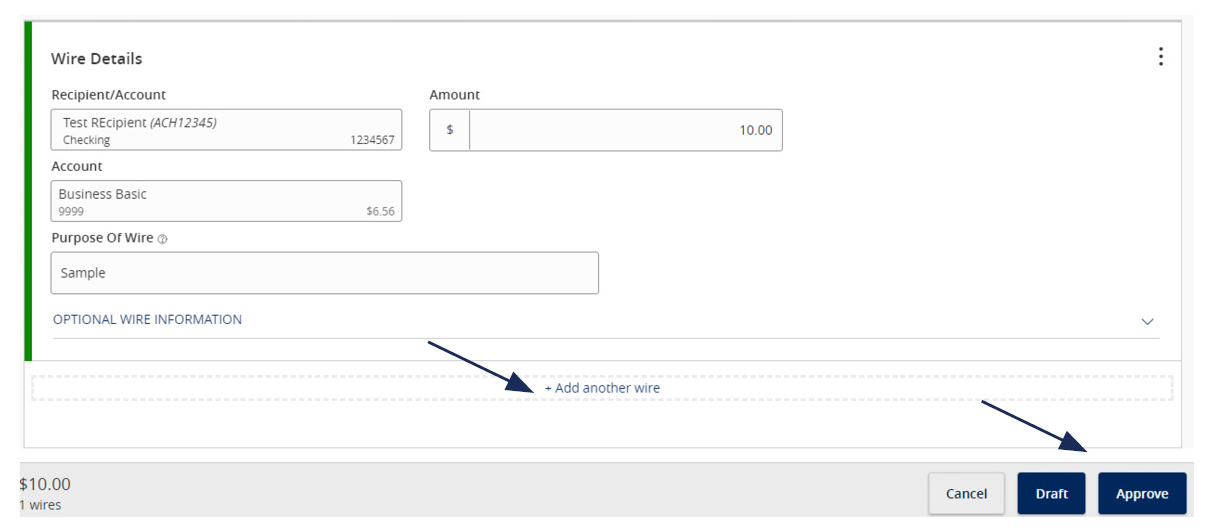
7. Select the 'Add another wire' link to add just a single wire to the page.
8. Enter the 'Recipient/Account', 'Amount', 'From Subsidiary' and 'Account' fields.
9. Review all information for accuracy. Then select 'Draft' or 'Approve' to complete the process.
Wire Upload Guide
NOTE: Wire Upload allows you to upload a formatted CSV file that includes multiple wire transfers instead of inputting the wire information manually.
1. Select the 'Transfers & Payments' menu and then select 'Commercial Payments'.
2. Select 'New Payment' and then 'Domestic Wire'.
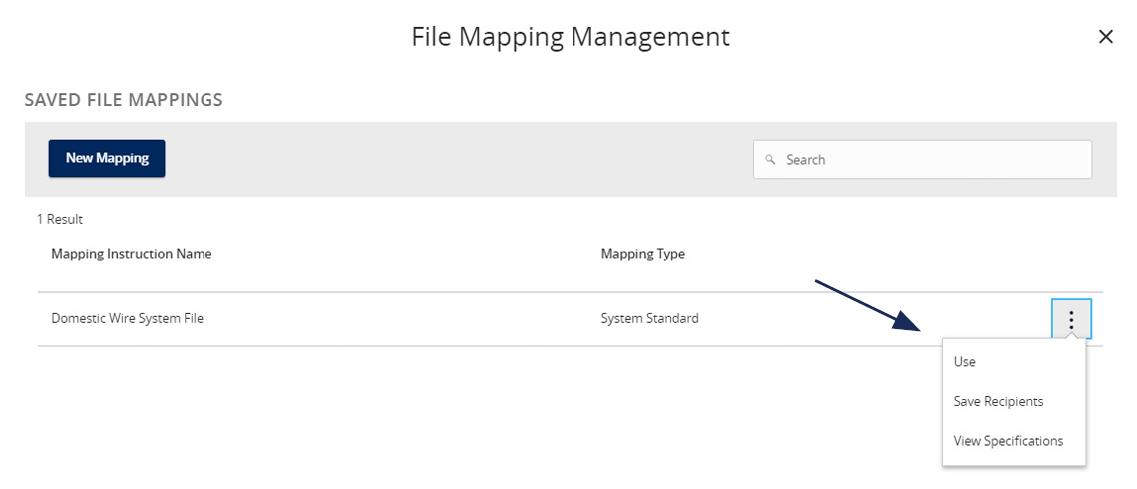
3. Select the 'Upload from File' link in the top right corner.

4. Select the 'Use' option to upload a CSV formatted file.
5. Click the 'Please select a file to import' box to browse for the file to be uploaded on the computer.
6. Select 'Upload File'.
7. Indicate the Process Date for the wires.
NOTE: The fields for each wire will be populated in accordance with the data included in the CSV file being imported.
Review all information on the screen for accuracy and select 'Approve' or 'Draft' in accordance with user entitlements.
Account Labeling Guide
NOTE: Account Labeling allows you to group accounts for easy identification. Only User Administrators will have access to this function.
1. On the homepage, select the 'Options' icon, next to each group name you would like to edit.

2. Select 'Edit Group Name' to start labeling your account groups.
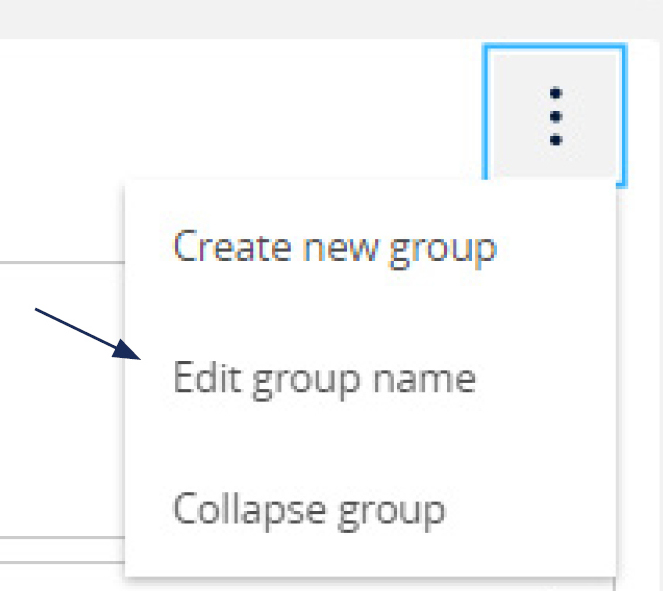
3. Then select the 'Checkmark' to save your changes.

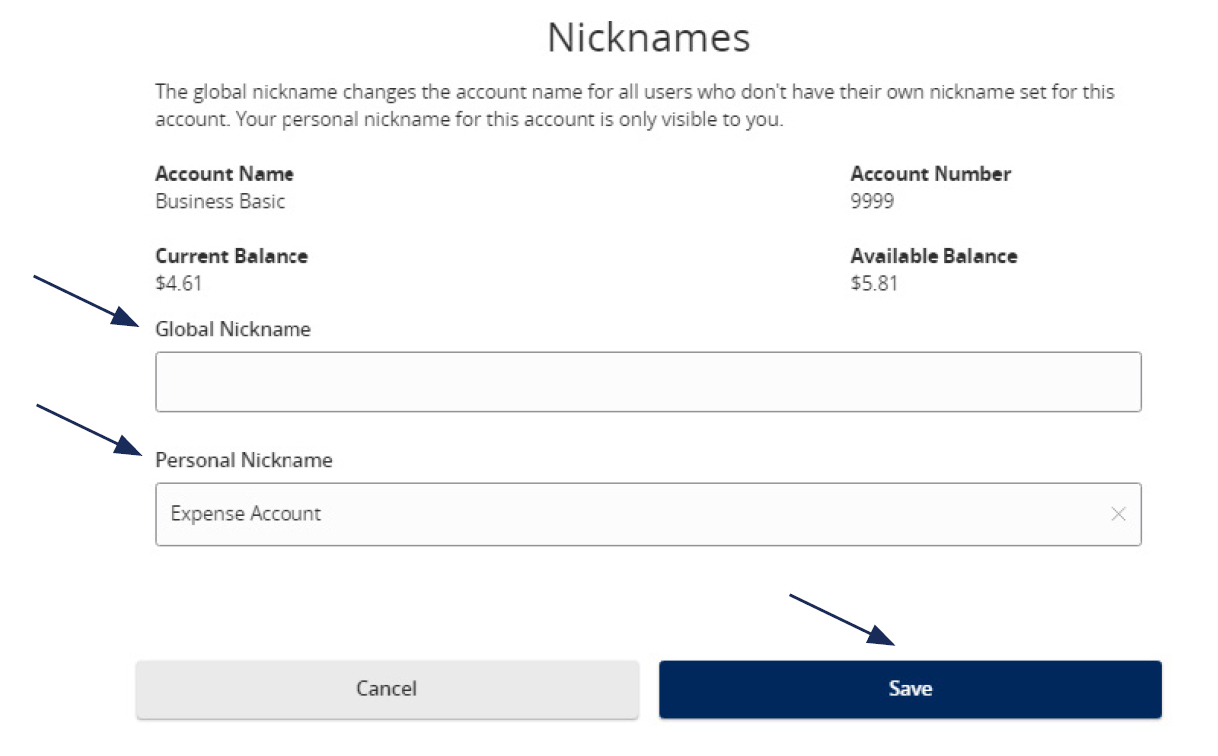
4. Select the 'Options' icon next to each account then select 'Nickname Account' to change its name.

5. You can provide a 'Global Nickname' or change the current "Personal Nickname".
6. Click 'Save' when done.
NOTE: The global nickname changes the account name for all users who do not have their own nickname set for this account. Your personal nickname for this account is only visible to you.
Initial Access to the System
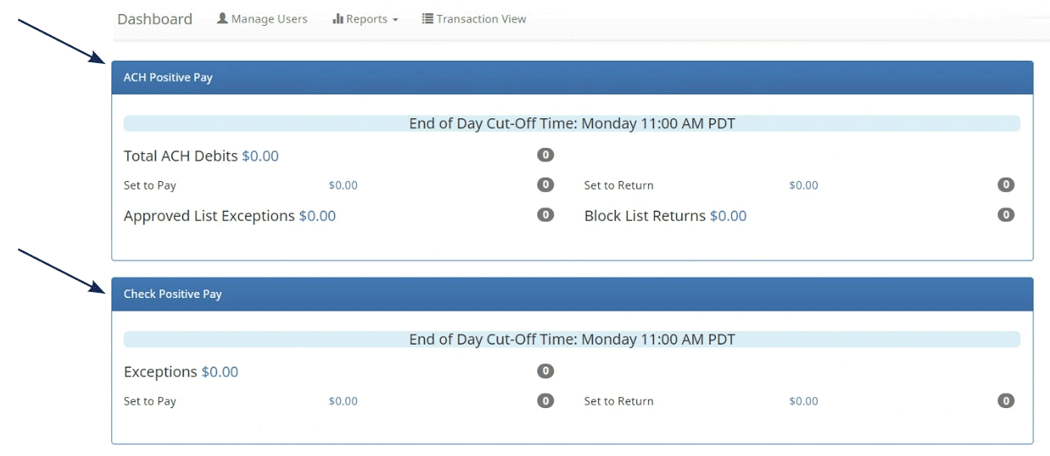
ACH and Check Positive Pay Guide
Initial Access to the System
NOTE:
The daily cutoff time for processing exceptions is 11 am.
Processing Exceptions and Viewing Activity
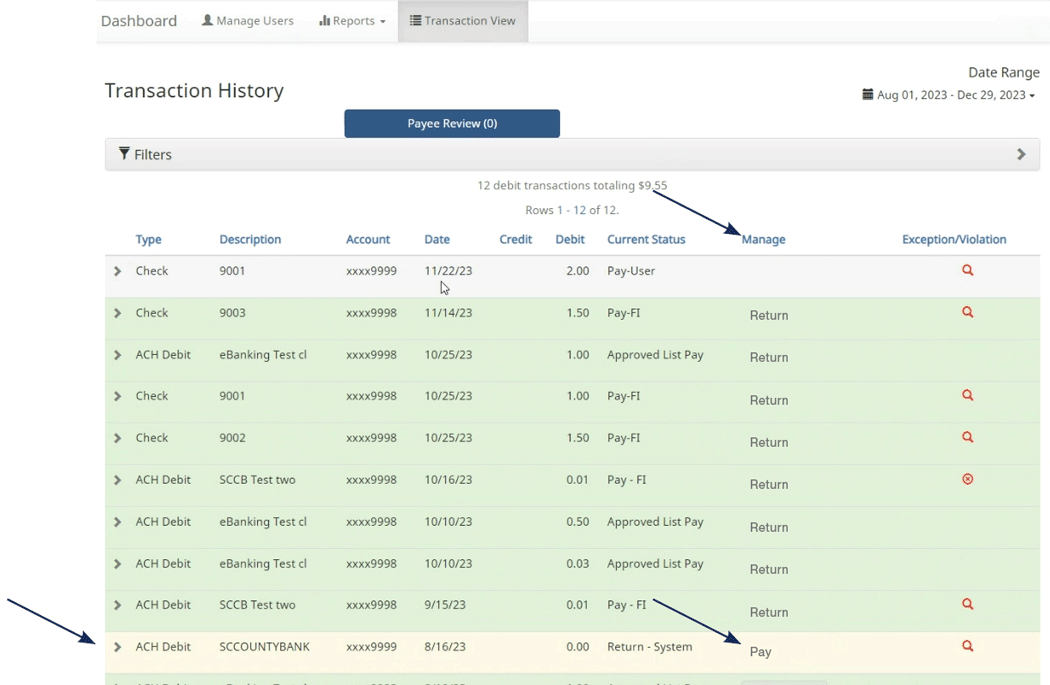


To change the return reason for a check, select the drop-down arrow on the left hand side, and then select the hyperlink under 'Return Reason'. Next, select the appropriate 'Return Reason'.
Common 'Check Exception' return reasons are:


ACH Exceptions
ACH Exceptions occur when an item does not meet the rules requirements.
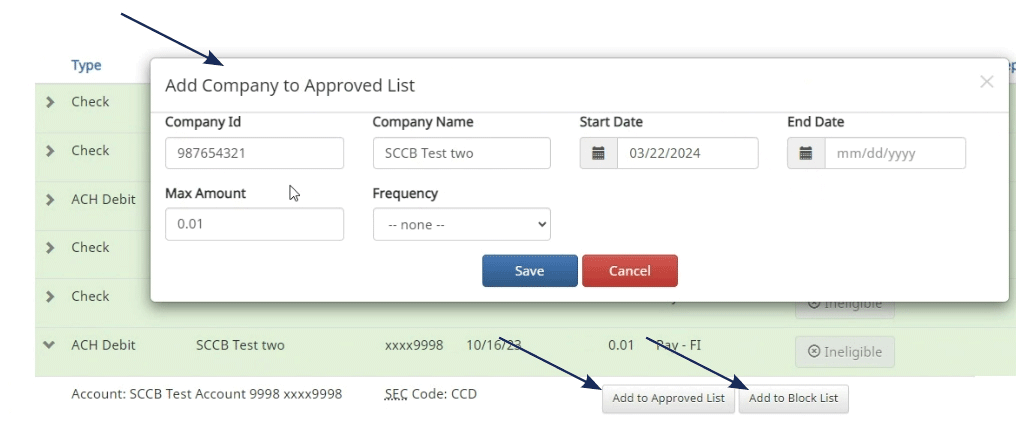
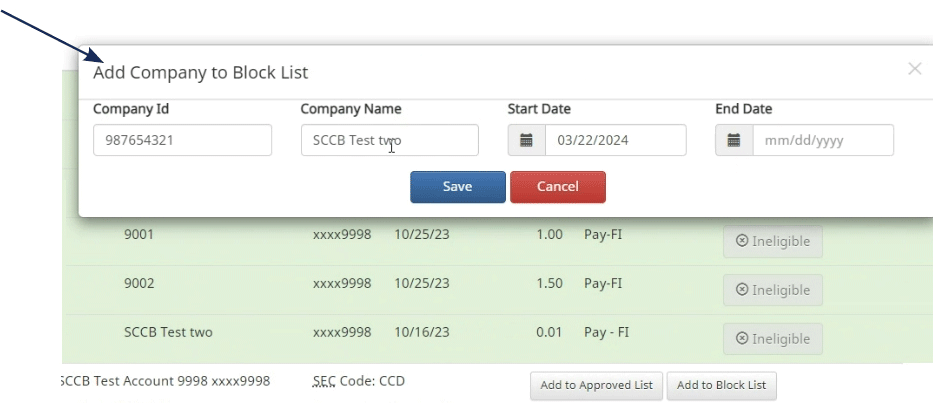
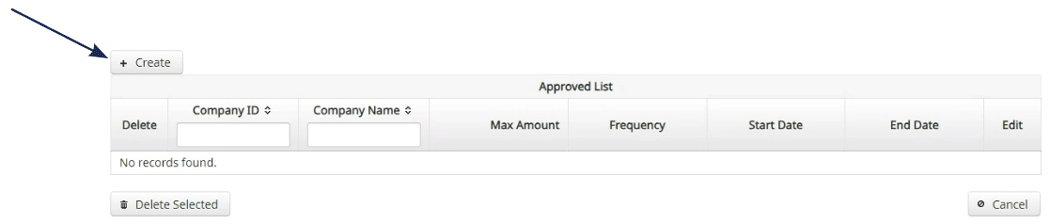
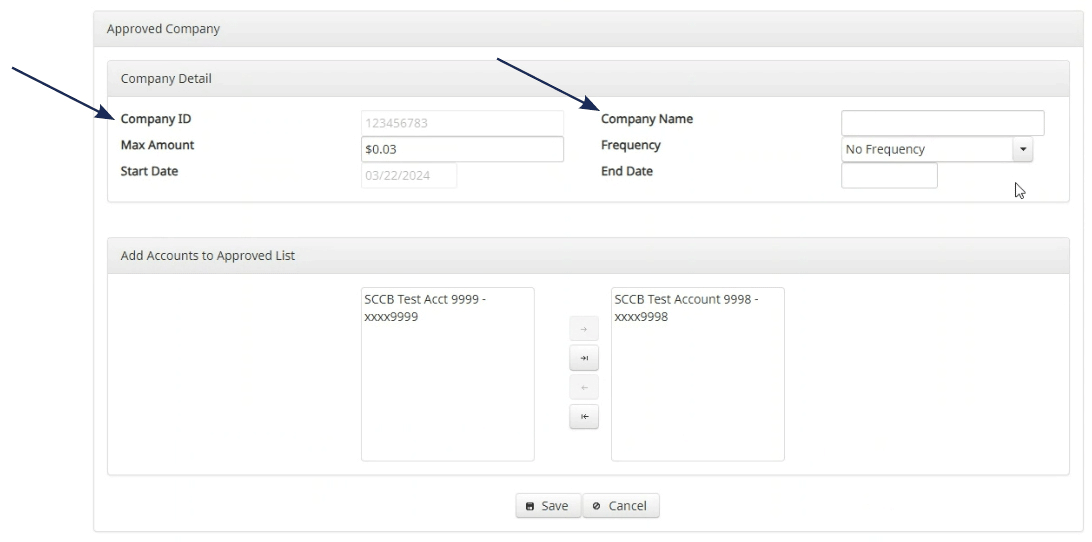
Steps for adding an approved list vendor are:
NOTE:
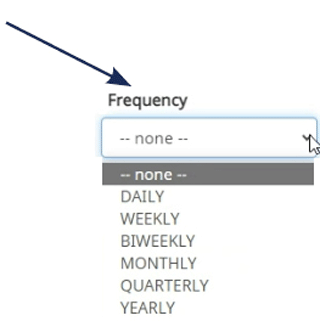
For instance, payroll would make one payment weekly,
if set to weekly. Use this with caution.
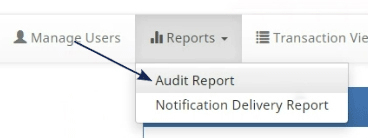
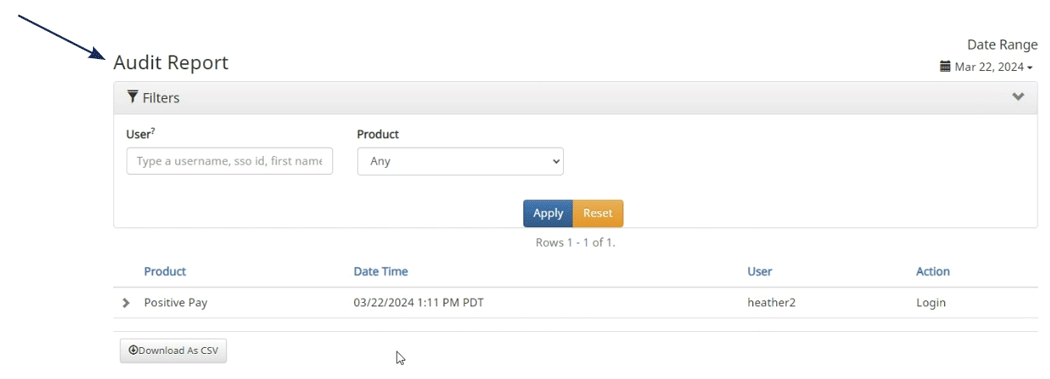
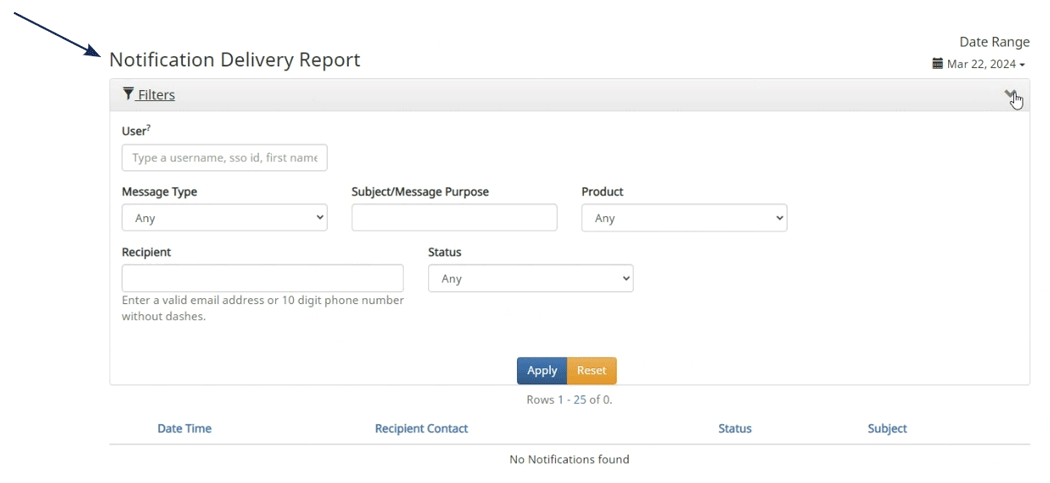
Reports
Manage Users
To use the 'Manage Users' feature please contact eBanking for assistance, eBanking@sccountybank.com, 831.600.4060.
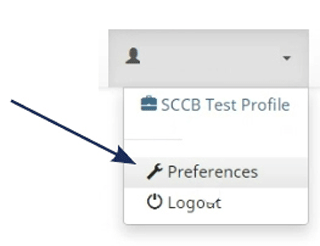
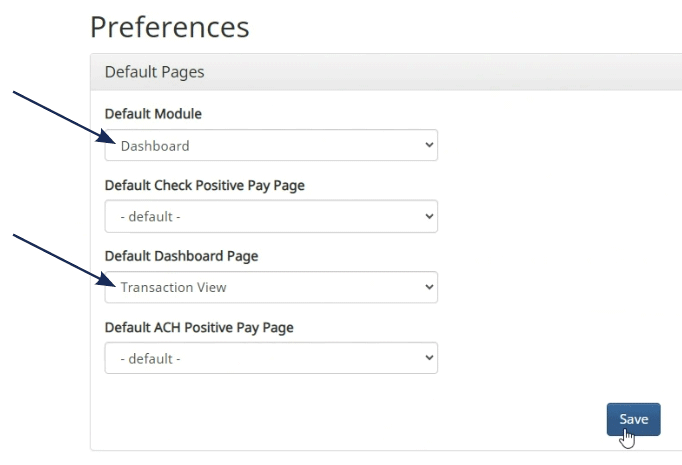
User Preferences
This section is used to customize a user's preferences in the system.
Hint:
To seamlessly navigate to the exception processing
screen when accessing the system do the following:
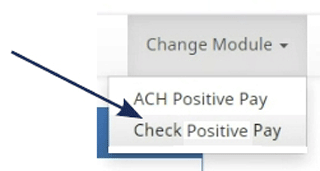
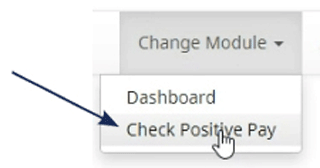
Modules
There is a specific module for 'ACH' and for 'Check Positive Pay'.
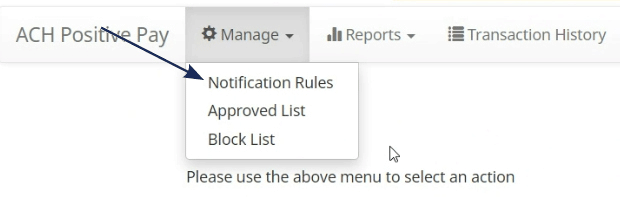
Change Module > ACH Positive Pay Manage > Notification Rules
NOTE:
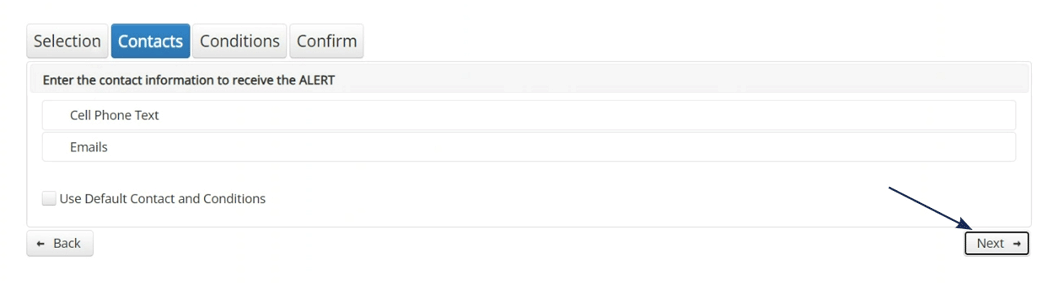
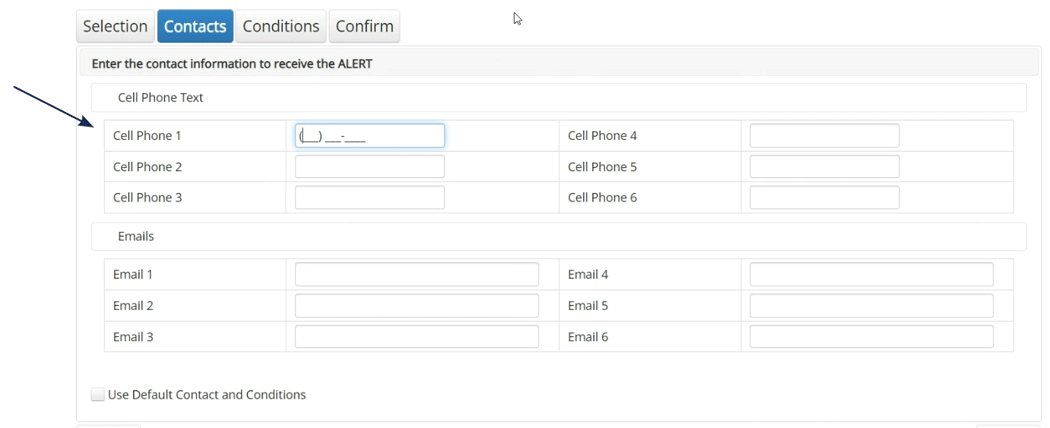
The tabs – Selection, Contacts, Conditions, Confirm
– are not clickable. Use the 'Next' button to navigate
through the screens.
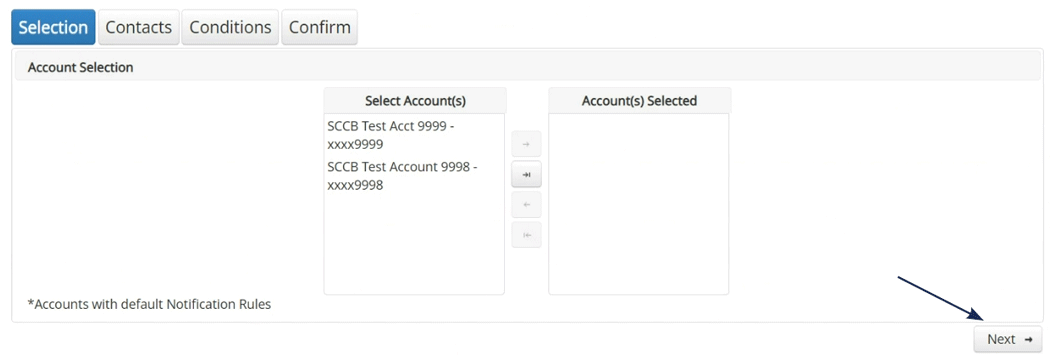
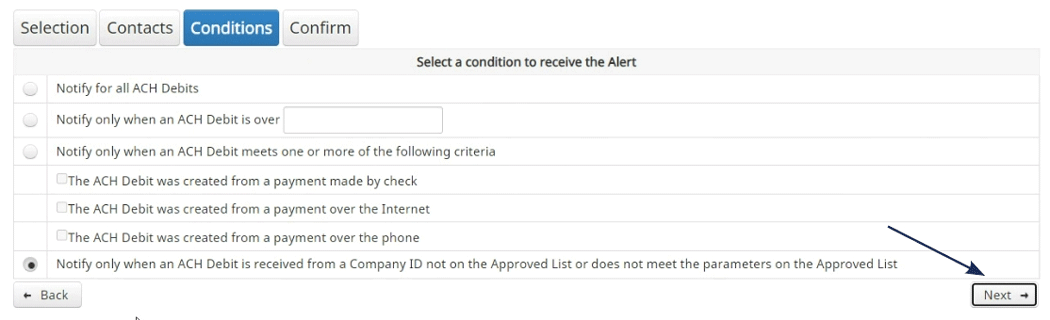
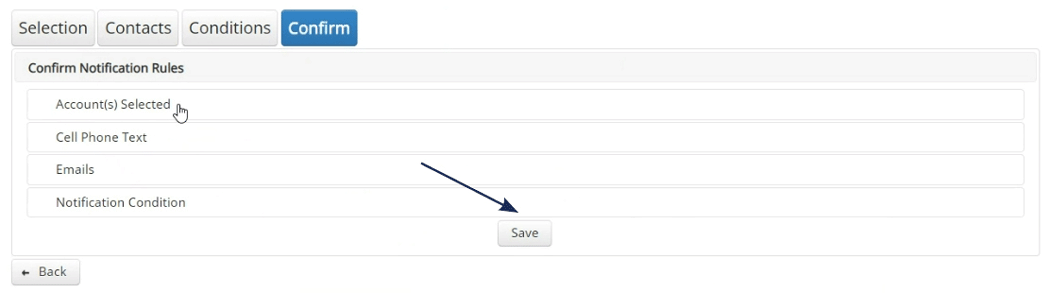
Notification Rules
This is used to setup users to be notified of exceptions.
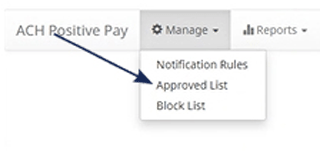
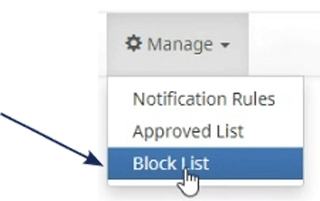
Manage > Approved List

Manage > Block List

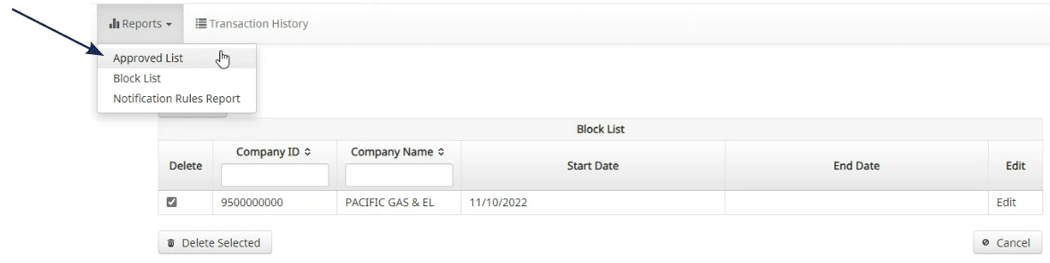
Reports
Reports available for the 'Approved List', 'Blocked List',
and notifications can be accessed through menu option
noted on the right.
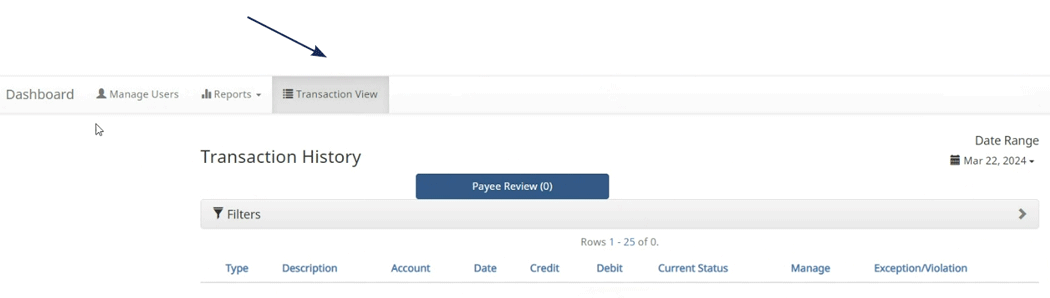
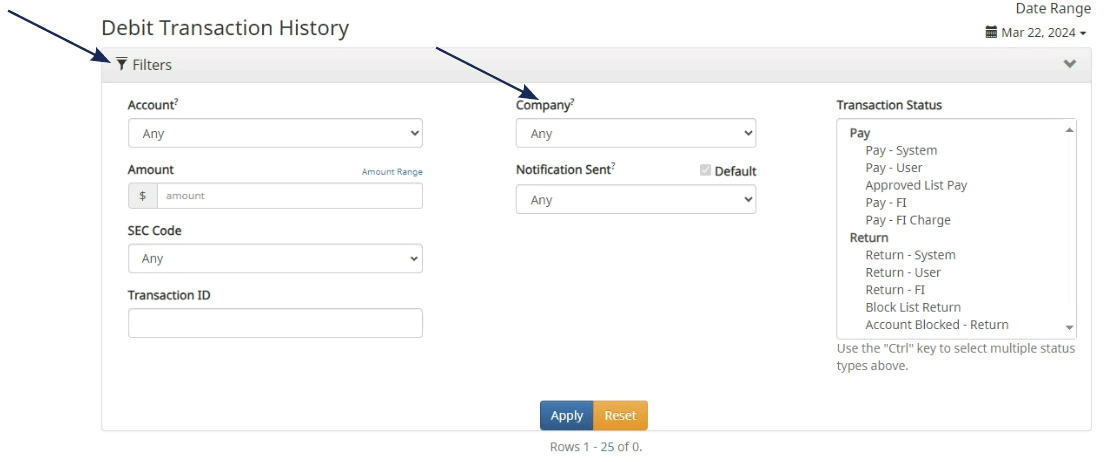
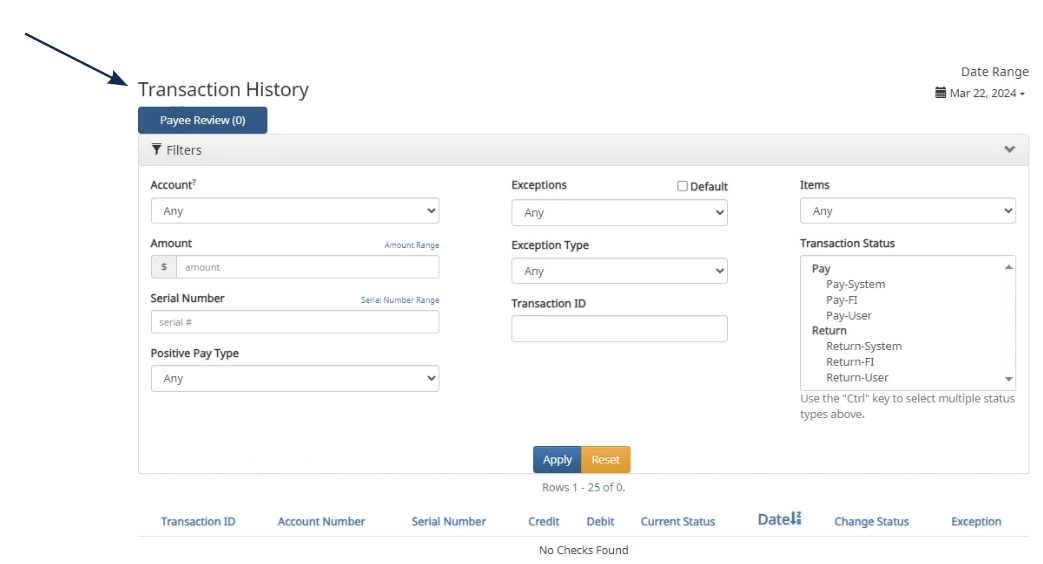
Transaction History
Use the available filters to view 'Debit Transaction' history.
Change Module > Check Positive Pay Manage > Issue Templates
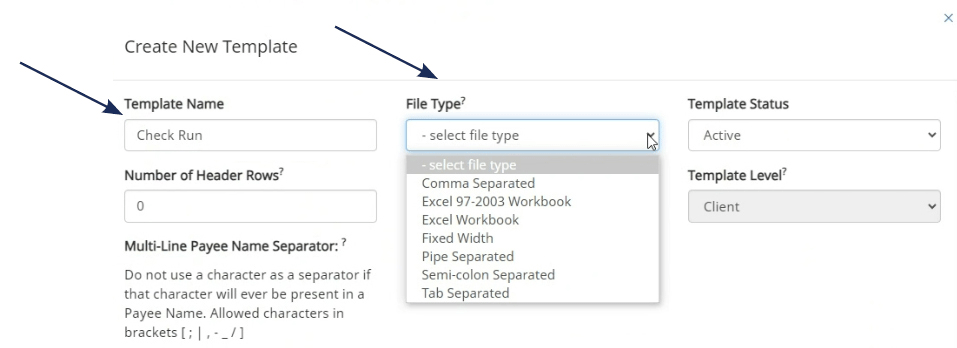
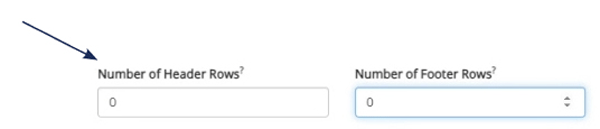
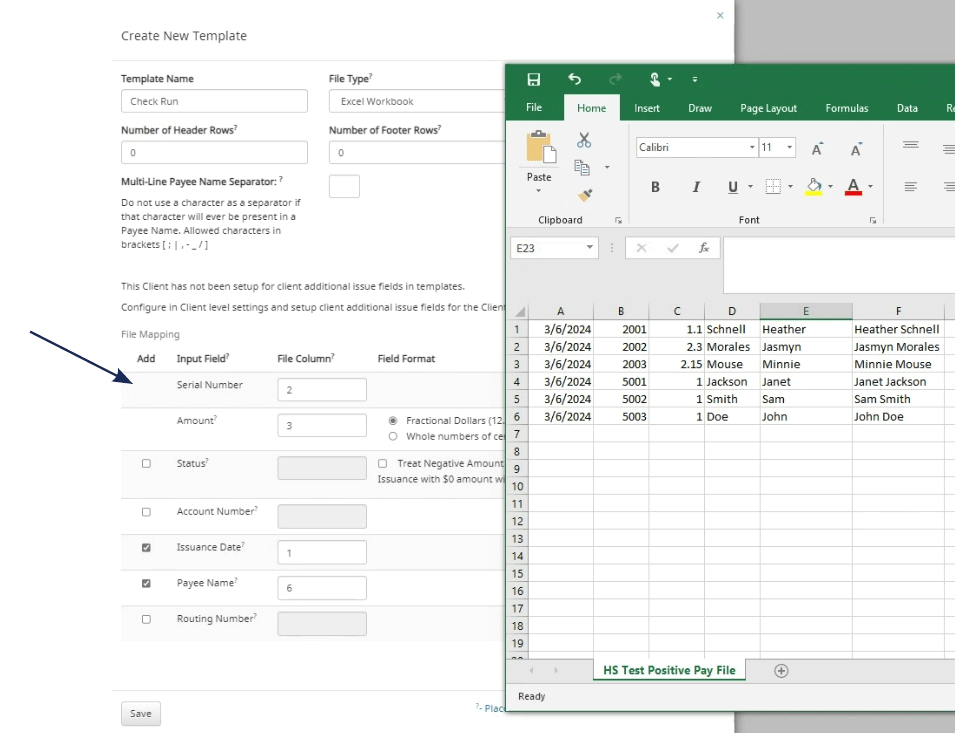
Issue Templates
Use this page to create templates corresponding to the
format of your issue file.
NOTE:
Hover over question marks for additional information.


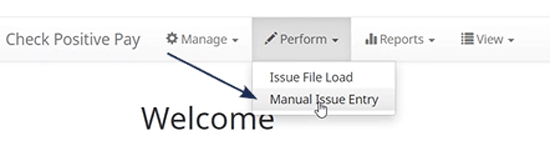
Perform
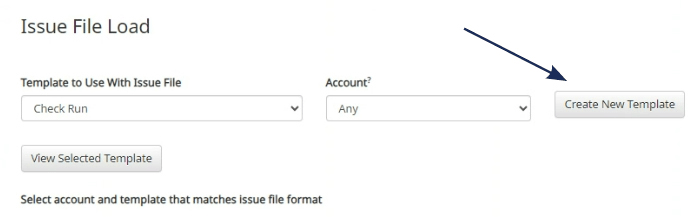
Issue File Load
Use this feature to upload an issue file.
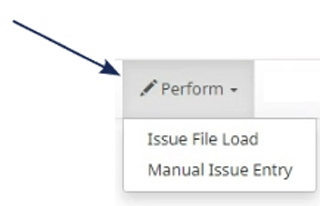
NOTE:
There is an option to click "Create new Template" to create a new template here.

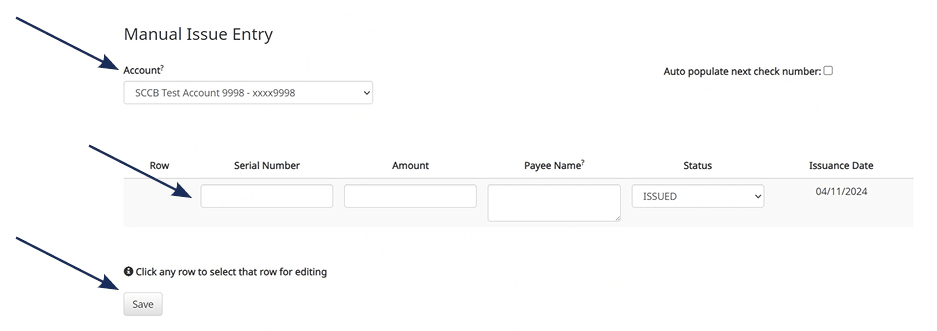
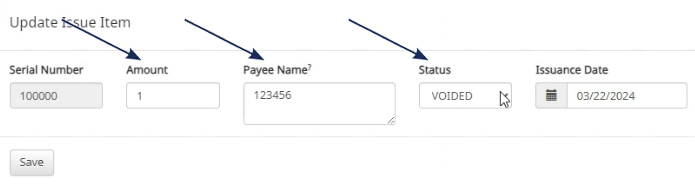
Manual Issue Entry
Reports
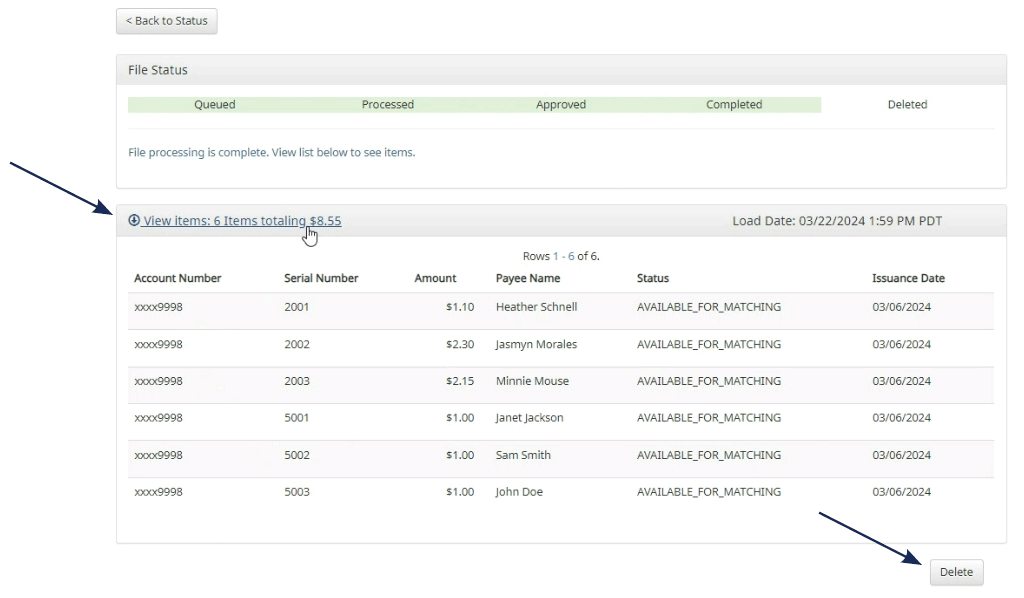
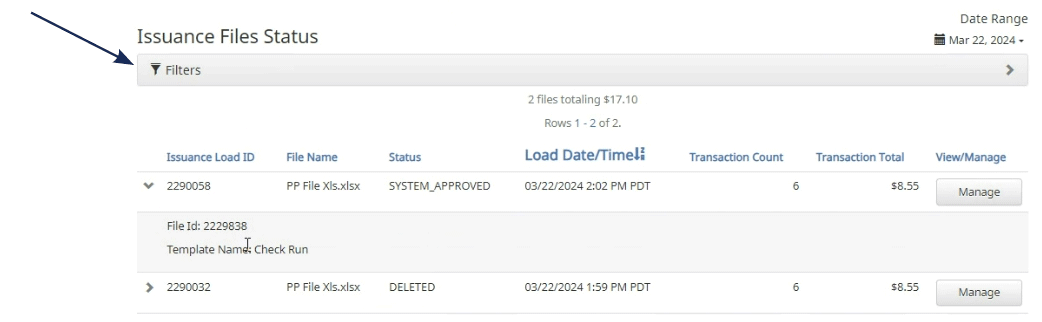
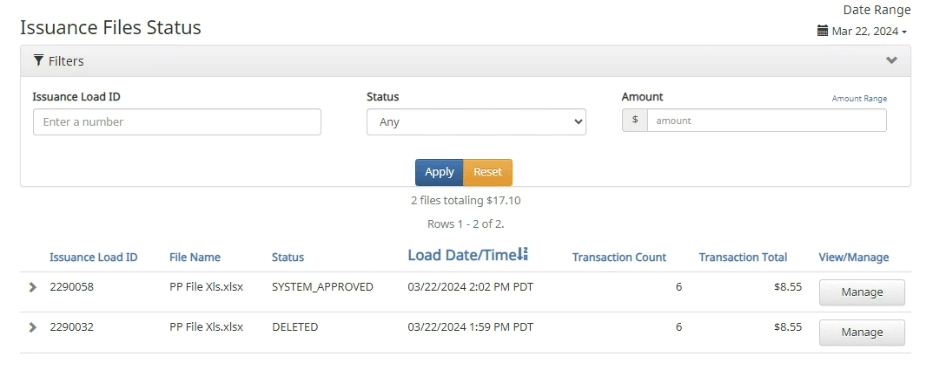
Issue Item Status
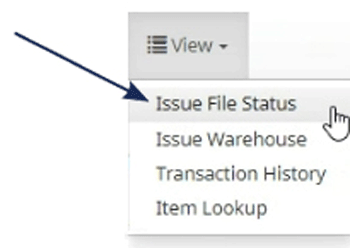
View
Issue Item Status
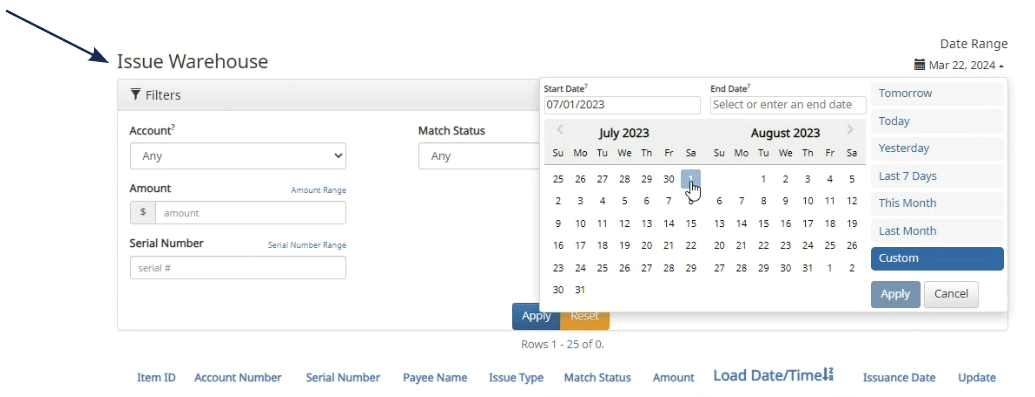
Issue Warehouse

Transaction History
Item Lookup

User Setup and Template Guide
The User Setup page is used by the company administrator to manage users.
1. Select the 'Check & Deposits' menu and then 'Positive Pay'.

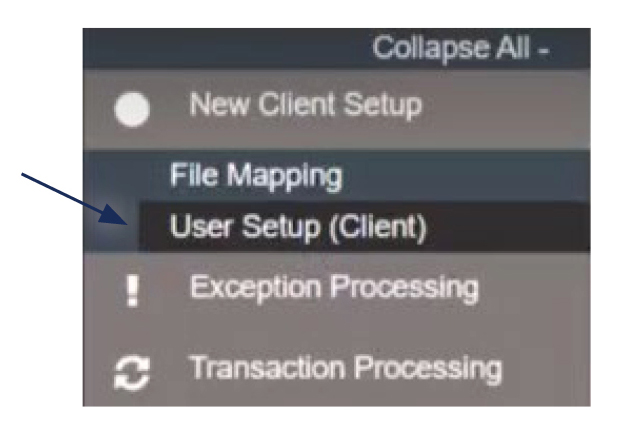
2. Under the New Client Setup menu, select 'User Setup (Client)'.
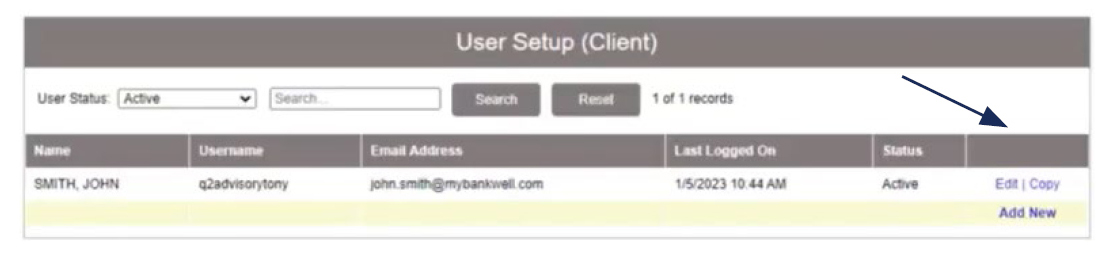
3. Click the 'Add New' button to set up a new user.
4. On the 'Contact Information' tab, complete all required fields on the screen which are designated with an asterisk.

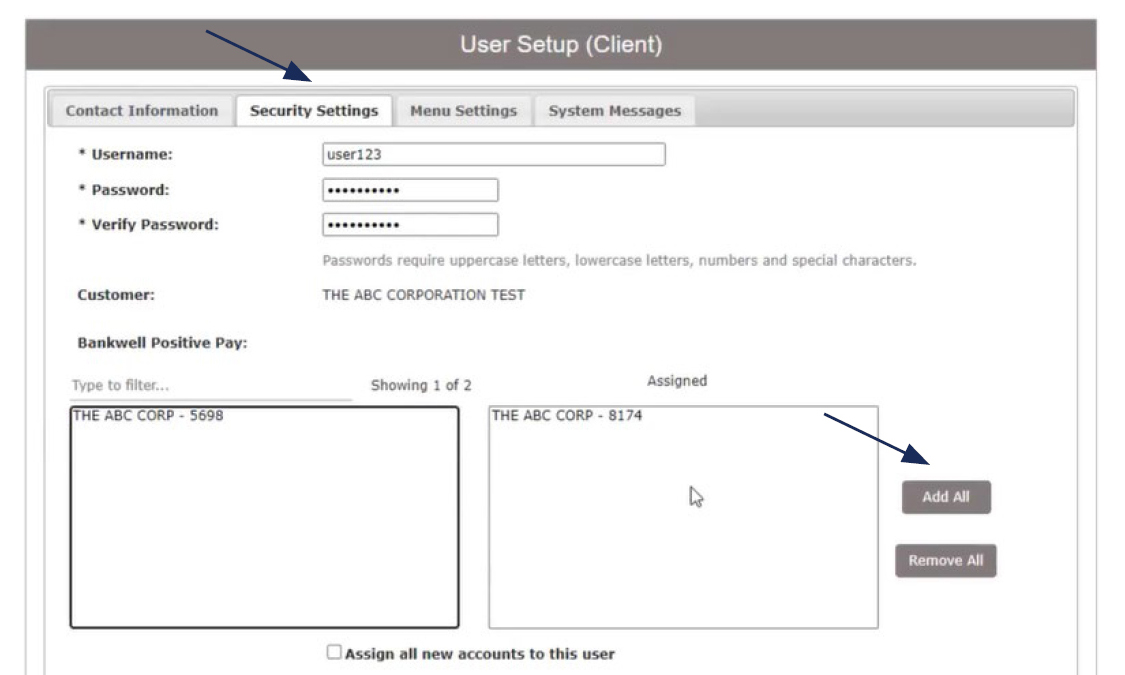
5. Click on the 'Security Settings' tab.
6. Enter the user's desired Username and default password.
7. Enter the password a second time for verification. The user will be requested to change their password upon initial login.
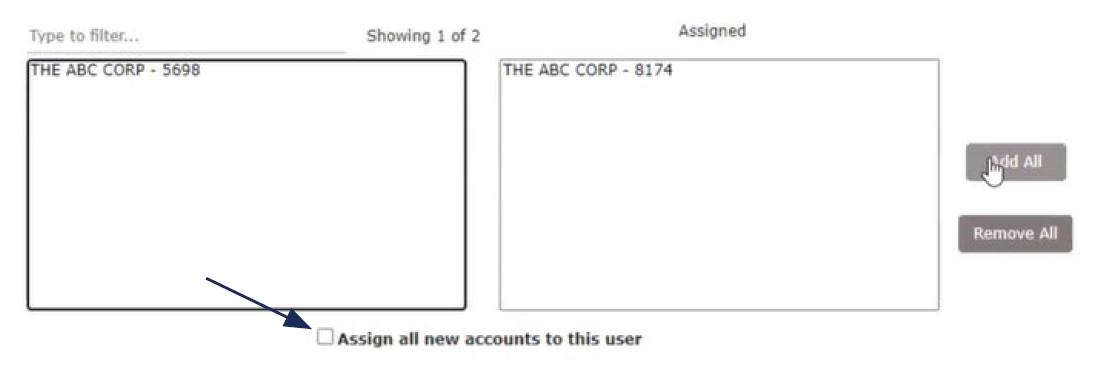
8. Select the accounts in the box on the left side of the screen the user should have access to. If the user should have access to all accounts, click the 'Add All' button.
9. Click the 'Assign all new accounts to this user' option if the user should be automatically granted access to all new accounts opened by the company.
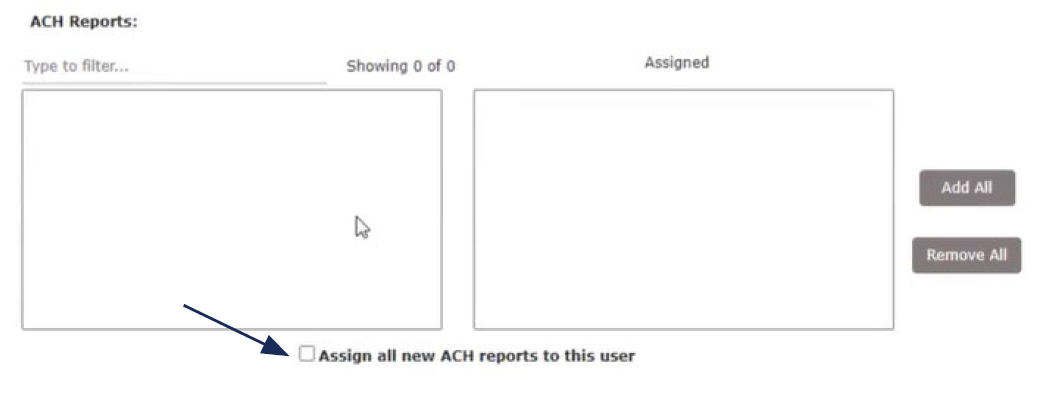
10. The ACH Reports section lists all available ACH Reporting Files.
11. Select the reports the user should have access to. Click the 'Add All' button, to add all reports.
12. Click the 'Assign all new ACH reports to this user' option if the user should be automatically granted access to all new ACH Reports created by the company.
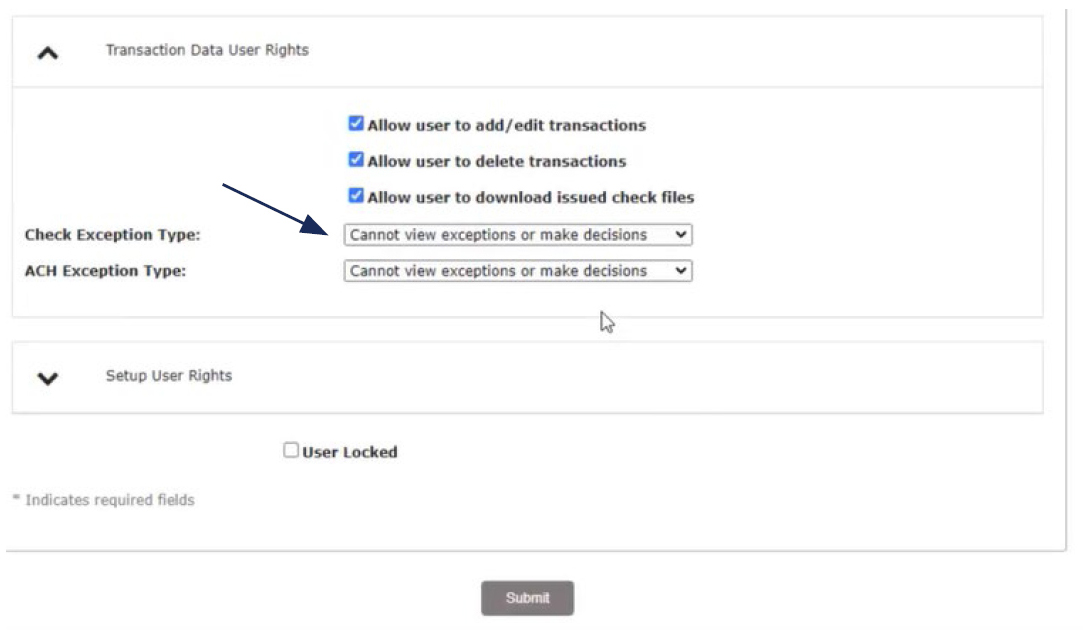
13. Click on 'Transaction Data User Rights' to expand the listing of rights available to assign to the user. Select all that apply.
14. 'Check Exception Type' specifies the user's permissions for check exceptions. Select the desired view option in the drop-down menu.
15. Repeat this action for the ACH Exception Type drop down.
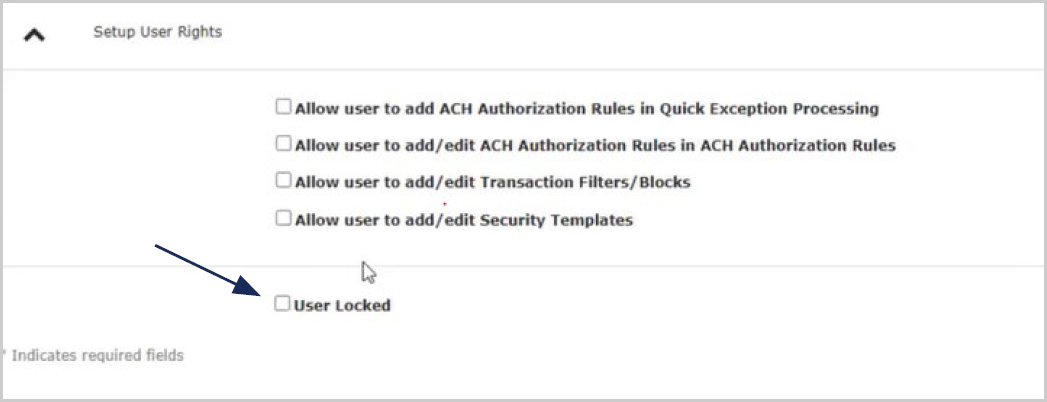
16. Click on 'Setup User Rights' to specify what rights should be available to the user.
17. Click 'User Locked' to lock the user record if the user should not be allowed to log into the system.
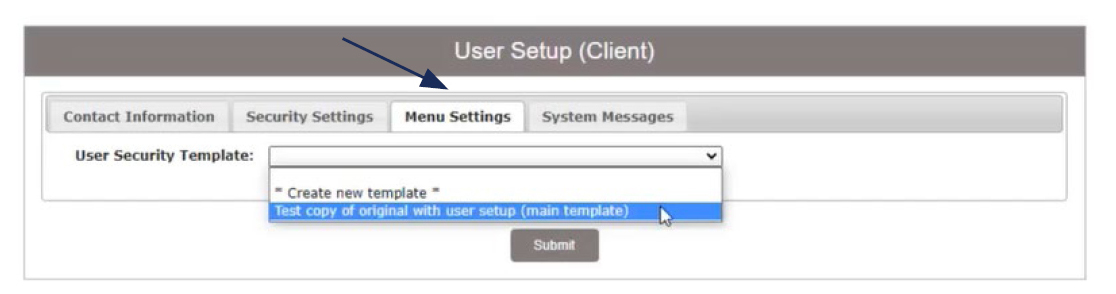
18. Click on the 'Menu Settings' menu.
19. Select the user security template the user should have access to.
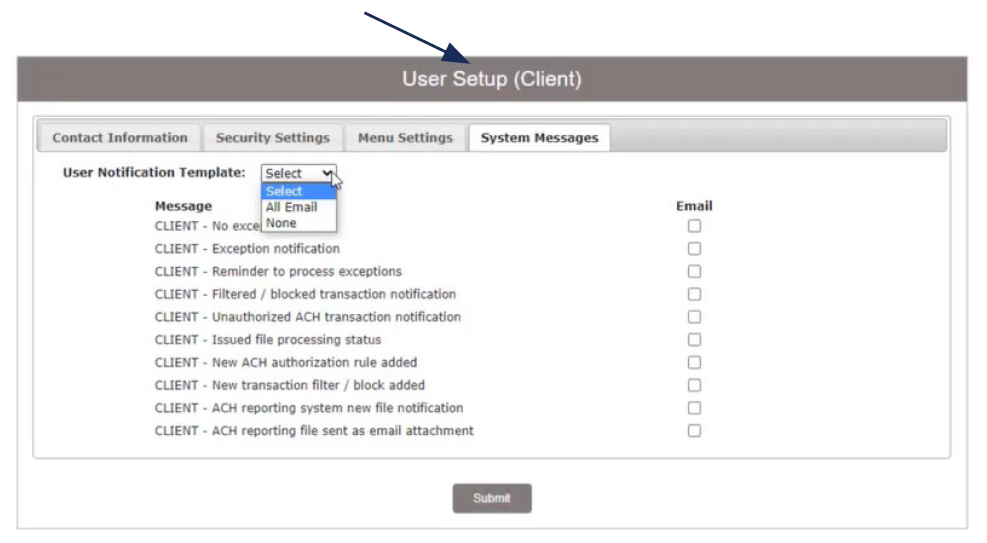
20. Click on the 'System Messages' menu to designate which notifications the user should receive.
21. Select an option from the drop-down menu beside 'User Notification Template' to quickly select all text or email notification options.
22. Click 'Submit' to complete the user setup process.
23. To search for an existing user, select the desired user status from the drop-down menu then click the Search button.
24. Click the 'Edit' button to edit an existing user, or 'Copy' to copy an existing user.